
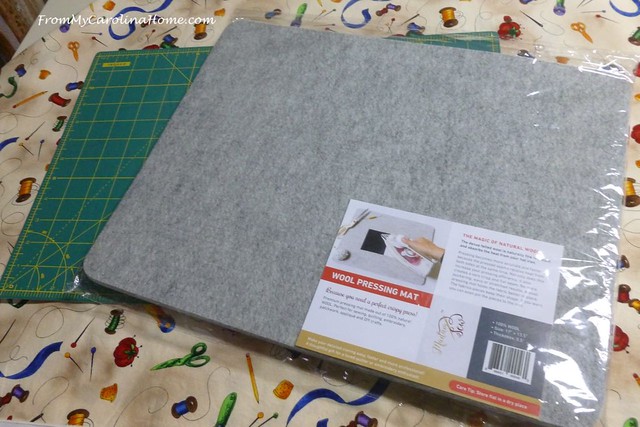
I am completely sold on these wool pressing mats. I have a large one on my ironing board, and decided to get a smaller one for using in classes and at retreat. When Madam Sew put them on sale (and they are still on sale! Click on Wool Press Mat ), I had to get it. This one is 13-1/2 inches by 17 inches, a nice size for table top use. I’ll put my rolled press mat under it to protect the table. My small cutting mat is about the same size, and it seemed logical to make a carrier for both of these to be able to keep them clean and easy to transport.
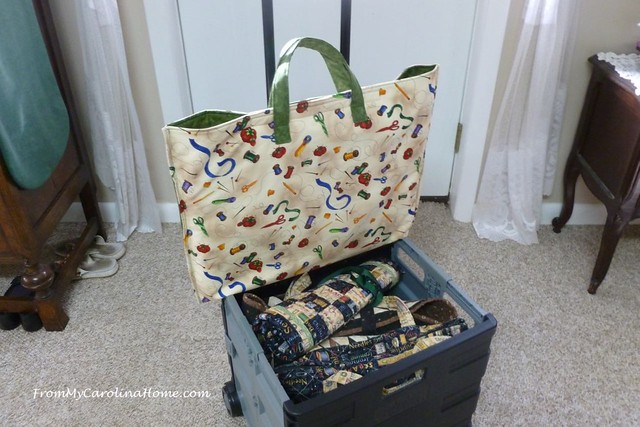
My Sweet Babboo got me a rolling crate to carry my things back and forth. For some time now, I’ve made do with a small, folding, rolling frame that really is too small and difficult to use. Some of my friends have these, so he found a good quality one for me at Office Max (no affiliation). I can fit my Janome Gem sewing machine inside the crate along with extra supplies. But the cutting mat and wool mat would stick out the top. So I made a carrier for them, with the added feature of a sleeve that slides over the handles.

You’ll recognize this method, I’ve used it so many times to make all kinds of carriers and bags. So, here is what you need to make one.
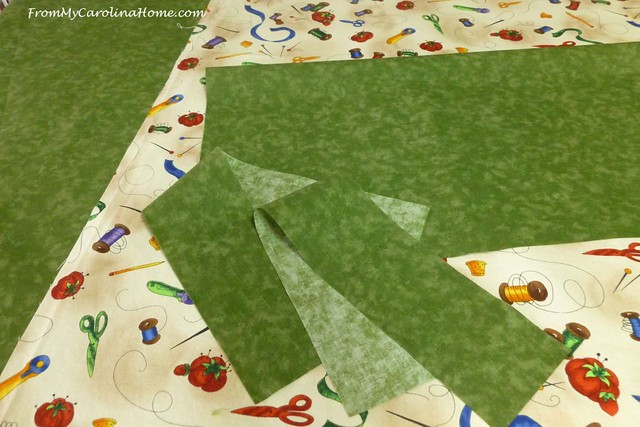
Base focus fabric –
cut one rectangle 34-inches x 22-inches
Lining and accent fabric –
lining – one rectangle 34-inches x 22-inches
handles – two rectangles 3-inches x 14-inches
sleeve – one rectangle 20-inches x 22-inches
Batting – one piece 34 x 22 inches, plus a bit extra to stuff handles if desired
Velcro for closure – 10 inch strip of hook and loop tape, optional for closure
Begin by sewing the sleeve. Take the accent sleeve piece 20 x 22 inches, and fold in half lengthwise to create a 10 x 22 inch unit. Sew the long raw edge, leaving the ends open. Press the seam open.

Turn and press, centering the seam on one side.

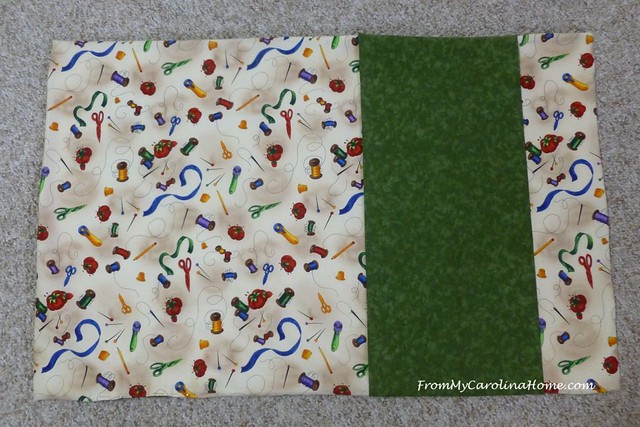
Lay the focus fabric on your table right side up. Place the sleeve 5-inches down from one short side, with the seam facing the focus fabric.

Lay the lining fabric right side down on top. Lay the batting on top.

Sew all around the sides, leaving an opening for turning somewhere away from the sleeve. Clip the corners. Turn, making sure the sleeve is on the focus fabric side, pushing the corners out to a nice point. Press. Topstitch all around the edge, closing the opening as you go.
Measure in 6-inches on the sleeve from the long side of the bag, and mark a line on the sleeve. Repeat on the other end of the sleeve. In this picture, the bag is folded.
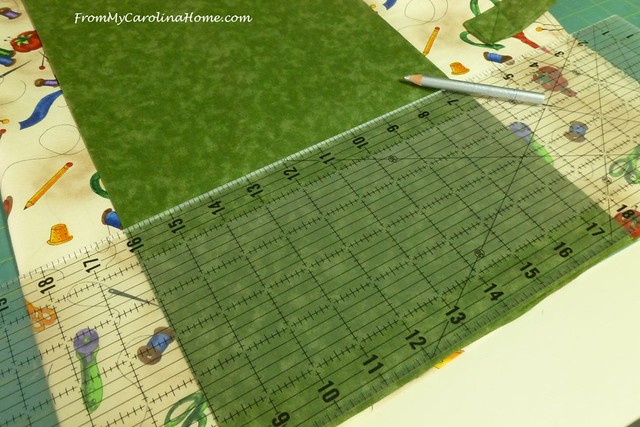
Sew on these lines to create a channel on the sleeve.

Add velcro to the lining side, putting the strips on the shorter ends. Place the velcro just inside your topstitching, centered on the edge. Stitch in place.

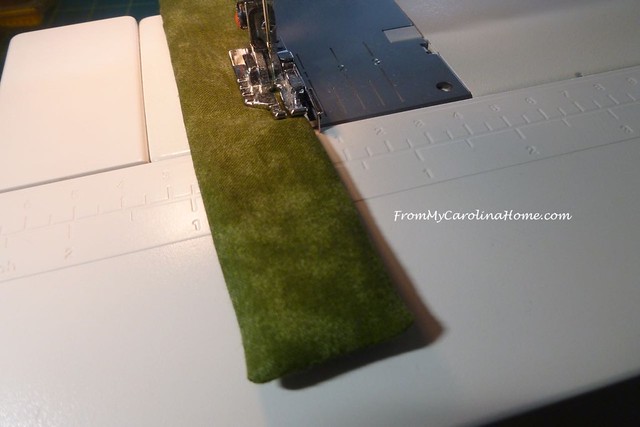
Make handles next. Take the 3×14 rectangles, and fold in half lengthwise to form 1-1/2 x 14 inch handles.
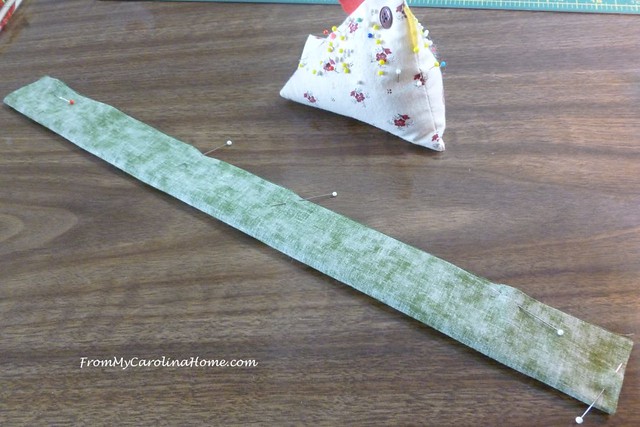
Sew one end, stopping about 1/3 of the way down the long side. Leave an opening, then sew the other end.

Clip corners and turn right side out, pushing out corners to nice points. Optional, add some batting inside if desired to make the handles a bit bulkier. Press. Topstitch all the way around, closing the opening as you go.
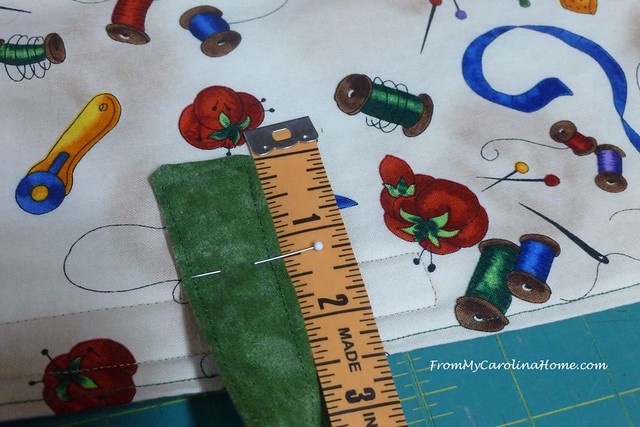
Place the handles 7-inches from each long edge of the base on the focus fabric side of the base. My tape measure has a bit extra for the tab, so I adjusted it after this pic was taken.

Place the handle end about 2-1/2-inches down from the short edge. This will ensure that you clear the velcro.
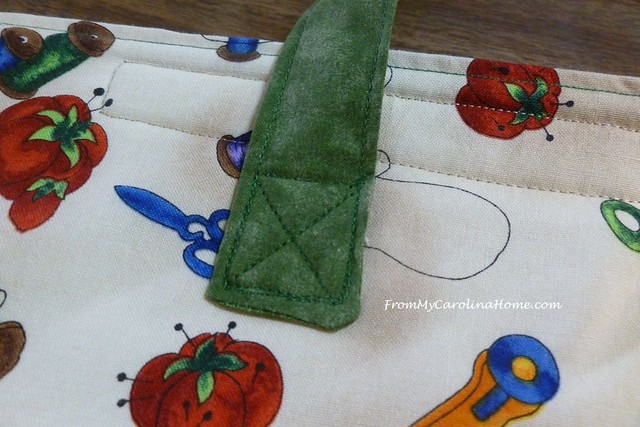
Sew about a one-inch square on the end of the handle, attaching it to the bag. Then, add an ‘X’ inside the square for extra strength.
Fold the bag in half, matching the handles. Using Sewing Clips to hold the edges, topstitch the sides together. When you have thicker edges to hold, these clips work better than pins. (Note this picture doesn’t show the channel on the sleeve. I went back and did that before sewing the side seams but didn’t get an updated picture.)

All done!! Now your bag will slip over your luggage or rolling crate handle, keeping it in place as you travel. I will be using mine a lot!!

The cutting mat inside the bag keeps the wool mat from folding over. Plus they both stay clean and easy to transport.
Here’s a pdf of the free pattern – Wool and Cutting Mat Carrier. Here are links to my other posts with free patterns for travel bags and accessories for sewing classes and retreats.
Quilted Sunglasses Case
Needle Case, Thread Catcher and Pincushion
Matching Travel Ironing Pad
Travel Pillow Case using the roll-up method
Road Trip Pillow Case with Pocket and Handles
So, now I am ready to travel and sew!! Have you made some travel cases?

I have one of those rolling carts, so at the moment, I am really impressed with how you made the bag to slip over those long handles. Just perfect. I don’t think I would have ever thought of that. I also have two rolling carts for my sewing machines which have those pullup handles. I haven’t tried the mats yet. I guess I should consider one. Thanks for the post.
I have that same rolling cart. I will be making the carrier to take to my local Quilts of Valor National Sew Day. So excited for the carrier and the sew day. Thanks for sharing!
What a great idea and so pretty too.
That SLEEVE is genius!!! I have a big mat bag that I made years ago, finally fixed the handles last year. I think I might have to “retro-fit” it, and my other bags, as I never know which one I might decide to use. It is always a struggle to keep them “in place” on top of my sewing machine trolley. THANKS for such great directions! You are a good “technical writer” and your photo “breakouts” make a visual learner like me happy! 🙂
Hi Carole! Fabulous idea and I just love the finished product. It’s so well thought out, and fits your needs perfectly. You could never find exactly what you want in a store. ~smile~ Roseanne
Great idea and I like how you made it so it slips over your handle.
Thanks for sharing this. I was looking for a tutorial on these awhile ago, when I was going to a class. I’m going to put this on my list to make before my class in June. Love the sleeve for slipping over the case handle. I have that with my travel tote and use it all the time.
I was just gushing about my wool pressing mat on IG yesterday! My seams have never laid so flat 😉 Love the carry pouch you made with the sleeve – I need to make one of those for business travel too!
Ingenious!!! Hmm I had to give up my large ironing board when we moved….this wool mat might be a good solution. Thsnks for sharing.
Great post….I’ve been wanting a mat and this is the best price I’ve seen. I just ordered one—hope you’re an affiliate! Now to make a similar pouch for my own rolling cart. Thanks so much for another great post full of helpful ideas.
You are very innovative. Lovely carrier!
Look at you, being SO crafty! I am not much of a sewer, but I do love to iron things. I may just need to pick up one of those ironing mats. For me there is nothing like the lovely pressed edge of a top sheet!
What a fabulous idea!! This would be great for travel of any sort because that sleeve would fit over a suitcase as well!! I can see it with some pockets inside to hold rulers as well. Thanks for the pdf!! These would make a great gift for anyone!
Great idea Carole, and as always a clear and concise tutorial. I ❤️ your fabrics too!
And saved. Thank you for the pattern, Carole. Looks very useful
Thank You for the pattern!
Love the rolling cart, I have been using an old post office box. It is getting to heavy to lift. Thanks for the patterns.
I could have done with a bag like this when attending quilting retreats, Carole. You’ve made it look easy to make. If ever I get to attend another retreat, or class, I’ll be making a bag with a sleeve to go over the trolley handles. I’ve showcased your fab tutorial today.
I usually just put the handles of my tote bag over the pull up handle of the trolley when I need to carry a lot. But having a sleeve on the back of the tote would be more stable and I should give it a go. This would be a good class to teach to my quilting friends(some day when we can meet again), so we can all go home with the bag. I do have 2 wool mats. One is very small just for taking to classes/retreats, but I also have it up against the larger wool mat which makes it a larger space when needed.
Hi Carole, I just saw your sit, I’m a new 73 yr old sewer. I have 2 of the wool pressing mats and I have the rolling cart. Would 2 mats fit in that bag? I love how it fits on the handle, thank you so much for the directions, I hope I do it justice 😂
I bought a horse saddle under pad, they were the same thickness for less than $25.00, they were about 30 by 36 great deal I love mine use it all the time Linda C.