
I am finally caught up with the repairs I had to do, and this was the most recent. The quilt was definitely in sad shape, with lots of patches that had disintegrated. The owner didn’t tell me how old it was, or I might not have accepted it for repair. I didn’t find out its age until after the repairs were done.

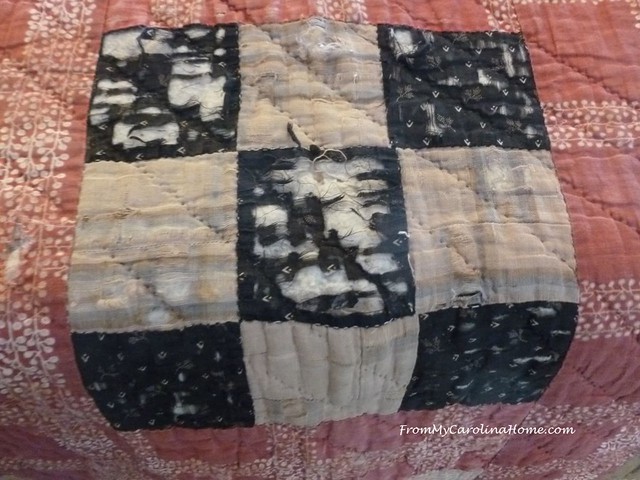
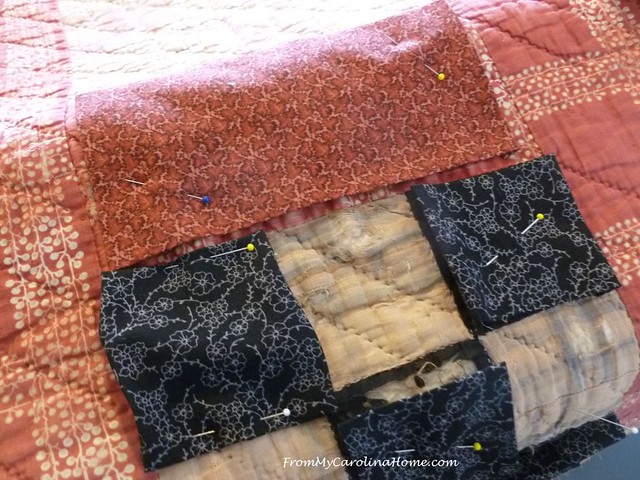
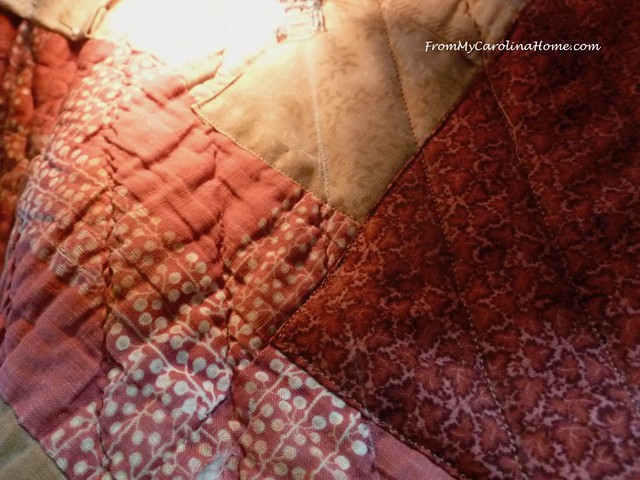
These black patches were severely worn. This is not an indicator of age, only use.
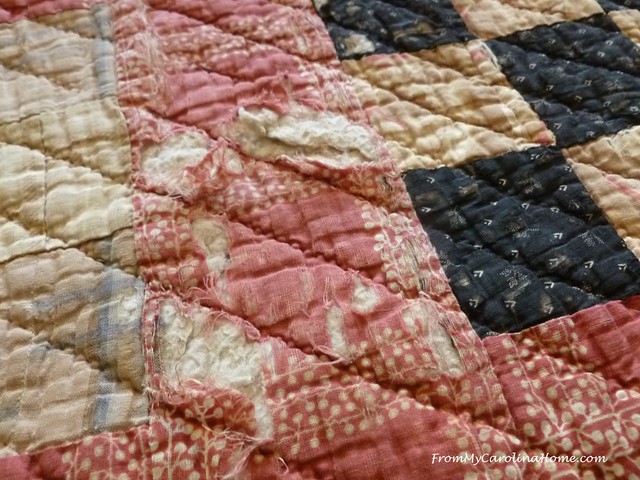
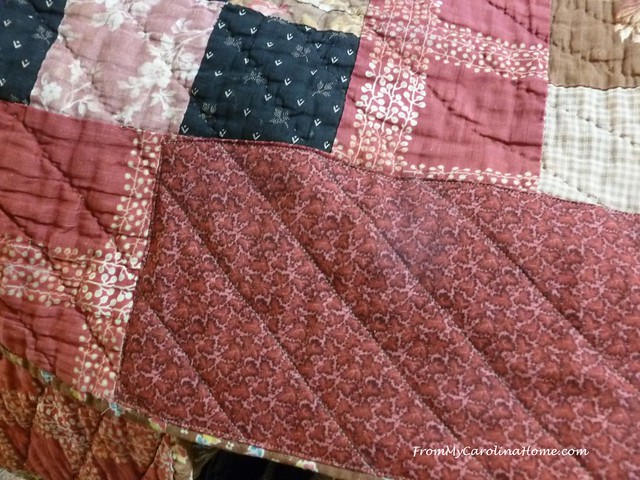
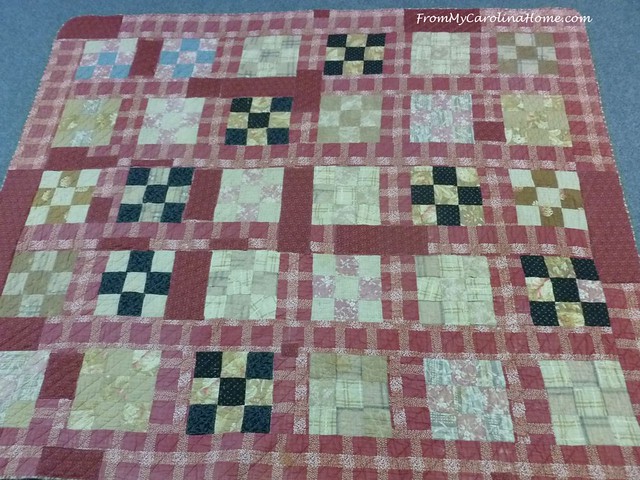
There were lots of worn areas on the sashing and borders too.
It almost seemed beyond repair, not worth the effort and expense. But this quilt had historic value to the owner, with a special kind of batting she wanted to preserve. Apparently it came straight from the cotton field, which should have told me it was older than the usual repair.

I began by making black patches from the fabric she sent. I rotary cut the squares, then used a plastic template to speed up the pressing process. I made so many that the plastic didn’t hold up, starting to warp from the heat.
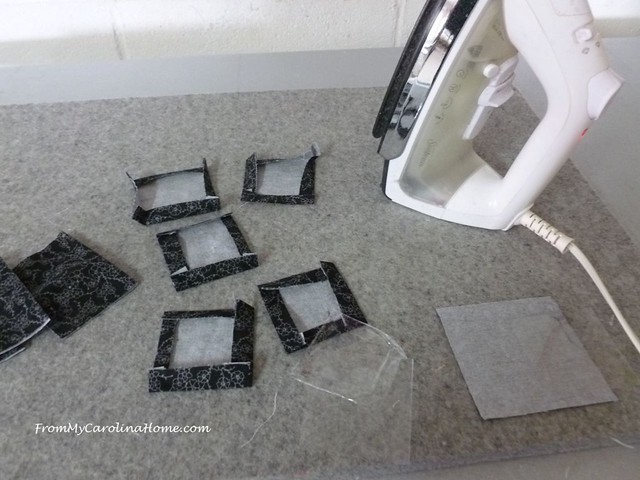
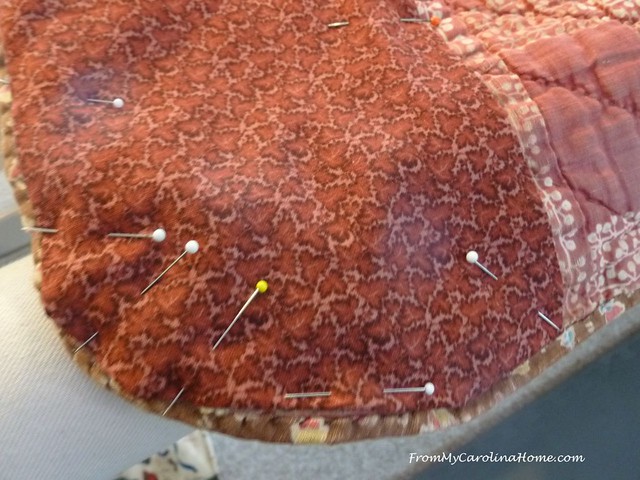
For the larger patches, using a large clear ruler gave me the dimensions I needed to cut for the next patches.

Doing them one at a time, I cut the right size, then pressed the seam allowances under.

Pining the patch into place, I made sure that the damaged area was covered.

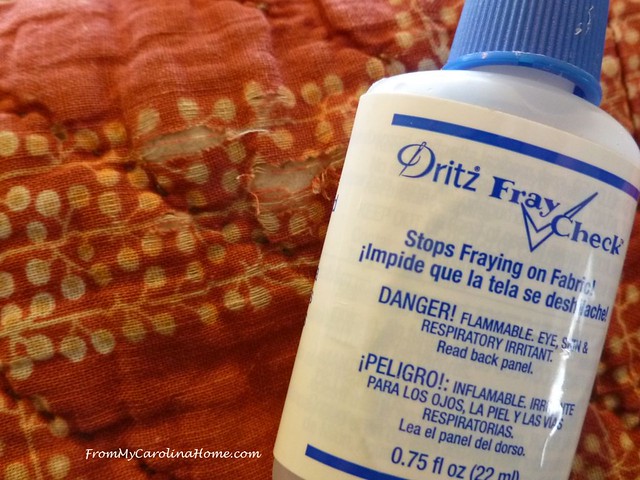
For some of the really small tears, I used Dritz Fray Check, then when it dried, I zigzag stitched the raw edges together.
More and more patches were made. I wanted to make all that were needed before beginning the sewing.
This corner had to be completely covered.
A long stretch of border needed patching too.

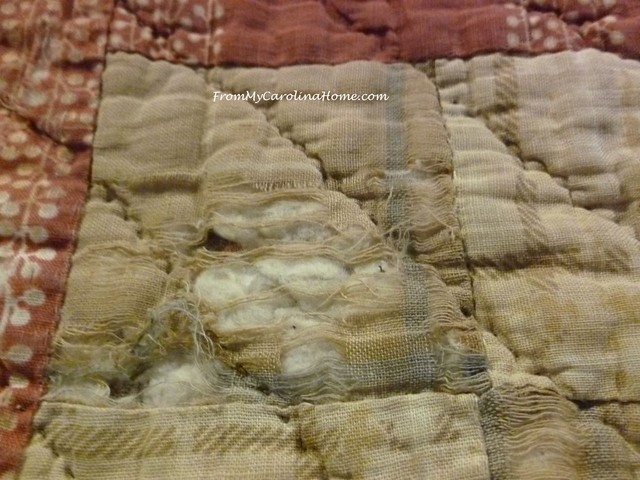
As I worked, I realized that some of the beige squares were disintegrating as well. This was not obvious as the cotton underneath was close to the same color, and there was a light streak in the print, more visible on other patches. The owner hadn’t sent any beige, so she hadn’t noticed this either. I found a fabric in my stash that was close, and emailed a picture to her to get permission to use it.
When all the patches were cut and pinned, I knew that I would have to begin the sewing with my domestic machine, as so much of the edge was involved. I needed to strengthen and stabilize the edge so it could be put on the longarm for the majority of the stitching.
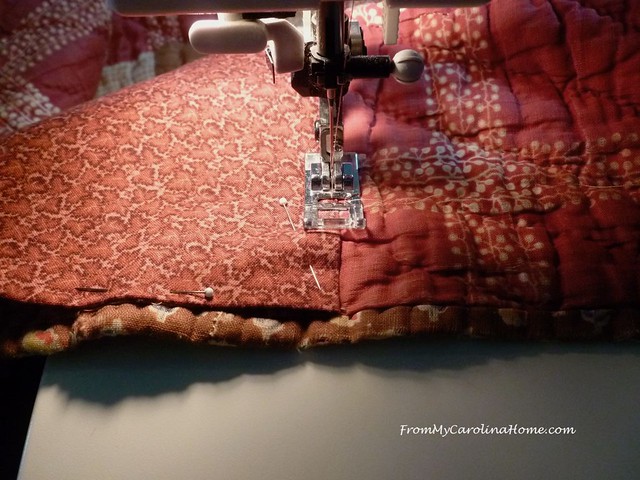
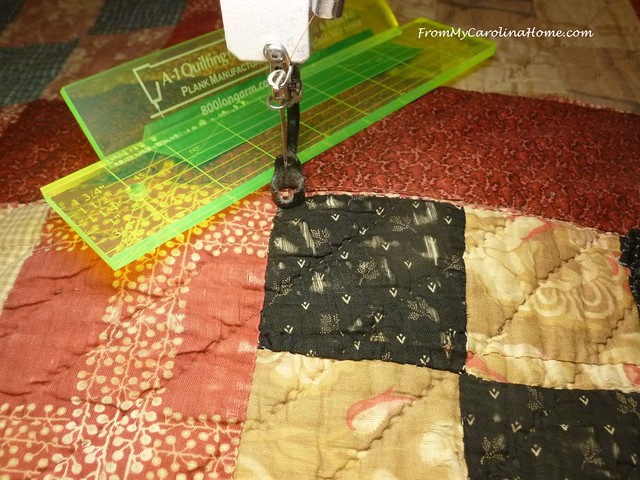
After the edge of the patch was sewn down, I needed to add some quilting to the large patches. To mark the quilting lines, I used a Clover White Chaco Liner, a chalk lining tool that makes a nice thin straight line. The lines were drawn in line with the previous hand quilting.

I marked all the lines, sewed on them by machine, then removed the chalk.
In some areas, I marked over two patches in a single quilting line, and stitched it all at once.
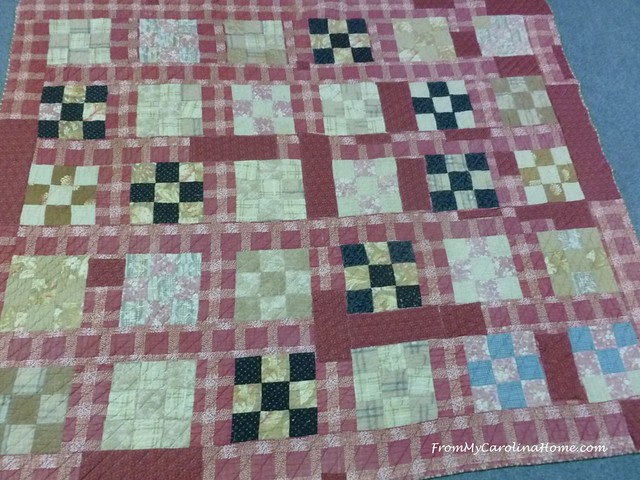
Another corner marked and ready to be sewn.

When all the border sections were done, I loaded the quilt on the longarm, using the patched areas for the pins and clips. I then worked methodically from top to bottom, moving from left to right, stitching the edges of the patches and adding lines of quilting where needed.

Traveling between the quilting lines, I stitched over the previous line of stitching to hide this as much as possible but not have to break threads and tie off as much.

On the longarm, it was easy to use a ruler to sew the line without marking.
Argh, just when I thought I had found and cut patches for all the damage, I find another one.

I stopped, made the patch and completed this section before moving on.

Sewing the quilting lines helps large patches integrate into the quilt, continuing the hand quilting lines.

So how old was it? It was made as a wedding gift for John A Stevens and Fannie A Barrett, who were married on January 19th, 1887 in Matthews, N.C. Oh, my, it is 133 years old!! I am so glad I didn’t know this before I started. I made a label for it so future generations would know its origin, and also the year it was repaired. Please label your quilts, it is so sad not to know the maker of an heirloom, and you never know what will become an heirloom. Here it is, all done. The owner plans to keep it on a bed, and only display it.
If you have a quilt needing repair, click on my page Well Loved Quilt Repair, also accessible at the top of the blog. It has all the information you need to submit and how to contact me for repairs.
What are you working on this week?
C&T Publishing has New Releases!

Such a labor of love! You did a beautiful job restoring this quilt.
You did an outstanding job on this one. As I was reading and looking at the pictures, it seemed like the whole thing needed to be repaired. At least it was enjoyed (apparently). Now, it will be more appreciated!
Wow! So incredible to take a part in preserving history.
wow that was one old quilt. you did a great job, I have repaired a couple old quilts but no where near that old!
Good morning Carole, and congratulations on doing such a remarkable job on a quilt, so severely damaged, it would have sent me running for the hills. You have so much PATIENCE and FORTITUDE, to never give up on a project, no matter how difficult. I would imagine this was the oldest quilt you’ve ever worked on, and should be very proud of your accomplishment!
Another great save! Such a great feeling to save something from the rag pile! I have someone here this week completely rewiring a couple lamps from my husband’s parent’s home and it is so satisfying to bring these old friends back to new condition. Will be fun to give one to a granddaughter setting up housekeeping one day. Good on ya!
Beautiful repairs. I have an antique Satin whole cloth quit where the back was worn and the feathers are coming out. There are several holes. I am thinking of just replacing the whole back. Would that be the best repair. It is all hand quilted and I can’t find the same color satin to make patches. The repairs need to be around the edges only.
Any suggestions.? Thanks.
Beautifully done! So you basically sew a patch over the damaged block? And you find that it holds well?
What a wonderful save and I really appreciate you showing us how this is done and the products to use.
You certainly have more patience than I do! Well done. Wow, imagine it being that old.
That was amazing! Very glad you choose to cover the old squares and not remove them. I would have been to scared to even attempt this and it turned out so well!
When I make a quilt as a gift, I add a pocket in the back for patches. I’m sure they throw them out but I also put some momentos in there sometimes. Like the one I made for our 25th anniversary, I put the stubs of the tickets from the cruise, a letter, come cards (yes this was a 5 x 5 pocket) etc.
Thanks for the info I’ll keep it just in case I get brave enough to do this.
You put an amazing amount of love into the quilts you repair. It is wonderful for the world that you have the patience and perseverance to do these repairs. Have a fabulous week.
As always you did a stunning job on this lovely old quilt. 133 years old – what a history it has.
I imagine it was all hand stitched and with the Cotton Batting coming straight from the Cotton Fields it must have felt like quite an honour to repair it. I’m always intrigued to see how random the blocks are assembled for the quilt. I suppose the maker just sewed each block together as they made them.
I do love seeing how you go about bringing these old quilts back to life. Well done Carole. :))
Hello Carole, Holey Toledoes…… You did a marvelous job on the repairing of this quilt! I knew you were going to reveal the age in the end, but I was so fascinated with each segment and each photo, I could not flip ahead and look. How amazing to have kept a quilt for 133 years and although worn, she had faith that you could repair it and you did!!! Thank you for sharing this fabulous quilting treasure story of your life with us. Have a fantastic day!
Repairing quilts is a pain in the neck!! You did a great job on this one. I’ve noticed that some of the old fabrics – indigo’s for one – seem to wear out more rapidly than others…I wonder if it has something to do with the harshness of the dyes breaking down the threads of the fabrics a bit so any wear and they shred??!
Wow, you reaĺly are gifted with the right skills and patience to repair this quilt! I have tried to repair atleast one of my own quilts over the years.I basically found it beyond my skills set and patience.
Just a beautiful job on this…it looks amazing…hugs, Julierose
Great job! I love your posts about quilt repair.
WOW! WOW! WOW!
What a fantastic job you have done Carole, what a skill to be able to save such a beautiful old quilt. Amazing.
This is amazing, Carole! Fine work!
Not only did you repair an antique quilt, you are so kind to share how you did it. Thank you for that! I recently received 3 older quilts (1940’s) that were stored in the attic. They are in pretty good shape, except for some staining. do you know of any special products that you could recommend for that?
I so admire you. I have quite a collection of vintage (and not so vintage) quilts and some are quite worn in the way you show; some less so, but clearly the batting is popping out (I can thank Stimpy, number one cat, for that). I’ve never been able to find anyone who can repair well and it’s way out of my wheelhouse. These aren’t family heirlooms or I might try harder. Still… Bravo.
Wow, you’ve done a fantastic job on this quilt!! I’m in awe of your work — and your patience for it! My boss has a quilt his great grandmother made that is in desperate need of repair. I do not have the skill or the patience, but thankfully I know someone local who does!! 🙂
Beautiful, an inspiration to all quilters.
Wow, that’s a lot of work, but how cool to be a part of this 133-year-old quilt’s history!
This was so interesting to read and I admire your patience. That is an old quilt! Nice to know that she will only display it. Have a nice day, Carole.