
It must just be my year for bad borders. I am not going to reveal where this particular quilt came from, I work with several charity quilter groups to do Quilts of Valor, and I do not want to embarrass anyone. I am reasonably sure that this piecer doesn’t read my blog, and I want to show you all one more radical idea to take up a mess of a border. The quilt is a tumbler style, which has a problem to begin with as the sides are often on the bias and more prone to stretching out of shape. A lovely wide dark blue backing was provided with the top.
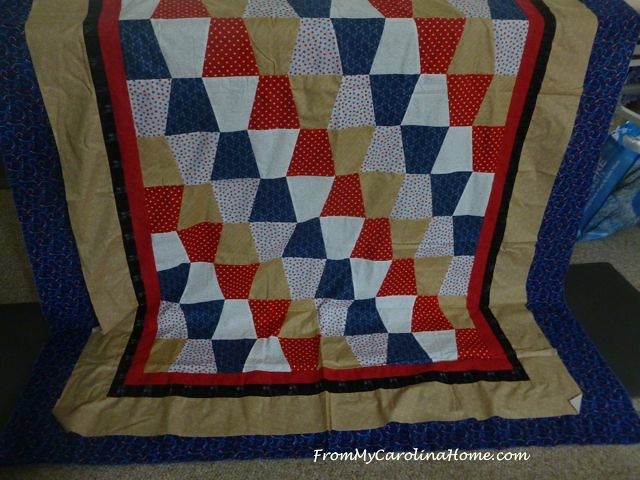
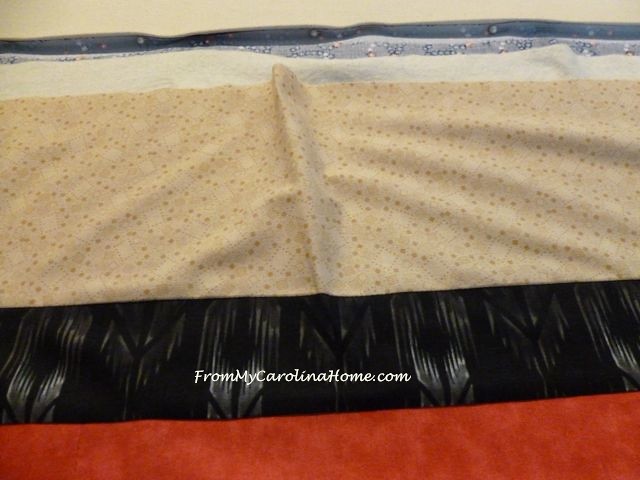
Just laying it out on the backing to check the size started to point to an issue with the border, actually three borders. The blue here on the edge is the backing.
Sigh. I know you all are getting as tired of bad borders as I am, but this one took the cake.
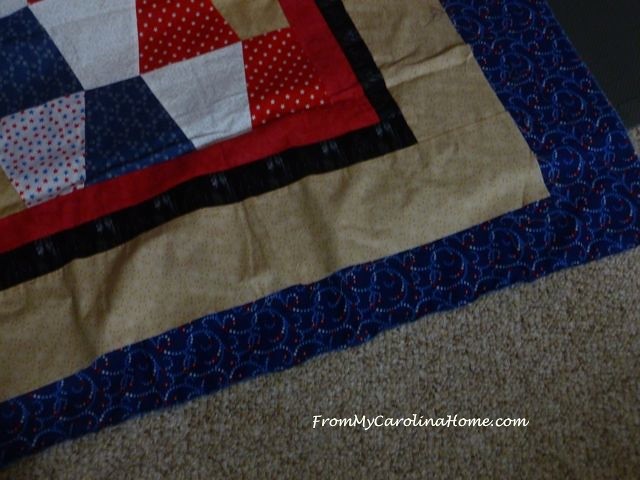
Once again, look at the extra fabric in this! But, it goes one step further.
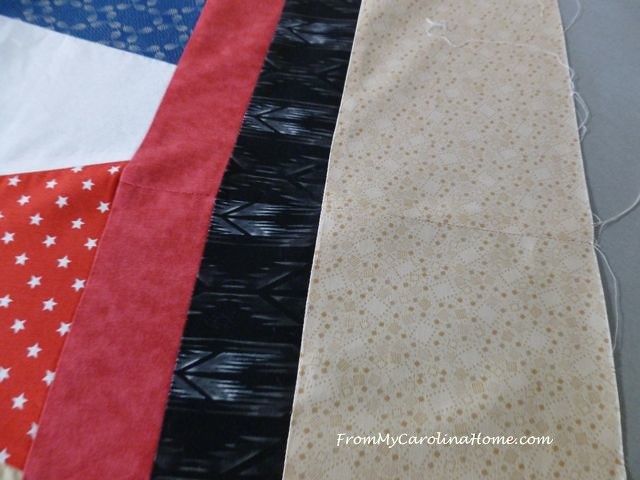
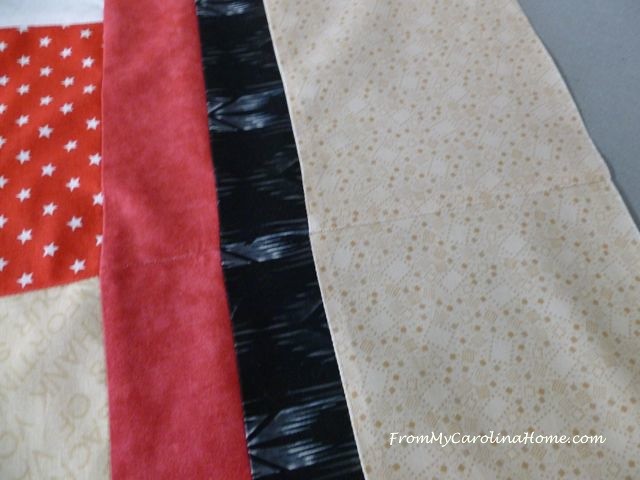
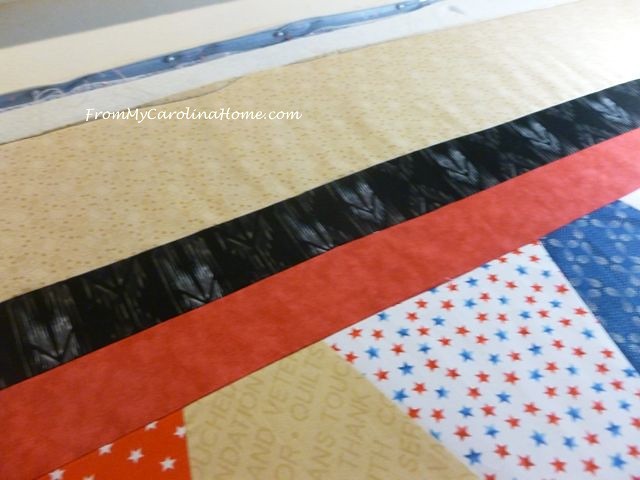
Here is the most graphic example I have ever seen where the outer edge was so obviously larger than the inner edge. The inner red border was this way.
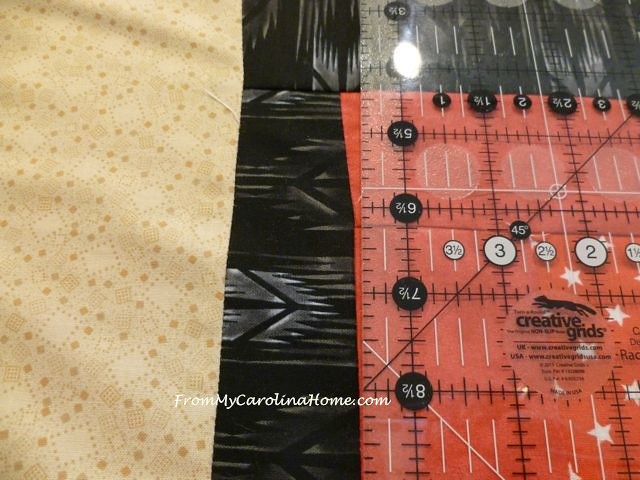
And the middle black border was also this way, adding fabric to the outer edge.

On both sides.
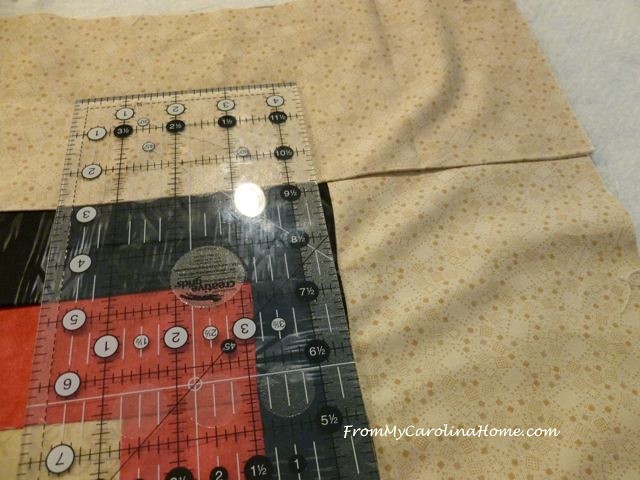
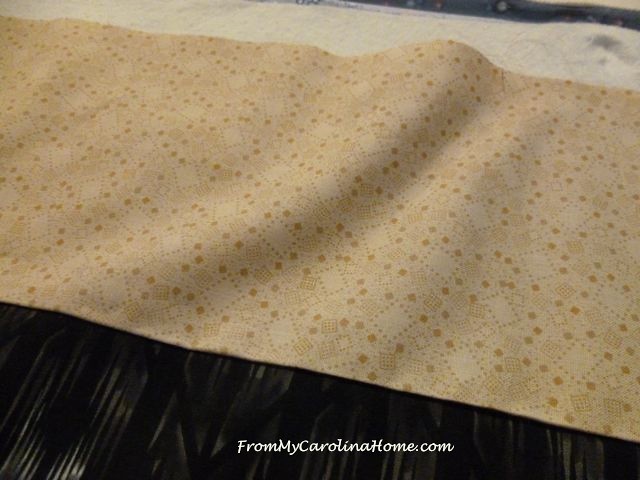
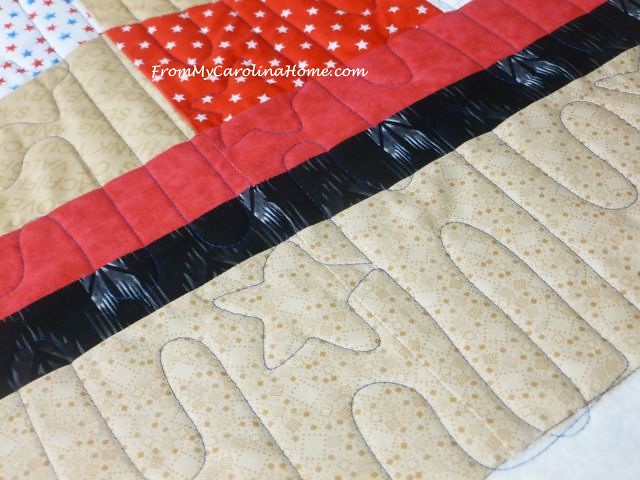
Which gave us this on the outer beige border.
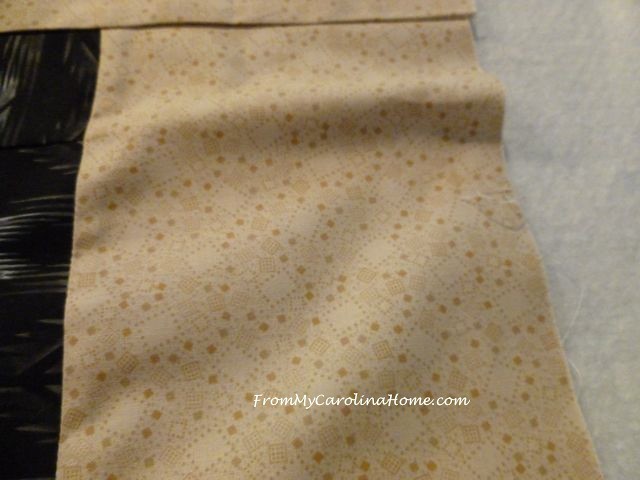
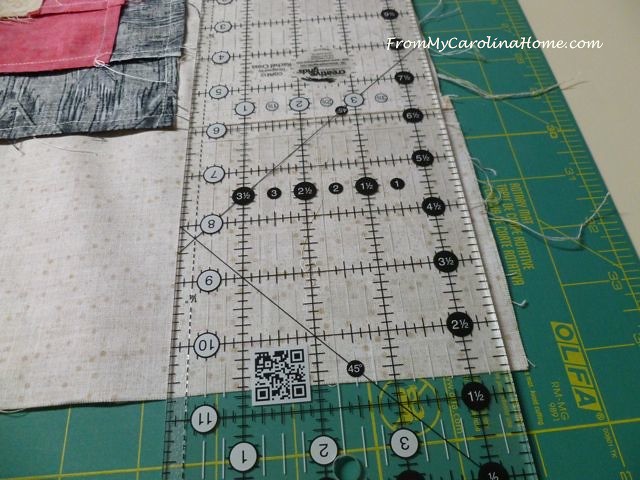
There was no way this was going to work in, or quilt out. So, I decided to do a radical thing, something I only considered because it was a charity quilt. If someone had been paying for quilting, I would have let the quilter have it back to fix the borders. I pulled it off the frame, laid it on the cutting table and marked darts in the borders on the back side. The darts went all the way through the three borders, decreasing to nothing at the inner sewn edge of the red border. The amount was determined by what was hanging over a straight line on my cutting board when I lined up the center section folded in half. It doesn’t seem like much here, but it is almost an inch of fullness coming out at the outer edge. I marked the dart with a pencil line…
then took it to the sewing machine and sewed darts on all four sides.
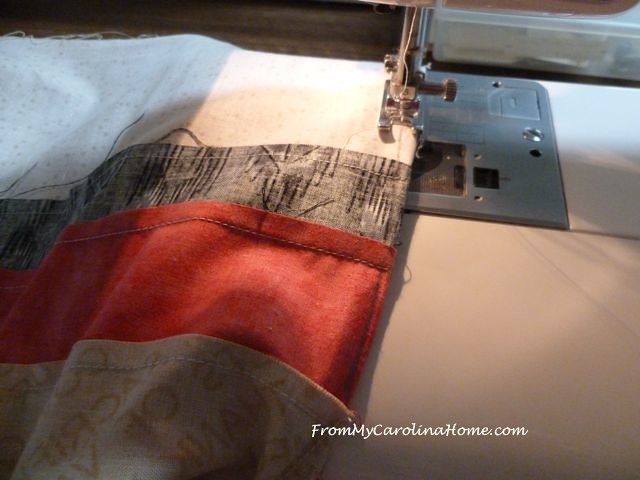
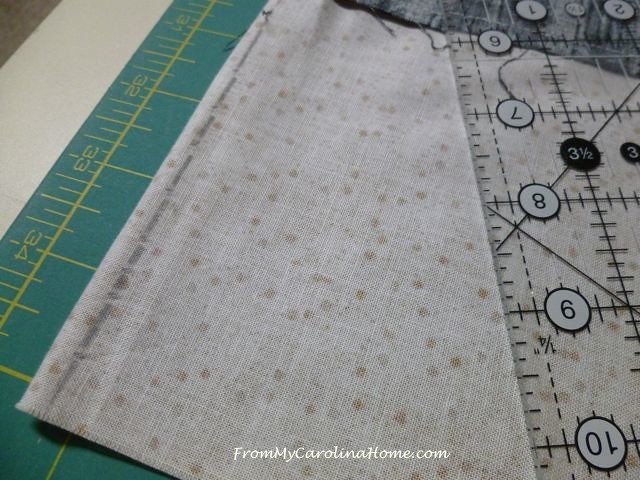
Then I took it back to the cutting table, and cut off the uneven edges with additional excess fabric. This will give me some room to push a bit on it at the corners to accommodate some of the remaining fullness, and stitch it straight.
I pressed the darts to one side on the backside first, then on the right side to set in the seam. It worked nicely.
Here is one on the other side. Now it lays flat.
I loaded it back on the frame, and stitched the top edge down. Much better! Even though you can still see the ruffle effect at the seam line between the beige and black borders.
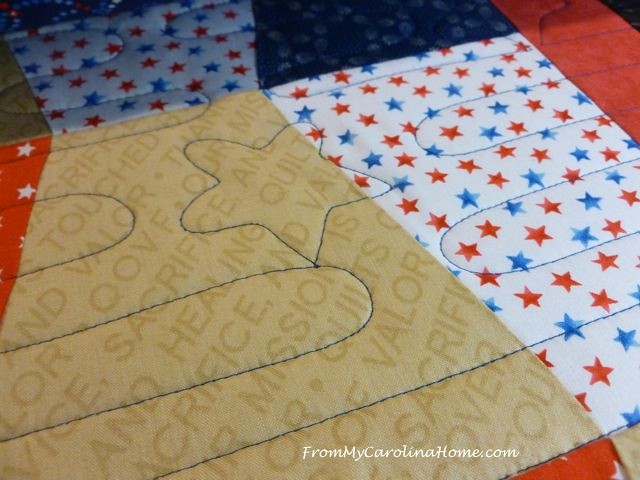
I thought that since I was doing more Quilts of Valor now, I should have a patriotic pantograph, so I got this one from Urban Elementz called Stars and Bars. It looked great on the website, but after using it, it isn’t going to be a favorite. It is too linear, doesn’t interlock and is a bit difficult to get the stars to close.
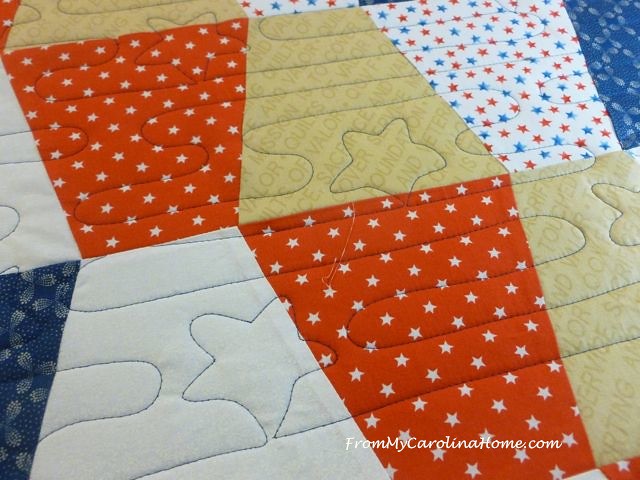
Later as I was quilting, I started doing the stars by crossing the point where it joins the stripe lines to ensure that the points closed. The panto has the stars corners rounded off, and I kept trying to make them more pointy. Consistency was a problem for me.
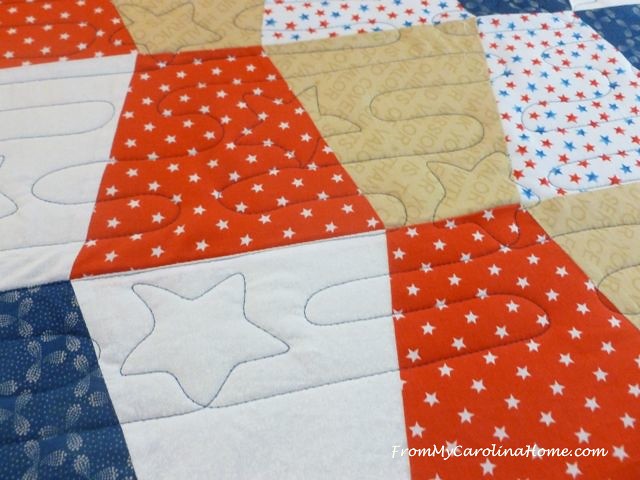
After the quilting was done, the darts are barely noticeable.
Looks pretty good all quilted up.
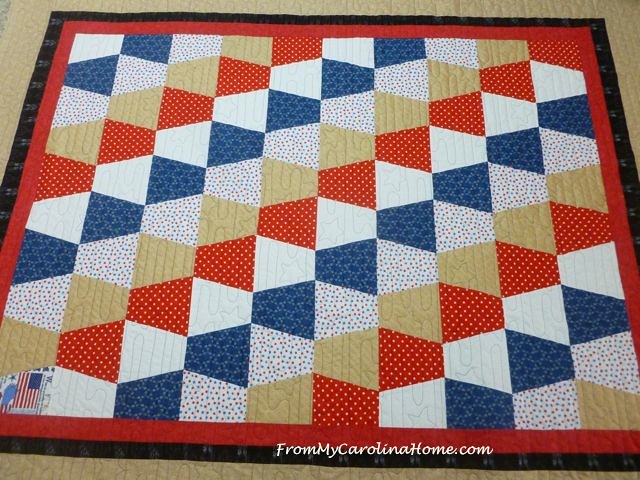
Even the borders are looking better.

So, it’s all good. If you are a new quilter, a self taught quilter, or you’ve never seen how to properly apply borders and why it is important to do them correctly, they are not hard. Just see my tutorial on Quilt Borders Understanding the Why. It goes through not only the ‘how’ of proper borders, but the ‘why’ and what happens when they are put on by the slap and sew method. The quilt I just loaded is perfect, with outstandingly perfectly applied borders and is flat as the proverbial pancake. I’ll show it to you all when it is done, but is a joy to quilt!! Ask your program chairperson at your local guild to do a program on borders, and feel free to put the link in your newsletters to spread the word.
What are you working on now?
Sharing

Great post again! What an outside the box approach to this problem. And it is hardly noticable when finished. Just a great idea especially for donation projects.
You are a magician! Finally got off the dime & started working on my grandson’s quilt – he is 4 already, & his Mama is getting her feelings hurt that gr’daughter has a quilt, but he doesn’t have his yet. I got stalled. . .never mind the whys, but good & stalled! All the blocks are done, but sashing decisions seemed overwhelming. Designed each block to mean something special to Mom, Dad, etc. E.g., Daddy loves bowties & served in the Peace Corps, so he has a red/white/blue bowtie, G’ma loves yo-yos & trains, so the red train has yo-yo wheels.. . . it was fun being creative, & keeping a little notebook of the meaning of each block. Some ideas were just fun, with no meaning except that! So, I’m on a mission now to finish & deliver in person this special quilt the end of July. Think I finally figured out the new machine hubby bought for me (one of the glitches in progress), & it will be top priority ’til then! So many inspiring quilts, hope to stay in the groove for a good long while!!
Great solution Carole. And thanks for the borders link. I had trouble with the border on a table runner, LOL. The thought of a quilt size is pretty scarry. And, as you are a nature lover, thought I would tell you our latest adventure…we collect water runoff from a small roof off the deck into tubs. We have heard a tree frog right outside on nights the past couple weeks. Great sound. Yesterday I started to dip water out of the largest tub into the watering can, and there were tadpoles! Lots of them! This is a first and I hope they can develop into frogs. Thought you’d get a kick out of that!
great idea with the darts! I am with you I am not crazy about rounded star points but in the end you got it all too work!
You get the award for patience. I would have done the pleats. Great idea for darts. Thanks for sharing . Glad you didn’t pull out any hair hopefully.Today I am quilting wounded warriors fund raiser quilt. Will post when done. Have a grand day.
Nice tutorial!! I’ve brought home a few baby quilt donations from guild to quilt for the women’s shelter and some were very bad and some were perfect. I, too, found that darts were easier to do than unstitch the border and reapply. Several of us spoke with the guild president about the problem and she gave several short talks about the importance of putting borders on properly (without blaming or discouraging anyone from making the needed quilts) by “measuring” through the center and halfway between the center and the outer edge. The two tutorials you did are wonderful teaching tools. Happy summer to you!!!
I applaud your efforts to educate others on the importance of using proper techniques when putting quilts together. I love reading your solutions to the problem of wavy borders, as most of the tops I receive to quilt have this issue. Every day I am learning more about using my new longarm, and your blog is a great resource for me. Thanks so much for publishing these types of posts Carole!
I took a quilt to a machine quilter a couple of weeks ago and they were so impressed that my quilt laid flat…I guess that is also a big problem!
Well Carole, I would never have thought of inserting darts, I would have been taking the borders off and reapplying! Will keep this in mind for the future. Thanks.
Linda
That was a good idea for all of that extra fabric. Well done.
I just finished a disappearing four patch for a fund raiser this weekend. I used purples and greens. It turned out nicely. I love your valor quilt, the gold is a nice touch with the blues and reds. Great fix for the border as well. I will have to store that away for a rainy day. Thanks Carole.
Way to think outside the box! Great job on getting it quilted.
You are SO patient to work so very carefully to come up with the best fix for an unsightly problem! Darts are an excellent solution, as ‘just quilting it out’ would not work and unstitching takes way too much time.
I recently finished a quilt made in an improv wedge/circles class – the instructor wanted us to cut wedge strips without a ruler, which lead to loads of buckles and bumps in the piecing, which led to many darts! I did not cut free hand once I got home, using the ruler for a straighter line without actually measuring and boy, did those sections lay flat just fine!
Keep up the good work of spreading the word about the simple and straightforward way to determine the correct length for borders – based on your posts and what I have heard from local longarmers, it seems to be an issue all over! @susansquiltstudio
It very much is, all over the quilting world, longarmers complain to each other about this issue. But seldom is the customer told, most longarmers don’t want to offend them. And I have to say they are right. The one time I tried to educate a brand new quilter, she responded by taking her next four quilts to someone else.
That is too bad that she took offense, as you have a kind manner and I am sure you presented it that way. Education is the best and from someone with such experience, she should have been grateful. Who am I kidding? I am far to sensitive and my own worst enemy about precision. I probably would have been upset too, until I “got it”……keep up your amazing posts please.
That was a very clever fix!! 🙂
Carole,thank you for linking your tutorial on borders. I just read it and am amazed at what a difference the method results in. I am a self taught quilter, but never tried the “slap and sew” method (to be honest, at first I wondered what was so bad about it but your example shows why). I guess all those classes in Home Ec were useful after all–I learned how to correctly cut and pin fabric for making clothes and the same rules apply to quilts. Thanks again for the tutorial.
I do have one issue: I use corner stones in my sashes and borders, so I do the top and bottom sashing first, then sew the cornerstone sashing. How do we make sure those are correct? I’ve so often in the past measured and the bottom cornerstone will be just a smidge off of true, and I end up unsewing an inch for room, and then re-sewing a tiny seam. I work hard to be accurate, but always that hair it seems. I’ve a quarter inch foot, but I’m starting to think the old method of lining up an old credit card or stack of stickies at the quarter inch works better! My viking doesn’t have the screw hole to put in the great seam guide that my old singer has, that can be adjusted to what I need. I also know my probably 30 year old viking needs a good tuneup, the bobbin won’t engage when I drop the feed dogs. My long arm quilter hasn’t complained, so maybe I’m doing well. But you always make me think!
Brilliant!
Thank you for this type of post. While I am a newbie quilter, I have never had borders turn out like that. I also noticed there was a small pieced part on the beige border, perhaps a cutting error or the fabric was so skewed.
That was so interesting. You work magic on a daily basis.
Great job, always performing miracles and sharing your fixes. Fascinating to see, and what patience you have!!! And devotion to the cause, too. I have a 40″ square baby quilt ready to quilt for charity…..hesitant but going forward–need it by Monday. I can do this, I can do this…. LOL
Looks like I’m not alone in saying the darts are a fantastic idea! I doubt anyone would be able to see them even if they were trying. Great tutorial, Carole.
I was shown by a top quilting tutor how to measure borders, and thankfully the ones I have done have been OK, The dart, barely noticeable, and what a great ides to take in that extra fullness.
Okay, that was a really bad one! You came up with a great fix, and I don’t see anything wrong with doing that, even for a customer, with permission, but I’d charge a lot to do it. =) It’s a beautiful finish!
You are truly the “Quilt Doctor!”
The darts worked so well. I was totally unaware of the border issue until you did your tutorial, so I’m going to retread when I do my next border, just to be sure. Thanks for taking the time to spell it all out. I do my own quilting, so I will be the one dealing with any consequences, but having everything square even for a home machine is a good thing!
I see two problems. The quilter did not Square things as she finished a row and looks like she is a “trailer off” quilter. When I first started I did that. Now if I have a problem with a block I immediately look where I might not have an accurate and consistent seam allowance. Math is so important in quilting. You did a great fix for this quilt. Cudo’s
You have the patience of a saint and the love of things done correctly. Every one of these correction blogs you share teaches us something we really NEED to know. I’m grateful that you took the time for the vet who will get that quilt. I also agree that the pantograph might work better on a different pattern. Great job !
Shared on Facebook today your post on Quilt borders Tutorial. You are awesome to do so much to get the QOV out the door!