
This tutorial is to teach the why of putting on a border properly on a quilt. There are countless new and experienced quilters using what we call the “slap and sew” method instead of the proper “measure and cut” method. I thought I would show you the difference, and maybe convince you that the slap method isn’t a good one. In order to do a proper job showing the difference in the two methods, I needed to make a couple of samples to use. So, I did quarter-square triangles, mainly because it would optimize the bias edges and make the point clearer. So, I sewed up 18 of them, squared them all up, and set them in rows of three.

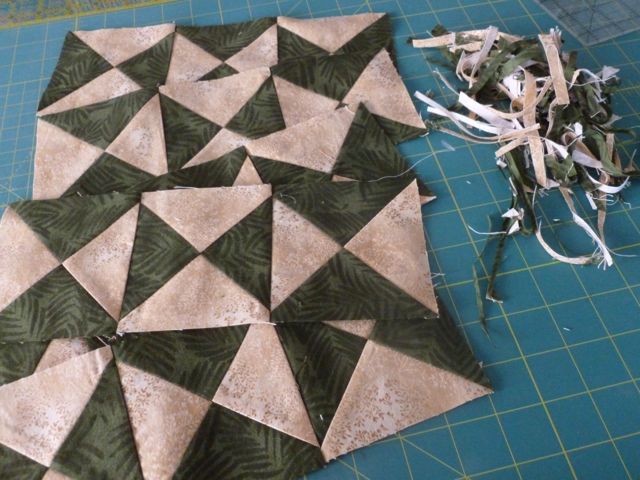
I carefully pressed them, seams opposing, so I could nest the seams. I assembled two mini-quits, identical in size. Note that they both have nice straight sides now. This will be important later.


I measured both just to be sure we were starting out the same. Yep, on track at 10 7/8 inches.

I cut one set of borders to that measurement.

I finger pressed each one in the center…

and did the same with the little quilt top so I could find the center.

Pin in place.

Sew with a quarter inch seam.

Then, for the slap and sew method, I just cut the same width border, 1 1/2 inches wide but much longer than I needed, then lined it up with the edge of the quilt top and sewed it on.

I used a lighter print so we can tell them apart. I tried to be as careful here as I could, I wanted to be sure I wasn’t overstretching the fabric, and I did the best I could not to distort it while sewing. I wanted a true comparison. At the end, I just sewed off the end of the top…

then whacked off the excess.

I pressed the first borders on both quilts and measured just to see. Look, we are already off, with the slap and sew border being just a bit bigger. Not much, but it will start to add up in a bit.


Next, I measured in three places to get the cross-wise border length.


The length was 12 7/8, just what it should have been after adding the first borders. So I cut the cross-wise borders to that length and sewed them on.

The slap and sew got slapped on. I measured in one spot first, not too bad at this point.

But look at the whole, the place where I got a 12 7/8 measurement is in the center.

See how much more fabric is there at the corners?

The whole thing seems to bow in in the middle and the lines are not straight. This is caused by stretching of the edge while applying the border fabric when sewing, and not meeting the exact measurement of the top. In spite of being ultra careful!!

Compare that to the measured border’s straight sides and nice right angle corners.

Now lets put on a second border to emphasize the point. The second border was the exact same fabric for both quilts, cut 2 1/2 inches wide, measured in three places for the first sides. I sewed it on with pinning to the middle and the edges, with pins between to keep the layers in place.

Now we go back after pressing, and measure in three places again.


Measurements are a bit different now, 16 1/2, 16 5/8, and 16 1/2. I decided to cut the crosswise borders to 16 1/2, as I had two measurements of that size and the third was just a smidgen larger. Cut and sewn. Note how flat it is, no wavy borders on this one.


Now, slap and sew, then whack the other one.

Here is where the difference is really apparent. Several things to note. First, the quilt with the measured borders is straight and flat. I put it face down on the slap method one so you can see how much bigger the slap method quilt is.

Second, the slap and sew has waviness in the borders indicating too much fabric on all four sides.


But the final proof is in the measurements. The measured border quilt is 16 1/4 inches square, just as it should be (after the 1/4 inch seam). But, the slap and sew quilt is 16 3/4!! And this is just one block. Imagine a lot of blocks at 1/2 inch too much border for each block! You can see now, how you will end up with problems. Lastly, I estimate that it didn’t save that much time either, it only took a few minutes to measure each side and cut the borders, well worth it!!


Imagine if you weren’t trying as hard as I was not to distort the fabric. And you have a king size quilt. Over the course of sewing 56 blocks for the king size quilt on my bed right now, this could end up being a lot of inches of excess fabric to deal with. Think I am exaggerating? Not really. I have seen borders that are several inches different in length between the opposite sides (which should be identical in length). This is how things like this happen, a quilt I recently quilted where the borders measured several inches too much. It was like a ruffle was put on the quilt. The only way to get it quilted was to put pleats in the border. It took four pleats per side to get all that fullness quilted. Plus, there were creases that just couldn’t be helped.


So, all this is to make the point that a properly sewn border will make a better quilt for you. Your quilt will lay flat and straight, hang straight on the wall, be easier to quilt, and not need the extra steps to cover up problems. This may also save you money if the longarm quilter doesn’t have to wrestle with it.
So here it is in a nutshell, how you should do a border for your quilt. Lay quilt top on a large surface or on the floor and measure your quilt in three places through the center of your top, average these numbers and cut the borders this length. If there is more than 1/2” difference, square the top again, or look for problems in the piecing that need to be fixed before adding the border. Fold the border and mark the middle. Fold it again and mark the quarter points, then once more and mark the eighths. Mark the quilt edge in eighths. Pin the border to the middle of the quilt. Next, pin each end. Match pins at the fourths and eighths and ease the quilt to fit borders. Finally, pin the rest of the border, making sure the fabric is spread evenly. Sew. Press. Repeat measuring, cutting, and pinning for the crosswise sides. Repeat as often as needed for the number of borders you have. Download a pdf of these instructions – How to Apply Quilt Borders
Please feel free to share this wherever you like, just give credit back to my blog. Please feel free to point others to this post that need some help with borders. Please do not copy any pictures or information. You may share the link on Pinterest, just credit the blog From My Carolina Home.
Did you know that how you measure is also important? See my newest tutorial on Another Lesson on Measuring Borders for additional information to increase your accuracy.
Do you need to miter the corners of your borders for a strong print? See my tutorial on Mitering Printed Borders, complete with instructions on how to calculate the fabric needed.
Thanks for reading and happy quilting!
Carole
Check out today’s Flash Sale at Fat Quarter Shop with my affiliate link.
My blog is about a variety of topics, quilting and sewing, crafting and cooking, reading and travel, mountain living and gardening, and more. You can follow my blog in several ways, see the sidebar for email sign up or blog-reader links. I have lots of free patterns for quilters, mystery quilt alongs, holiday quilt alongs, and seasonal events with giveaways. Please follow me for all the fun! New projects coming up!!

I have tried to get all 3 of my daughters to do this and only one has listened! That would be the one who wound up with borders that waved at her! Needless to say she became very familiar with her seam ripper. Good tutorial!
Thank you, JoAnne!
Great article
How do you add for mitered borders?
Thanks
I would be one of those daughters and I’m totally guilty of slap and sew. I think I better listen to mom now.
Thanks for the post. I hate sewing on borders, but still end up liking the look of them on most of my quilts. It is so worth the time to measure and pin. I’d love to see a tutorial on the finer points of mitered borders, especially matching up prints.
Thank you, Coral! There is now a mitering printed borders tutorial under the Quilting Basics heading at the top of the page.
This is the BEST written explanation/tutorial I’ve read and totally AGREE WITH!
THANK YOU for taking the time to educate quilters around the world.
Nan – Indiana
I am totally guilty of the slap and sew,, but now that I can actually SEE the error of my ways, I will be changing to the measure and cut. There used to be an old commercial on tv that said “I’d rather fight than switch”, so I will say, “I’d rather switch than fight with my quilt!
Thanks, Deb! Please share the link with your quilting friends, and follow the blog for more tutorials to come.
Thanks for that information. From now, i will measure and pin all the time.
Wow great examples to show why I need to stop doing what I do! Thanks for sharing this with us!
You’re welcome! Glad you found it useful. I have more tutorials on the blog, now on a page so they can be found more easily. Just look at the top for Quilting Tutorials.
Rosemary B here
I just took my first quilts I have ever pieced to quilt club today.
Oh yeah, last night I slapped on some two inch borders.
I wanted some advice and boy did I get it from Brenda and Renata. 20 minutes worth of a lot of new knowledge for me.
So, reading this, this evening, is so great. Now I know why those quilts at the expo were mostly amazing and perfect, and one was kinda rumply
Thank you for sharing this😇💛❤️❤️
I had no idea I was doing borders wrong! But I did know they were wavy. This is the first time I’ve seen instructions for measuring borders. Thanks for taking the time to write it up; you’ve changed my method for the better.
Old sewer, but new quilter here. I did not even know there was a “short cut” of slap and sew. Very glad to read the comparison of both before I encounter or attempt the supposed quicker method!
I should have said seamstress instead of sewer! LOL!
I am guilty of this also; but I think I am impatient. I like to see quick results. I am self-taught and sometimes (not always) it looks like it. I will try and follow the directions on the next one and hope for the patience I need. Thanks for the tutorial. Elaine hertz
Thank You! so much for this very necessary information. I’m a self taught quilter,and I cannot tell you how many time I have made the mistake using the slap on method. I will never do that again. You are awesome to share in such detail. I give you all the credit you deserve it. Thanks again.
Great detailed directions & information! I like that you showed the correct way to do border and the slap & sew way with results! Such a meaningful lesson! Thank you so much!
Pingback: Tuesday Tips–3/24/2015 | QuiltMouse
You got this right on!
Pingback: Bordas em quilt | Maryshow
Great tutorial ! You explain everything so well. It makes such a difference to the finished quilt.
Bravo! I’m all for precision….as it equals quality in my book. Much thanks! I’m new to the world of quilting and these types of tutorials are deeply appreciated! ***smiles***
I saw information on a longarmers conversation board about wavy borders but, didn’t know what that involved. I also just finished the Farm Girl Vintage Quilt and it has lots of borders. I cut my borders to the measurements listed and hoped I wouldn’t get waves. It was pretty flat with a very slight excess. I take my quilts to the longarm studio where I took a class and can longarm quilt them myself ( with lots of help and instruction, but a good cost savings). They have never complained of waviness to me but I didn’t even know about the slap and sew method. Now, I feel like I understand borders better and can get the flatness I deserve. When I learn something I like to know the ‘why’ part and you’ve explained it very well. I know I’m not the only one who learns better by ‘showing’ too. Thank you so much for the great tutorial.
The biggest complement I have ever had on my piecing skills is the one from a longarmer who thanked me for the top that was SQUARE! LOL She really meant it! I am currently working on a top that I just want done. The pattern in an expensive book was so off mathematically that the completed blocks vary by almost 2 inches. I only finished six of the 16 blocks when I decided I had wasted enough time on the problems with the blocks and worked out a means (coping strips etc.) to make them fit while allowing the top to be flat and square. Aurgh! I will be practicing my FMQ on this top as I will not inflict it on another!
I have to admit I am guilty of slap and sew, as I didn’t know there was any other way to add borders. Now that I know, next quilt I’ll try this step on the curve of learning to quilt.
Just sewed my first 20 block set with sash in between the blocks and was searching how to apply to top and bottom and sides when I found you. What a wonderful clear lesson, thank you, I would have probably done the slap and sew method. I will search for your new posts. Bless you.
After quilting for 9 years using the slap and sew method, I finally learned at a quilting class the right way from a wonderful teacher. My quilts have never looked better.
Thank you, thank you, thank you! Excellent article! I have been trying to educate people on border construction forever, and now that I am quilting for others on a longarm, this is more important to me than ever. I get so upset with patterns that have the “slap and sew” method in their instructions. I will point everyone to this article, thank you for taking the time to make the samples. Hopefully this will convince a few people.
Hi Carole,
I am fairly new to quilting and have had this problem with borders from the beginning. Thank you so much for this tutorial. I will definitely be changing the way I measure and apply them. I do, however, have a question about cutting them. Does it matter if borders are cut on the WOF or LOF?
No, it really doesn’t.
Wish all piecers would do borders correctly. I occasionally get quilts to longarm that are nearly 6-8″ larger because of poorly attached borders!
Hello, I am sew excited about your blog and this post. May I use it on my business facebook page, with attribution?
Thank you so much for this well illustrated tutorial. I am a longarm quilter and will be sharing your blog on my business page to gently educate my customers. Thank you!
Thank you Carole – I love this! I didn’t pay much attention to attaching borders until I started longarm quilting and discovered how difficult and frustrating it can be to quilt wavy borders.
Just read this tutorial. Your demonstration with the mini-quilts would have been more compelling had you used the same sewing techniques in both: you sewed the “proper” method with the border on top of the block and the “improper” method with the strip underneath. This guarantees that the feed dogs will “gather,” at least a bit, the border fabric. I have to admit that I use the “improper” method for adding borders to my quilts, but I always sew with the body of the quilt underneath and that way, don’t get extra fabric in my borders.
Just putting the border on the top and stopping at the edge will still result in inaccurate borders, yours may be too short. This will make the top bigger resulting in excess fullness in the middle. Or depending on how the fabric feeds, they could still be too long. Your longarmer just isn’t telling you. Try the hang test I talk about in the longarm problems post. See if the quilt bows up in the middle when you fold it in half aligning the top and bottom edge. For the tutorial, I put the slap-and-sew border on the bottom so I could see where to stop sewing since I was sewing first and then cutting, which is how most people likely do it. If pins are used, it won’t matter much as the pins will help keep the borders and quilt top in line. Measuring and pinning is the best way to get flat and accurate borders, no matter which part is on the top or next to the feed dogs. The gathering of the feed dogs is part of the problem. I have been longarming bad border quilts enough to know that many quilters need to change how they do things. Pinning is not that hard, doesn’t take that long, and you might be surprised at your results if you try it. Measuring and cutting borders to the correct length makes a huge difference.
Thanks for the tutorial. I’ve quilted for 20+ years. I sometimes doubt my technique. Your tutorial confirmed the correct way to add borders. Great job!
Carole, I have two problems. One, I don’t have floor space to lay out a queen size quilt or larger. The second, even worse, is I have bad knees. Do you have any solutions for my situation?
Do you have a dining table? You can fold the quilt in half and measure and cut with the top and borders folded in half. Or, get a cardboard folding board and use your bed – like this one http://www.joann.com/cardboard-pattern-cutting-board-36inx56in/9815127.html
Hope that helps!
Carole
This was a great tutorial….I have to admit that you and I seem like similar people. I had been told by fellow quilters for YEARS that I was doing 2 things wrong….pressing my seams open, and using straight of grain binding when my quilt had no curves. I made 2 potholder sized quilts…one with open seams and straight of grain binding, one with nested seams and bias binding. They were then washed and dried everytime I did a load of laundry (twice a week for over a year). End result? Seams with not a problem either way, but after 1-1/2 years, the straight of grain binding lay perfectly flat, while the bias binding quilt rippled all the way around! I long arm quilt as a business and just finished a slap and sew border that was 15 inches wide….what a nightmare…ripplies all over and even a few small pleats despite my best efforts. I never know whether to mention it to my customer or not….but for this particular individual I just don’t think I’ll take any more quilts as it seems like a pattern with her. I would welcome your thoughts. BTW – I am in SC, in the northern part so…hey neighbor!
This is from one of your comments above: “Pinning is not that hard, doesn’t take that long, and you might be surprised at your results if you try it. Measuring and cutting borders to the correct length makes a huge difference.” EXACTLY!! It is so easy to do things well, that I don’t know why people choose not to. The only good reason is because they don’t know better. I found your post on the facebook Longarm Quilting group. I don’t do 3 measurements on each side, just one in the middle. It works well for me, because my piecing is pretty good and especially is consistent. And I’ve found that when I do have a little splay on the corners, I can usually trim them to square with minimal change in appearance, which is not noticeable at all once the piece is quilted. Thanks for the post.
Thank you so much for this excellent tutorial and for your generosity in allowing me to put a link to it on our website. My husband and I are longarmers, and I am so tired of explaining to clients who have caused us endless headaches about how to apply a border. I had written down a few addresses to tutorials for some, but yours is so well done! I shall simply refer them to your website.
Thank you again for taking the time to write and photograph the rationale for doing it the right way.
What an awesome tutorial. I believe it the most clearly explained one I have read. Thanks so much for your time and effort in preparing it.
What a wonderful tutorial. thanks
Thank you. I read this just in time!
Oh my goodness! Just found this post. I’ve been quilting for three years, and did not realize I was “slapping and sewing” on my borders, because I pin them – but I leave them long and whack them off. I did not think about the corners being distorted. Or about squaring up before I add the borders. Oy. I still have a lot to learn. I’m a longarm quilter, and I’ve just recently started taking customer quilts, so I’m seeing a lot of problems. Sometimes I rip out more than I sew. I’m super glad I found your blog! Thanks for your help. 🙂
Please never delete this. I’m serious, I’m considering printing it out, laminating and sticking it above my sewing table (if I had a wall to stick it on) I’ve always had problems with my quilt tops not being square, not laying flat, I can make a quilt that is 2 inches wider at the bottom then the top. Quilters have tried explaining what I’m doing wrong, but your photos and wonderful explanations have finally made it click. Thank you so much for sharing!
Great tutorial, Carole! I’ve had this conversation over and over with our ministry group, but it only “took” when they all started quilting on the frame themselves – and had to deal with some of those wavy borders! Thanks for sharing!
Thank you for sharing this information. I am a converted slap and sew border maker. I have been using this method and it really makes a difference in the look of the quilt.
This is such a great tutorial, Carole! I love the comparisons that you made and how well it showed the difference between the two methods. Every longarmer knows how important accurate borders are!
The best tutorial I’ve ever read on this! Thank you very much!