Today we finish the table topper. Final assembly will include setting triangles to put the bell blocks on point. Cut 3 squares of background fabric 11 x 11-inches. Cut two of the squares on the diagonal once to create four large triangles. Cut one square on the diagonal twice to create four smaller triangles.

Sew the four smaller triangles to the bottom of each of the four bell blocks along the hypotenuse of the triangle. The 90-degree angle should be the point at the bottom.

The setting triangle will extend a quarter inch past the edge of the block. This will give you a seam allowance. Sew the triangles to the blocks.

Arrange the table topper with the larger setting triangles between the blocks. Sew together in diagonal rows.

I found it was easier to keep things straight by pinning both sides of the diagonal rows. So, for the center row, pin both bell blocks to the center star. For the other rows, sew both setting triangles to the bell blocks.

Press the seams opposite.

Sew the rows together.

Since I like to make a binding that is a bit wider than a quarter-inch, I add a border of background fabric cut from 1-1/2-inch strips. Be very careful measuring and cutting here, and use lots of pins, as those setting triangles are all bias edges on the border side, and very easy to stretch out of shape.

Adding a narrow border ensures that my bell points remain intact. You can add any size border that fits your needs. You could use a print if you liked.

Quilt as desired. I loaded mine onto the longarm, and thought about doing some medallions and feathers on it. This project is small and can easily be done on your domestic machine.

I decided just to get it done, and quilted it using a fun Christmas theme pantograph called Deck the Halls. It has bells and holly.

It is quilted with white Glide thread in the top, and Bottom Line in the bobbin.

The white thread blends well with the gold, and creates nice texture on the background.

With small projects, quilting is fast.

Bind in a color for a nice frame. I used the same gold as the bells. You could use your accent color, or if you used a print for the border, use the same print for the binding. The gold goes well with the backing too, a gold background print with red flowers and green stylized leaves that looks just a bit like a holiday print.
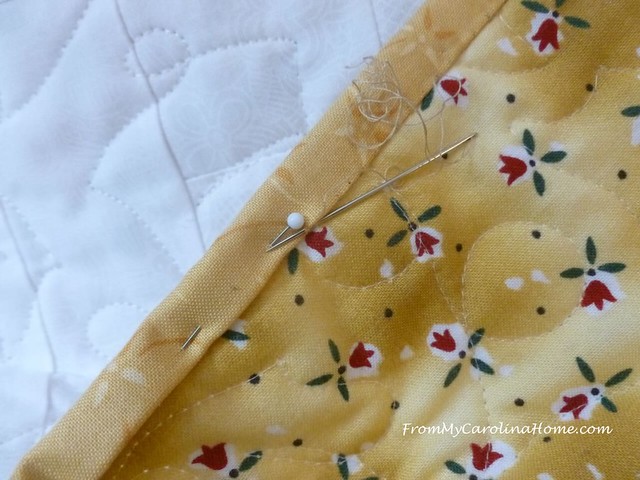
All done, and ready to put on the table. Mine finished at 30-1/2 inches square.

Enjoy!! More Christmas in July coming on Sunday!!


One more busy day and I’ll be able to actively work on this! I love how it finishes. Thanks for the great instructions.
Thank you!
Christmas in July – Table Topper FinishingHi I seemed to have missed the first block of the bell, any chance you could send that to me thanks Donna
Donna, just go to the blog and look at the past post from Tuesday.
Thank you Donna
What a great finish!! Thanks for the fun project. (Waiting out the excessive heat to get back in my sewing room! May be Christmas in September at this rate; another 100 degree day!)
What a fun arrangement to put the blocks on point!
That’s so pretty, Carole! I love the on point setting with the bell blocks around the center star. And the gold binding is a perfect finish, too. I’m hoping to get some sewing time for this one today!
I might even try making this as a tree skirt! But wonderful for my dining room table! Thanks!
It just might work for that too! Fun idea!
Lovely! The backing is so pretty – love me yellow fabrics. Switch out the fabric & those could be wedding bells.
Oh, so true!! The bells could be white with the background in the bride’s colors!
that is a cute one for Christmas
Love it!!! what a fun one!!!
Thank you, Carole, for this quick table topper pattern. I’m looking forward to making this. You have such beautiful birds~~we don’t have as many colorful birds in western Washington.
Carole, I love this project. The bells could be beach hats in summery colors. My progress is slow. Our daughter is visiting and it’s a lot of work getting my hand to work properly again. But I’ll get it done. Thanks for all you do!💕❤️😊
I thought I’d pop in and say hi! This is a really cute topper. Unfortunately, I can’t sew along as I am mostly being Nana these days. One of my grands is seriously ill and I am being the help needed with the other seven. I’m just going to live vicariously this year and enjoy your two weeks of Christmas in July. Thanks for the great inspiration! I think I’ll print out the pattern, maybe I’ll be lucky enough to find enough free time to make this.
It works well as a table topper. I can see it on your lovely table at the holiday!
That’s very pretty!
Cute! Thank you for the inspiration! Merry Christmas in July 🙂
I’ll definitely try to get this adorable table topper done before the holidays. Wish me luck with my physical therapy and finding some sewing time.