
Ready to learn how to get half square triangles out of jelly roll strips? It isn’t hard, but you will have to be very careful doing these, as the cuts will be on the bias rather than straight of grain. Don’t be afraid, let’s take it one step at a time.

Begin by carefully pressing your 6 background (BG) strips and 6 jelly roll (JR) medium/dark strips with a generous amount of spray starch or Best Press. This will help keep the bias from stretching as you work with the half-square triangles.

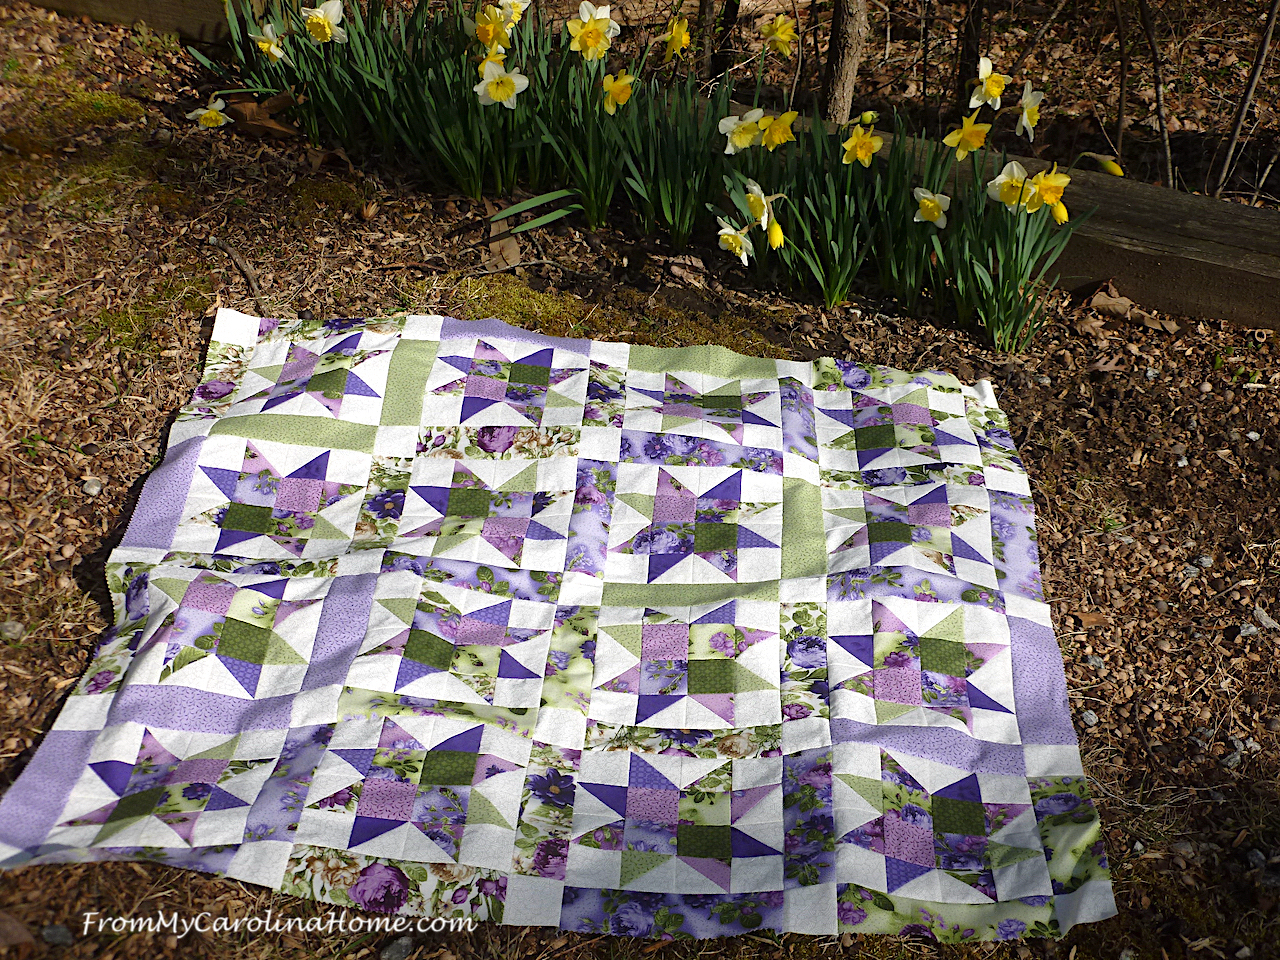
Sew a JR strip to a background strip along both long sides.

Repeat 5 times for a total of 6 JR/BG strip sets. (In the pdf download it says to press to the darker side at this point, ignore that.)

Using a Deb Tucker Triangle Trimmer ruler, place the 45-degree diagonal line on the seam line on one side at the 2-1/2-inch line. Place the first one past the selvedge edge.

Cut on the ruler edges to make one half square triangle (HST).

Turn the ruler around to the other edge and line up the ruler again with the 2-1/2-inch line on the stitching line, then cut on the edge to make another HST. Move the cut triangles out of the way as you go. I’ve put them back for the photos for clarity.

Repeat cutting with the 45º line along the seams, alternating sides until you have 128 half square triangles. Note that you will have a bit of waste between the HSTs here and there. Just cut that away.

Also note that sometimes the cut edge of the previous HST will make an angle on the one under the ruler. Don’t worry about this, it won’t affect the unit.

Repeat cutting with the diagonal line on the ruler along the seams of all six strip sets, alternating top and bottom until you have 128 half square triangles.

For those who do not have a Triangle Trimmer ruler, here’s how you can do this step. Get out your square up ruler, or other ruler that has a 90-degree angle at the corner, and is marked on the top and side with measurements. You’ll use the markings at the 2-1/2-inch point on both sides to make your cuts, placing the seam line to intersect those points.

To make this easier and more accurate, place a piece of tape across the ruler at the 2-1/2-inch mark on both the top and side. Tear away a bit in the middle so you can see the seam on the strips.

Place on the sewn strip unit, aligning the seam along the tape pieces. The torn section in the middle will make it easier to see if your placement is correct. Cut the unit on both sides of the ruler, and proceed as above.

Carefully press the seam to the darker side, taking care not to stretch the bias edges as you go. Use an on and off method of pressing, don’t move the iron across the units, only pressing down, then lifting off. You can trim the triangle ears off if you like, but these should not need squaring up.

So, that’s the lesson for this week.
If you are just now finding this quilt along, here is the schedule, and a link to the first post with an overview and color ideas, along with the pdf download for the pattern.
Oh, My Strippy Stars!! Quilt Along Schedule – March 2023
March 1 – Overview
March 7 – Four patch units
March 14 – Jelly Roll HST units – today!
March 21 – Block assembly
March 28 – Quilt assembly, final sashing and finishing
****************************
At the end of March, you can sign up for a great online class, with a special discount for readers of my blog! For my readers all over the world, especially those in the southern hemisphere, you don’t have to watch it live. Once you pay for the course, all the segments will be available to watch beginning the next day. So you can sign up, and watch at your convenience, PLUS they are yours forever! The videos do not expire. It is a fantastic deal for 12 hours of classes with the coupon code below.

Ever wanted to take a comprehensive class on using color, selecting colors for quilts, working with scrap colors, and more? Creative Spark Quilter’s Color Mixer is an online class on March 30, 2023 – 9 am to 1:20 pm, PST. (noon Eastern to 4:20). Here is the fabulous lineup of speakers and topics. Note there are three sessions for each time period, you choose one for that day, and can go back and see the others later.

The class is regularly $49, but you can register with the coupon code using THIS LINK for only $29! Plus the class is watchable later without an expiration, so even if you miss that day, it is available after at your convenience. Using my coupon code gives me a small commission, thank you for using my link to check out the class. Share with your friends!

Thank you for using my links when you can. Purchases made by using my links do not cost you any more and you can use your existing accounts with these merchants. When you buy from them, I may receive a small commission so I can continue to bring you fun quilt alongs, free patterns and ideas, while keeping obnoxious ads off my blog.
Madam Sew has savings on New Arrivals for the New Year! Then save even more with these coupon codes! Save an additional $5 off orders over $50 with Code: SAVE5 or Save an additional $10 off orders over $100 with Code: SAVE$10
Shop the sales at Fat Quarter Shop! Sales on Notions, Books, Patterns, and Fabric. This month get 20% off the Basic of the Month Spotted by Zen Chic for Moda Fabrics, 30% Off the Books and Patterns of the month by Camille Roskelley, and see the Precuts of the week. Save on Notions from ByAnnie, and cross stitchers save on It’s Sew Emma Project Bags. Don’t forget the daily Flash Sale!
Visit Sulky Threads for special savings and great deals on all kinds of threads and stabilizers for your springtime projects.
Share your progress in our Facebook group. We’ll pick up again next Tuesday with the next step.
Are you having fun with this quick quilt along?

Giggling this morning as I see your passion for patchwork and I’m fussing and cursing as I finish up my patchwork retreat project…..longing to get back to my more freeing style (freeing at least for me). Quilt history is steeped in patchwork and it’s so great seeing talented folks like you keep inspiring all of us.
Interesting method to make HST. Wondered how that was going to work out. Will be watching this project, saving the clues for when I have a little more time.
Oh goodness…my head is spinning. This may be why I have never started to quilt. lol
Excellent HST tutorial. I purchased the Tucker Triangle ruler for another project and have been using it ever since as I like the fine lines and uses for this ruler.
I’m working on finishing the seams of the quilted jacket that I was inspired to start last year when you led a quilted jacket project. Hoping to finish the jacket before anything slows my momentum.
Happy stitching!
It’s a two-fer for me – I’ve never used this method for hsts & I’ve never used the Tucker Trimmer for anything but trimming hsts. I agree with the comment above, I love it for trimming hsts because of the fine lines. Off to sew some hsts.
Just got my package started for my retreat first week in April. I think I can make it work with the strip set I have and the background. I hope to do a little strip cutting before I go so I am ready to sew like the wind. Love the way this looks.