
Last year we had a tree fall in the forest on our property, and part of it landed on the driveway. So, no choice but to cut it up and move it. It was a black locust, which is really nice hardwood. So, in exchange for giving the wood to our wood-worker neighbor, he was asked to slice some discs from the trunk for me. He was happy to do this, and I got about 6 wood slices. I let them sit in the garage for a couple of months to totally dry out. Four of them had a fairly even slice, and I set to cleaning them. I decided not to sand them smooth, I like the rustic look to them.
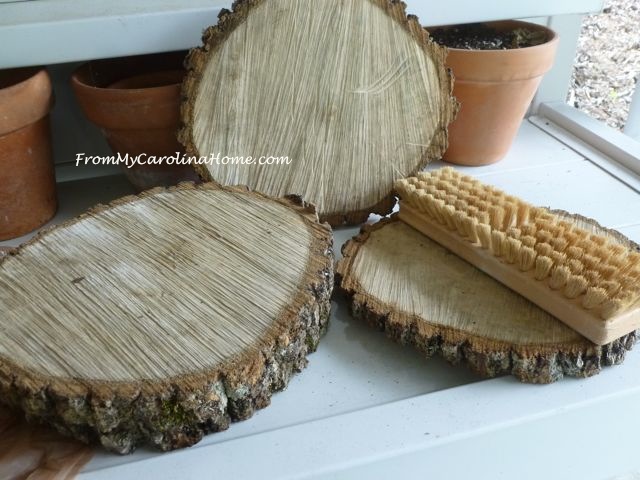
I used a stiff brush to knock off any bark that was loose, and all the dirt in the crevasses. I scrubbed the cut surfaces too, to be sure any sawdust was gone. Then I tried a spray varnish.
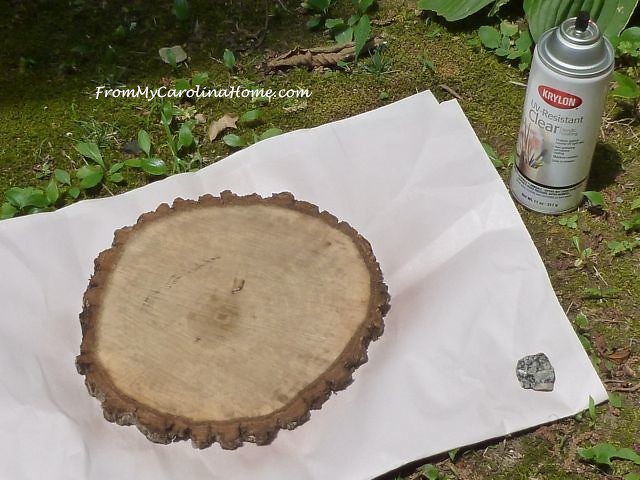
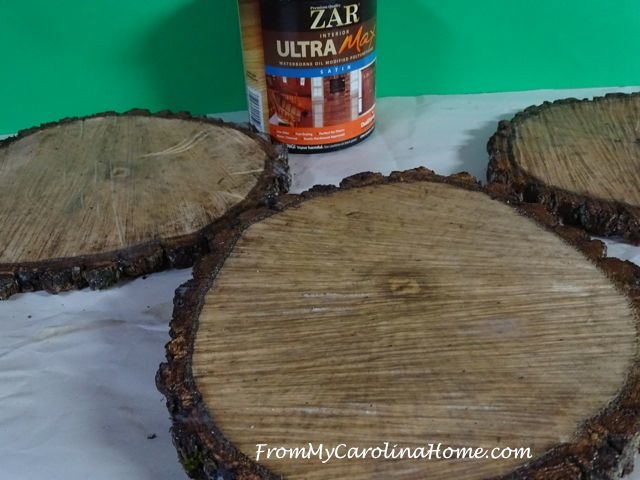
This didn’t seem to work well, the porous wood just soaked it up. So, I scoured around in the basement and found some varnish that was a matte finish. This is just what I wanted, not shiny. So, using a foam brush, I put on three coats on both sides, making sure to get all the bark well covered. Allow the wood slices to dry thoroughly. If you don’t have a tree to cut up, these are available online and at a couple of the big box craft supply stores.
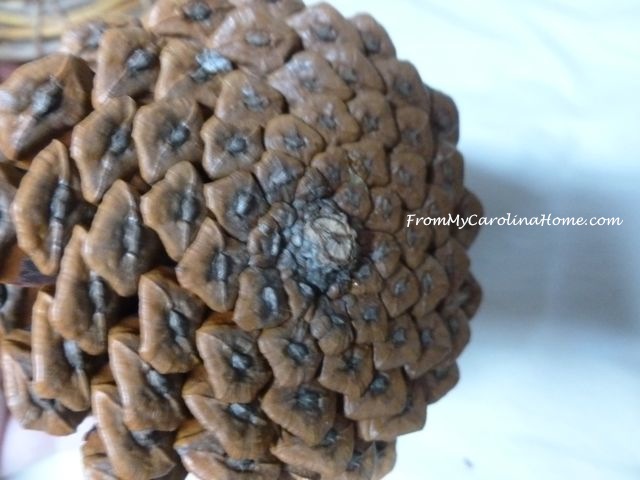
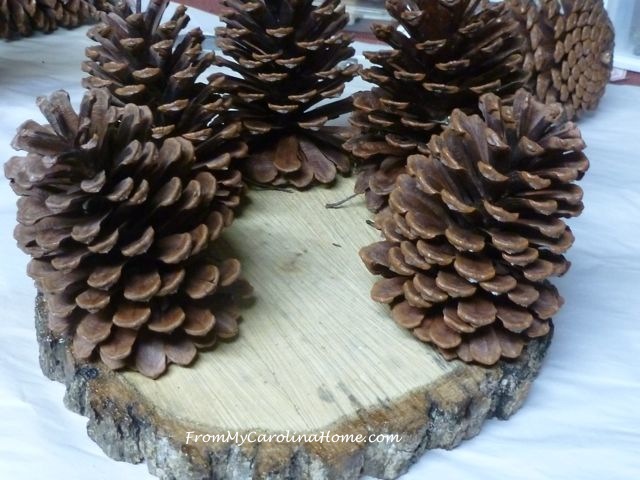
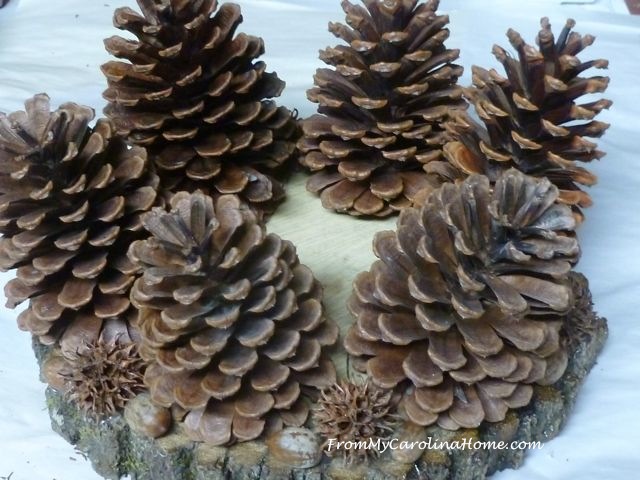
Next I got out my supply of pine cones, and picked out several that were about the same size. I have a huge basket of pine cones, some from friends, and some from estate sales. The pine cones were chosen by how solid the base appeared. Any stem remaining was cut off with plier cutters.
Six pine cones made a nice ring around the edge of the wood slice.
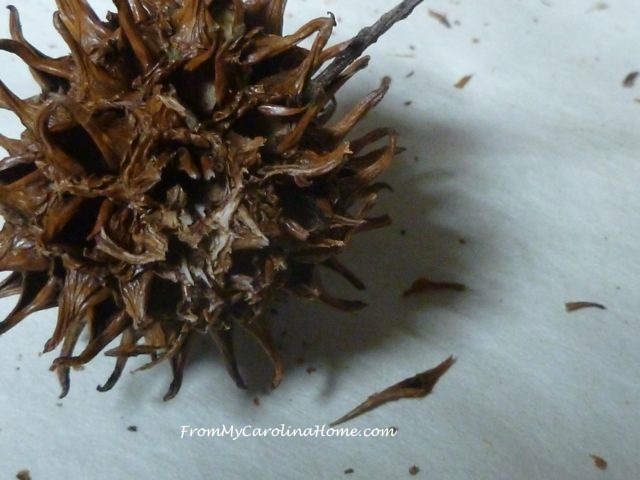
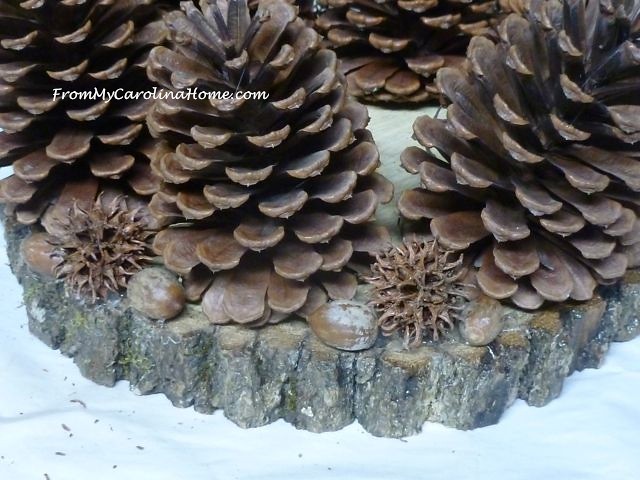
Once all the pine cones were attached with hot glue, the spaces between were filled in with sweet gum balls. Our back yard is full of these little things.
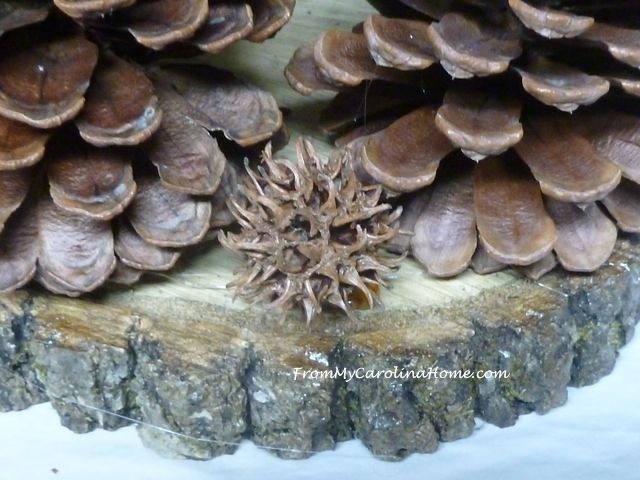
To make it easier for the sweet gum balls to be attached with hot glue, I trimmed off part of one side with scissors.
Acorns are added between the sweet gum balls and the pine cones to fill in the small spaces remaining.
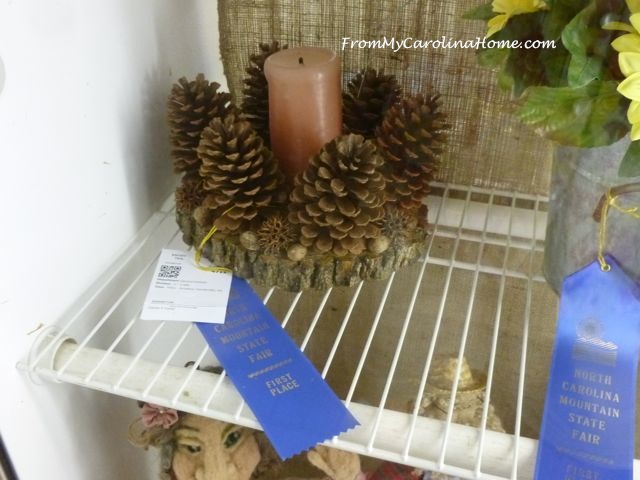
All done, and I added just a bit of hot glue between the pine cones where they overlap just for stability.
I added a tall candle to the center, just for show. Red or Green candles could be used for Christmas, but for now I am going with an Autumn color. If you want to use a real candle, be very careful as the pine cones might catch fire. It would be better to use a votive holder with a tealight, or better yet, a battery operated light.

Then I entered it into the Mountain State Fair, and won a blue first place ribbon for the category of Crafts Using Natural Materials. It was exciting that it was selected to show in the cases.
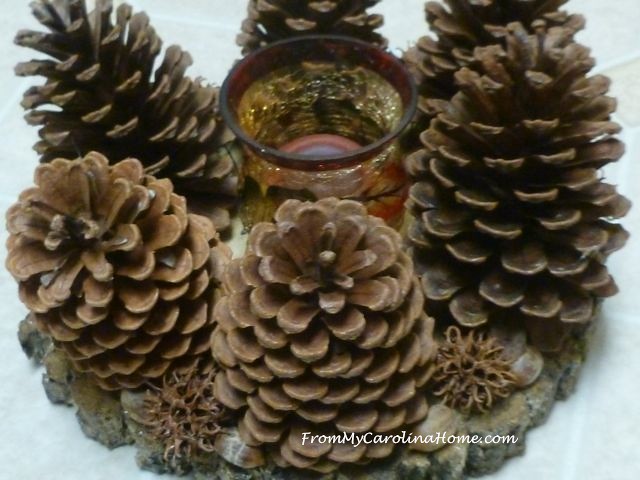
This will be a centerpiece for a rustic tablescape I have planned for later in the year. The crackle glass votive candle holder fits well too. It is a pretty leaf design with autumn colors. I have three and they come out every year at this time. Keeping the flame below the top of the glass holder is safer.
I like this a lot. Our home is being bombarded with acorns right now. Seems like just as soon as DH gets them swept up and thrown into the woods for the squirrels, the trees drop a whole new load. You do have to watch your head right now, it is easy to get beaned by one. So, I think I need a couple more crafts to use up more acorns.

Do you like to craft with pine cones? Share your pine cone crafts with us on our Autumn Jubilee Flickr group.

My blog is a variety of subjects, quilting and sewing, tablescapes and recipes, book reviews and hand stitching, crafting and mountain living. I love to have new followers, too! See the buttons on the sidebar to follow by your favorite method. If you are visiting from Fave Quilts, Pinterest, a blog hop or link up, please stay a bit and have a look around, my tutorials are gathered at the top in pages to make them easy to find, and the categories on the sidebar will gather posts in any subject for you. Lots of fun is had here, and I invite you to follow with any of your favorite methods, see the sidebar for ways to follow. My fourth mystery quilt is in the planning stage, and will begin in January 2018. Click on the Home page to see the latest posts on the blog.
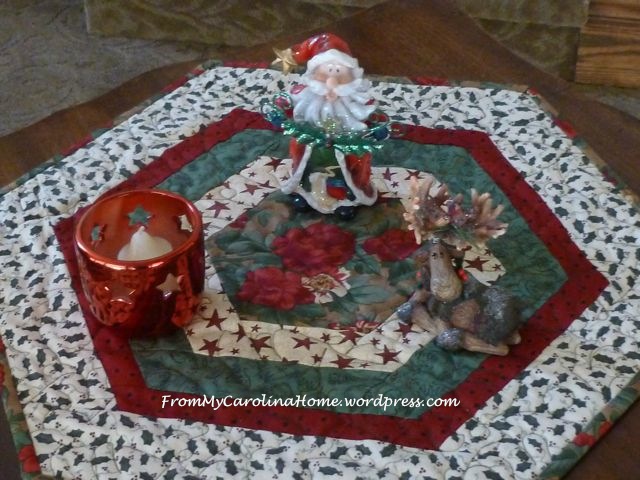
Are you a quilter too? See my Christmas Hexagonal Table Topper free pattern!

Great project. Congrats on the win. Love that you reclaimed some wood from your tree.
I love this candle holder. What a great way to use nature’s bounty.
It looks like you had fun with this project as well. Congratulations on the ribbon. Did you spray your pine cones and acorns and sweet gum balls with sealer? We have pine cones dropping like crazy in our yard. Last year I collected 100 of them and cleaned and dried them for table decorations at our guild. The members were anxious to take them home. I can never come up with a plan for something to do with them! This looks great!
An effective project – so simple looking and pretty. Well done on the blue ribbon win.
What a neat idea, so resourceful! It reminds me of the expensive candle rings bought in stores. The ones you made however seem more durable.
Great project….we cut our own firewood on our property so I have access to log slices…but none of those cute gum tree balls! Now acorns….I have plenty of those! It sounds as though the squirrels have been throwing them onto some of our metal roofings. I accused Mr. and Mrs. Squirrel of having a spat last week…I swear I think they were fighting (or playing) by throwing them at each other.
This is so creative and beautiful ♥
summerdaisycottage.blogspot.com
Congratulations on your blue ribbon, well deserved for such a creative and fun centerpiece. I would love to make one this year. You have such great ideas. :o) m
Good Morning Carole! Congratulations on the Blue Ribbon! I feel the judges made the right decision after reading your post tutorial and seeing the final results. I will definitely be having hubby cut me some of these flat wood pieces and making this project! I picked up dozens upon dozens of pine cones last year around the area (we do not have very many) and slow oven roasted any bugs. LOL. I have many projects planned out like wreaths, hanging scented with a large pretty bow, a few others and now your wonderful project. Thank you for sharing and have a fantastic creative day!
What a lovely centerpiece. We used sweet gum balls and acorns with a bit of wire and yarn to make ornaments one year. We put the wire through th acorn with enough left on top to make a hook for hanging, then wired the acorn to the sweet gum ball. Two short wires with curved ends went into the sweet gum ball to make skis, a bit of yarn wound round the “neck” and you have a little winter skier. They were really cute, the acorn cap looks like a little hat.
Love this & I love pine cone crafts! Will send you a picture of something I made.
Very creative you deserved the Blue Ribbon!
What a lovely candle setting and well done on your win 🙂
I am a pinecone fanatic! I have pinecone sconces, pinecone curtains, placemats, napkins, and napkin holders. Not to sound morbid, but my hubby and I already have our headstone and there are pinecones on a pine branch on it. The sad part…..I do not have any grown pine trees that produce pinecones. I have none in stock for crafting. I love your design!!
What a great idea Carole! I was just over at my daughters yesterday and picked up some sweet gum balls. I’ll have to head to the park for pine cones. The neighbors came over yesterday and helped Bob cut and remove the tree while I was gone so I don’t know if I can still get some cuts from it. Your work is beautiful!
I’m not surprised your piece won a blue ribbon. It’s beautiful and useful, both. The only thing I’ve made with pine cones is peanut butter and seeds all over it for bird feeders. I quilt, but I’m not very crafty!
Congrats on winning! This is a great idea…so creative…love the natural elements! Pam @ Everyday Living
We had a large tree cut down last month and I’m waiting on my Mr to cut some rounds for me. Thanks for the info on how to prep and finish them.
How fun. I have some pinecone’s. I want to make one for my new lodge theme room! I love this.
I’d love for you to come over and link at The Fabulous Fall party!
It’s over here:http://mychristmasjourney.blogspot.com/2016/10/fabulous-fall-party-lets-party.html
Happy Fall!
Congratulations on your blue ribbon project. Great use of the locust wood and pine cones.
These are really pretty…and very unique…here from the Fall Paty
Carole, congratulations & thanks for sharing @Vintage Charm!
I love this idea, Carole. And just by changing the candle, or it’s container, you have a centrepiece for a different season or celebration. Next time I have a tree cut down, I’ll have to get someone to cut me a round. Not sure where I’ll get the pine cones, though, but I’m sure I can source some. Perhaps a trip to a pine forest. Plenty of gum nuts, though, and I think they’d suit. I’ll admit to having to Google ‘sweet gum balls’. Love how I’m inspired and learn new things at the same time. Thanks for sharing.
So simple and so beautiful. I love the photo in your header too. Stopping by from The 12 Days of Christmas DIY Challenges xx