
I am still on my plan to make more boy’s themed quilts for our charity quilt goal with the quilt club. I found this really cute Winnie the Pooh fabric, but it is directional. The print has a fairly large repeat, so bigger pieces will show off this print better than cutting small ones.
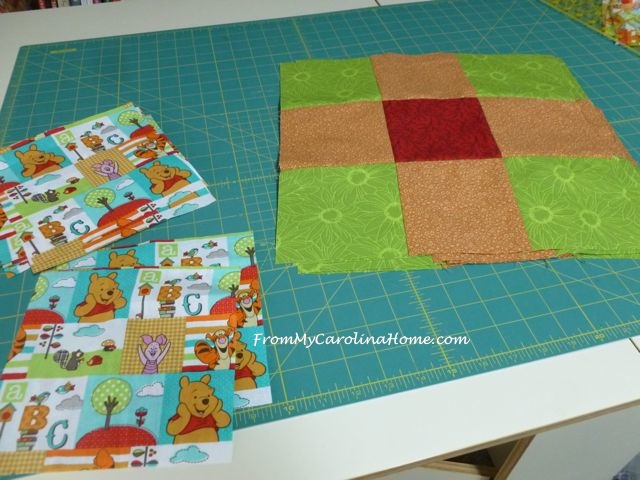
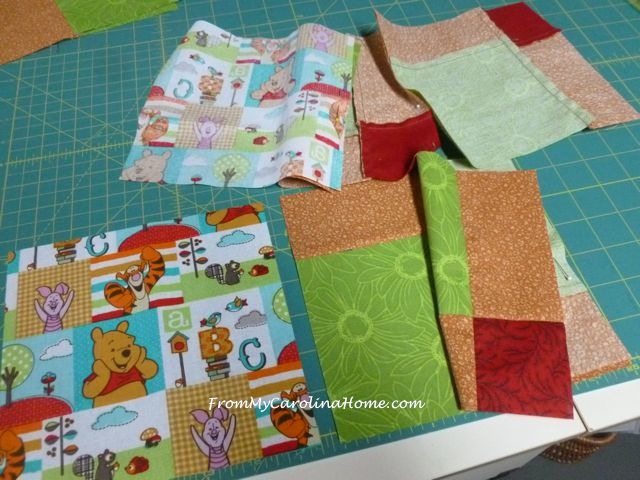
I decided to use the Stacked Bricks pattern, and use the Pooh print for the 7 inch squares. I made a nine-patch with five-inch squares in colors that went with the print. Then I did the cuts, turning the upper left and lower right.

Next, I sewed the two top pieces together, and the two bottom ones together. The sewn pieces were offset to allow the Pooh squares to be added.
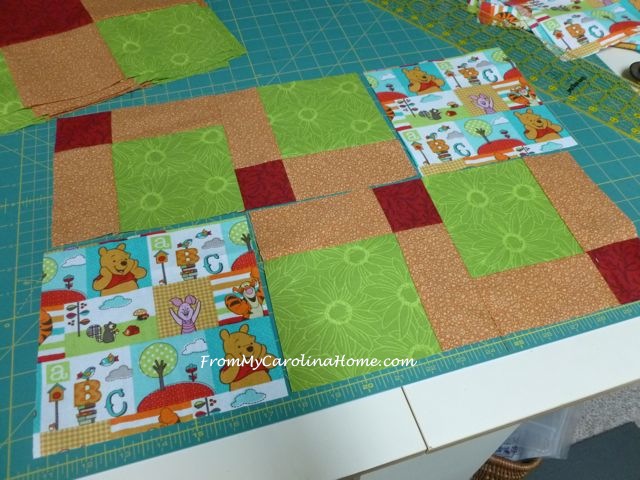
Continue sewing in rows, and press toward the Pooh print.

Here is one brick done.

I began making rows of bricks, being careful to keep the Pooh print right side up.
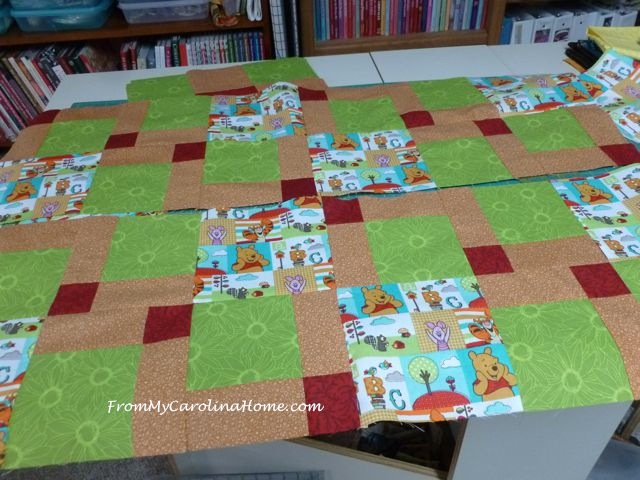
I had four bricks stacked, and decided I could do eight to make a larger quilt for an older child.

So I made more bricks.
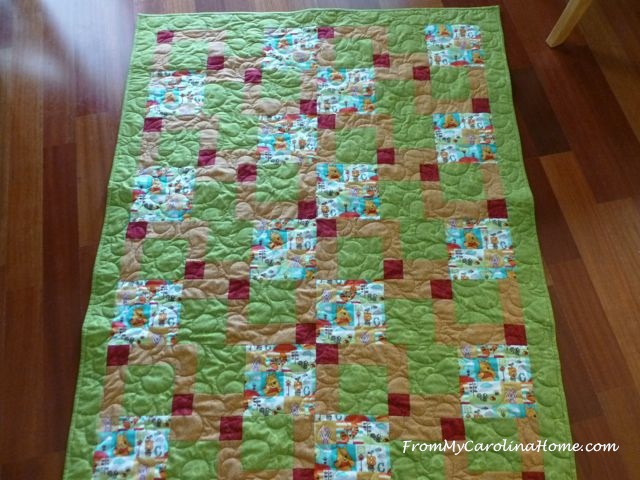
This made a nicely sized quilt.
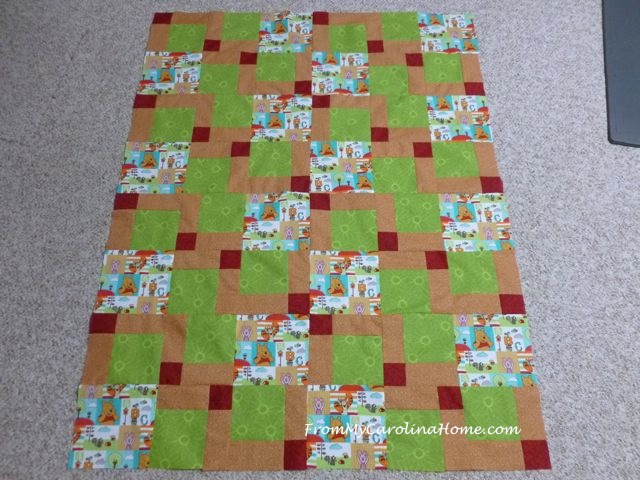
A matching green border was added, and then it was loaded up for quilting.
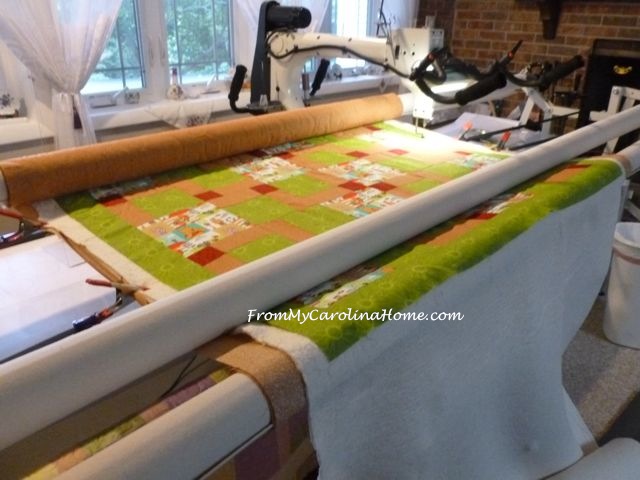
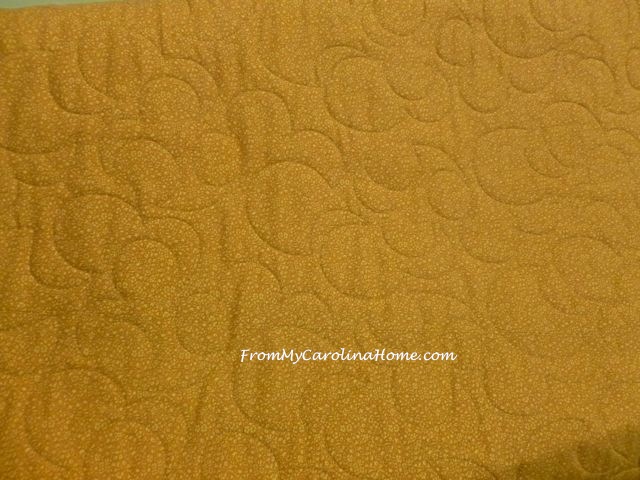
I used a cloud pantograph for this one, echoing the clouds in the print.
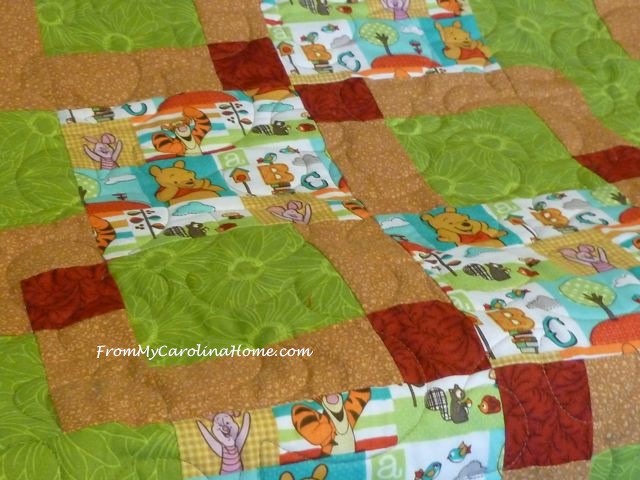
I had several pictures of the quilting, but it is actually easier to see on the back.
Binding is the same green print. Some of you may remember this print from the Elizabeth House quilts, and I am happy that I have used the last of it between this quilt and the next one.

All done and just needs a label and it will be ready to deliver.
I am a bit ahead of schedule, as the kid quilts are due in November. So, next month I’ll show you another quilt with the same directional print, but used in a non-directional way.
If you are visiting from Fave Quilts, please stay a bit and have a look around, my tutorials are gathered at the top in pages to make them easy to find. Lots of fun is had here! My blog is a variety of subjects, quilting and sewing, tablescapes and recipes, book reviews and hand stitching, crafting and mountain living. I love to have new followers, too! See the buttons on the sidebar to follow by your favorite method. My next mystery quilt will begin in January. Click on the Home page to see the latest posts on the blog.
And one more thing to add, my How to Serge Perfect Napkins tutorial is being featured on the All Free Sewing blog Seams and Scissors today! Happy National Sewing Month, and Happy Quilting!

This is so cute. Any little boy would love to have it.
I can’t believe how quickly you roll these quilts out. Amazing.
Great stretch of an old reliable quick block, good way to include the directional print. I have quite a few kid fabrics that would work this way, will have to keep it in mind.
I was all set to post the first of my two small scrap dance quilts as finished, complete with buried threads, binding and a label. As I was considering different ways to quilt it’s fraternal twin, which is all basted, I noticed that two rows in the center block were in the wrong direction! I’m doing the same thing you posted about, picked out the quilting and piecing and am now sewing the strips back in. Fortunately all the quilting was straight diagonal lines, so rebuilding will not be too big a challenge. Oh, well, I guess this falls into the the same bucket as ‘measure twice, cut once’.
Nice pattern idea for a directional print. I usually work with scraps, so mine would never look as “put together” as yours.
Carole, you have created such an adorable quilt! I really like the fabrics you chose to go with the Pooh fabric, because it enhances the fabric terrifically. Plus, the way that you quilted it is spectacular! Thank you for sharing and I did go and leave a brief comment on your tutorial. Great Job in the tutorial and being selected to do the tutorial. Do you get published often? With your brilliant talent, I am sure that you do! I have been so busy with various projects that I am just now getting on line. I also read your posts from the other day and they were a lot of fun, with some great tips! Have a wonderful dream tonight so you can have another wonderful creative day!
You do such a great job of coordinating fabrics and picking just the right patterns and designs. This is so cute! and the secondary zigzag is pretty neat too!
That is a cute quilt! FYI, I am the lady making your scrap dance quilt queen size! I now have 30 squares made. 15 of each block. Whew. I do like how it is turning out.
Nancy
Thanks for taking us through the steps to make this quilt top. It really makes the most of the Winnie the Pooh fabric and I’m sure it will be treasured by the young boy who receives it 🙂 We visited Ashdown Forest in Sussex at the weekend (where Winnie and friends lived) – the bridge is there ready for anyone who wants to play Pooh Sticks!
Great use of the directional prints, thanks for the free pattern. I do lots of donation quilts so I will give it a whirl someday!
Your quilt looks really sweet and fun! Thank you for sharing the pattern. I like your Scrap Dance pattern as well. Nice work!
This is really cute. I find myself avoiding directional prints but You make it look easy! Thanks for sharing and linking up! xo jan
Thank you Carole ❤
Great tutorial….love the finished quilt!
I’m going to try your serging technique for napkins when I can get up my nerve. I’m still afraid of my new-to-me serger!