
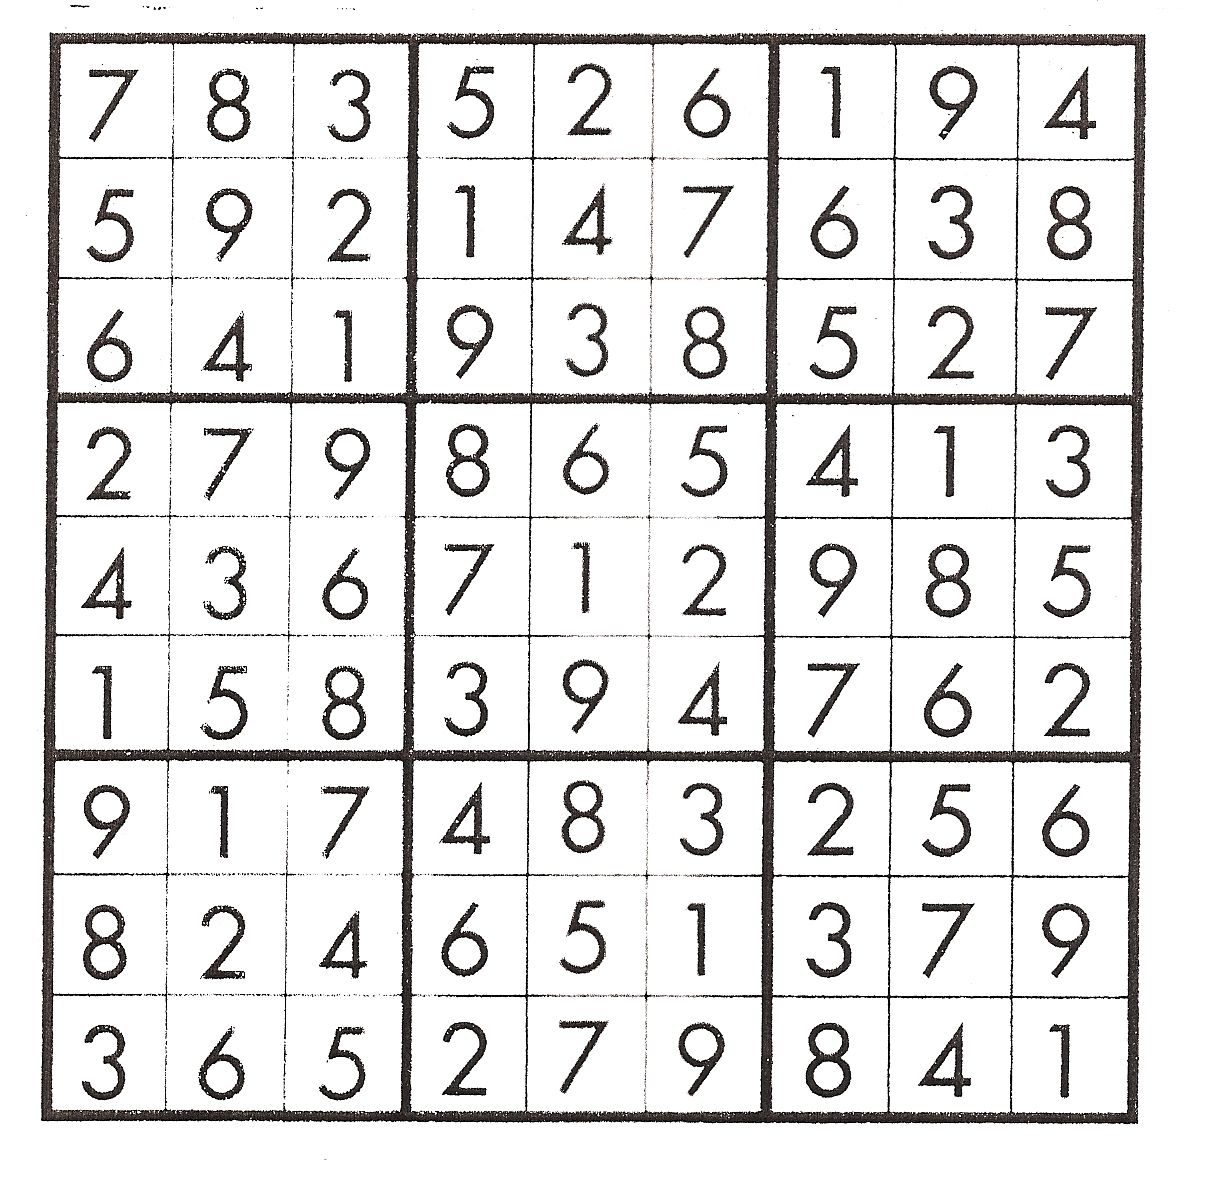
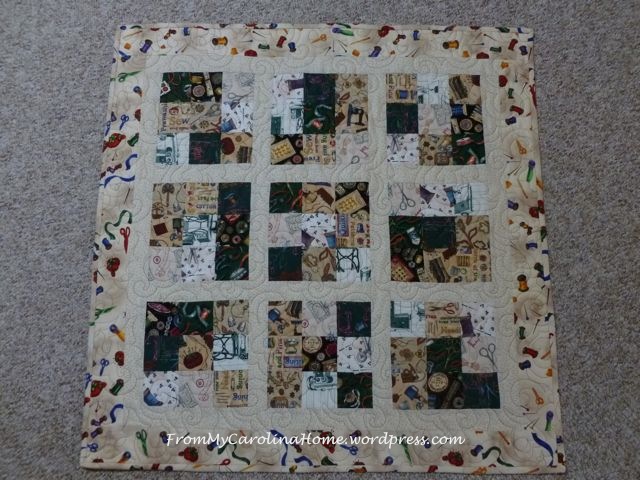
This is such an easy quilt to make, but it does take some planning and a lot of care in assembly. Sudoku is a type of puzzle where there are nine nine-patches, and each number or fabric appears only once in a nine-patch, and only once in any row or column across three nine-patches. If you have a Sudoku puzzle lover in your family, this would make a wonderful gift!
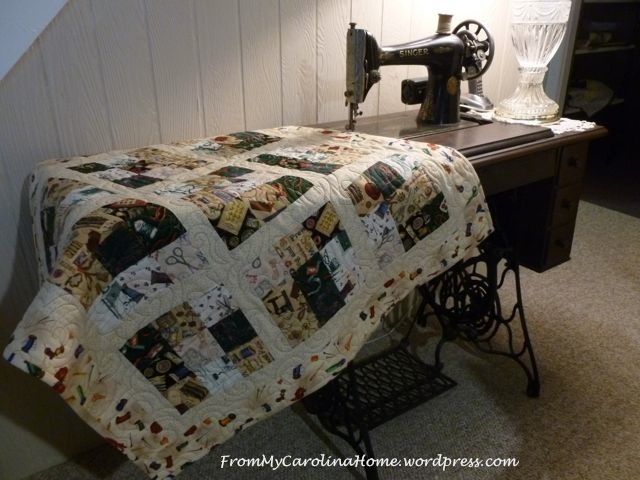
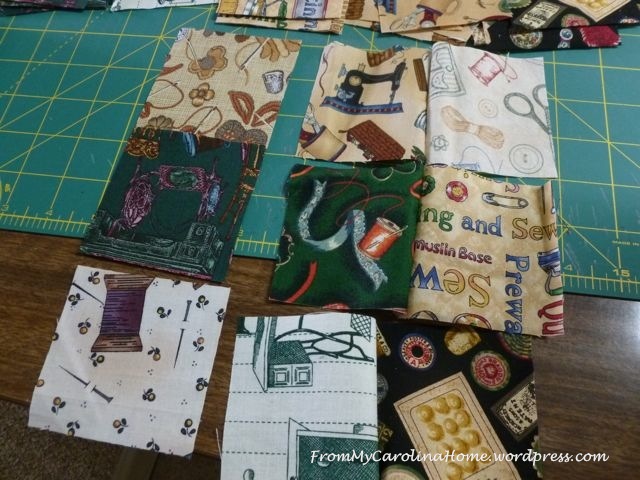
The great thing about this pattern is it has all straight seams, and all squares. It is easy enough for a beginner, but does have a bit of challenge to get the pattern correct. You can make them any size you want, which makes using pre-cuts like layer cakes and jelly rolls possible. You just need nine different fabrics, cut into nine squares of each print. A layer cake 10×10 fabric will cut into 3-inch squares with some left over. A jelly roll strip will make 2-1/2-inch squares, and you’ll have almost half a strip left over. Using a fat quarter, you can get up to 6-inch squares. Scraps work too! I had these sewing prints to use, and thought a Sudoku quilt would look lovely on the antique sewing machine.
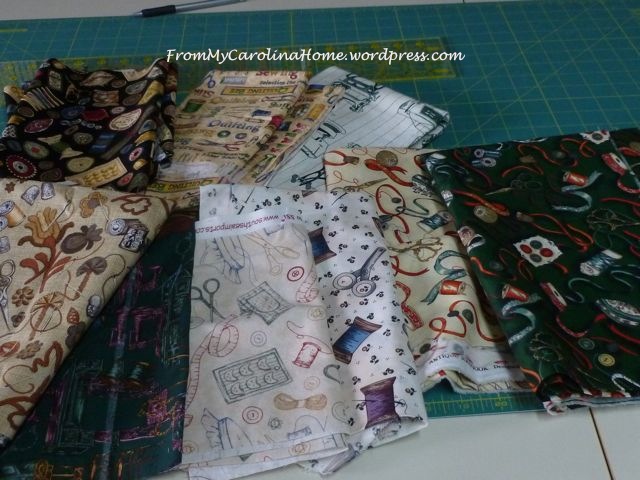
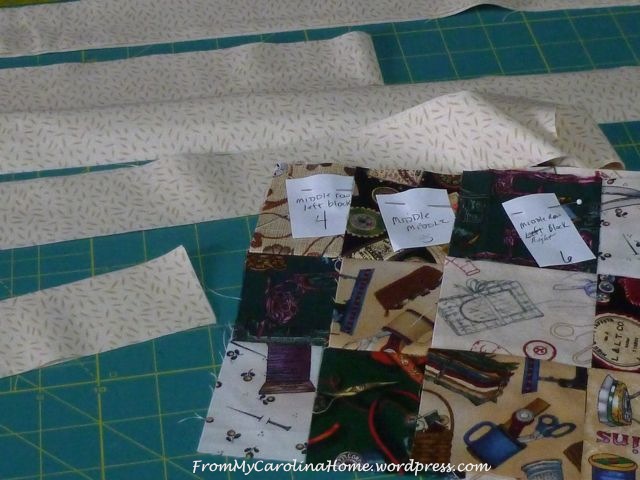
So choose your size, and cut nine squares of each fabric. Use a scrap of the fabric, an extra square, or the rest of the strip to pin numbers on your prints from one to nine. Lay these out at the top of your work table with the stacks of squares next to them. This way you will always have your numbers straight and it will help you keep each of the squares correct. Note that a couple of these prints are close, #2 and #7 are close, but #2 is only browns. Numbers 3 and 4 both have dark green backgrounds. Don’t worry about placing the prints, they will all be next to each other at some point in the quilt.


You’ll make one block at a time and label it. This is vital because the nine-patches are all different. They have to be in order to meet the requirement of only one fabric in any row or column across three blocks.
Here is the numbered grid to follow.
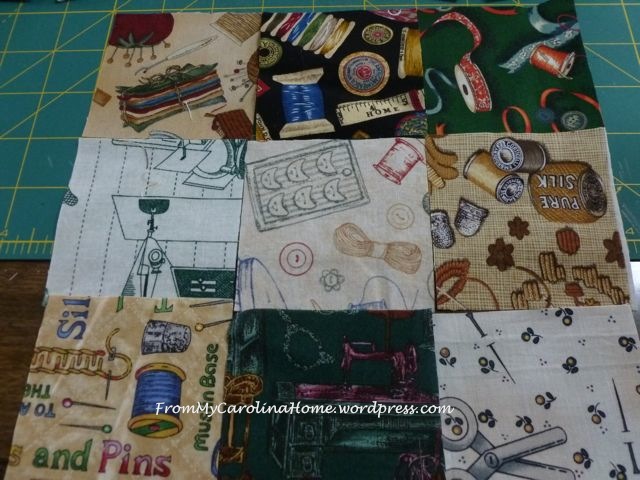
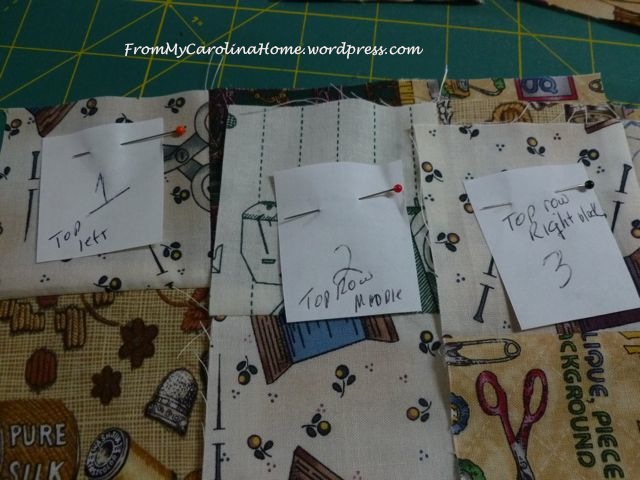
Pull the fabrics by number for the each block and lay them out. Check them to be sure you have it right. Sew in rows. This picture is the center left block, just in case you are checking it against the color key photos. Oh you know you were, LOL, or you wanted to!
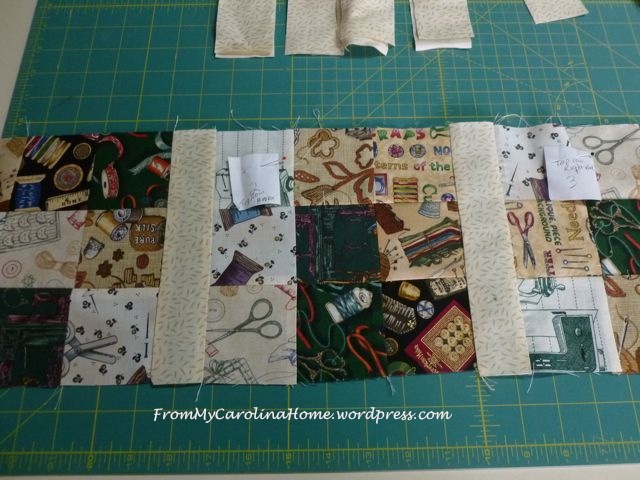
Press the top row and bottom row seams to one side, and the middle row to the opposite side so the seams will nest. Finish up by labeling the block. I recommend labeling each block in the upper left square in order to keep the squares oriented correctly. Use numbers, or directional terms like top row left,top row middle, top row right, center left, center middle, center right, bottom left and so on.
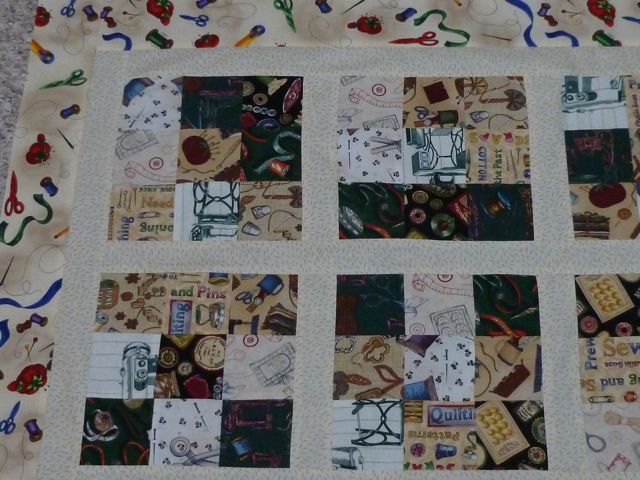
Repeat for all nine blocks. Lay out your finished squares and check it against the pattern. Check to be sure that there are no repeated prints in any row or column.
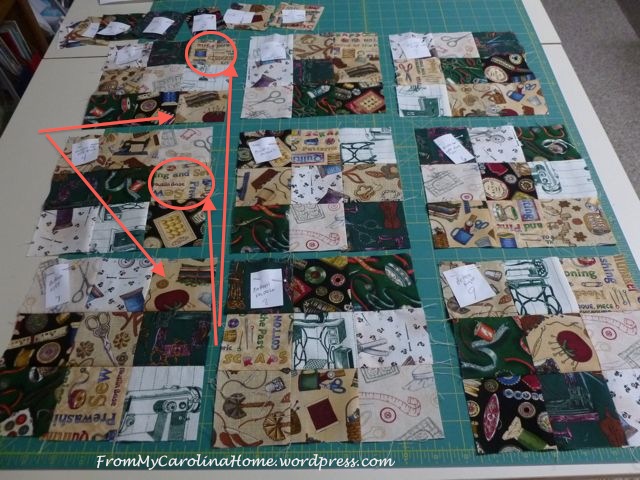
Oops, something wrong with that, there are two patches of two different prints in the same column across all three blocks. Since there are two mistakes in the top block, maybe it is the problem.
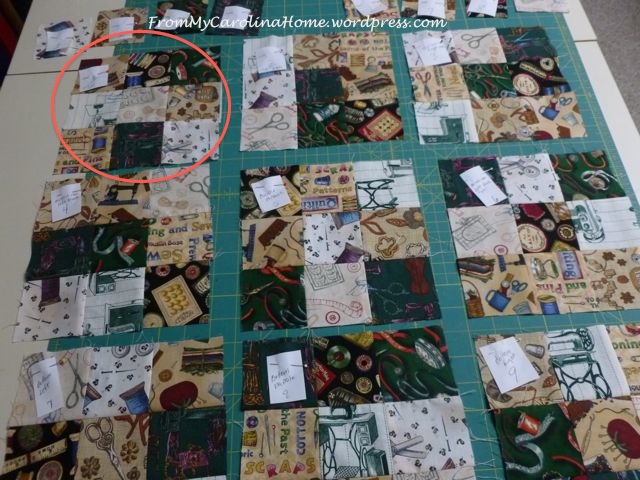
Yep, the block was turned the wrong way. I was labeling the top left corner of every block, but I got it turned and didn’t check it as I put it down. Now you see why labeling the blocks all in the same spot is important. Now it is right, checking against the pattern again.

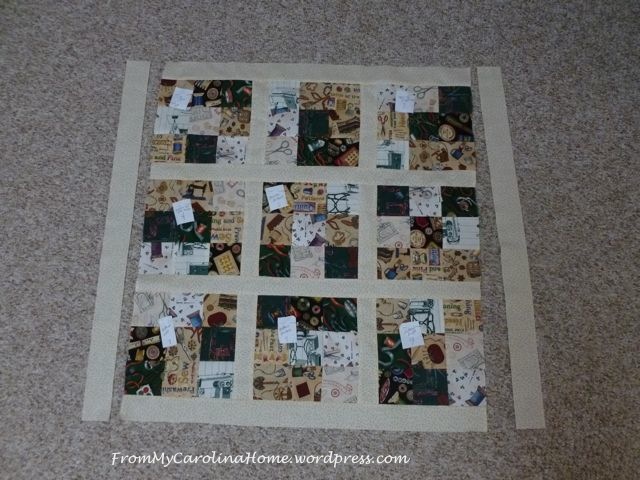
Add sashing strips in a neutral tone to let the blocks shine.
The sashing should be about half the width of the squares.
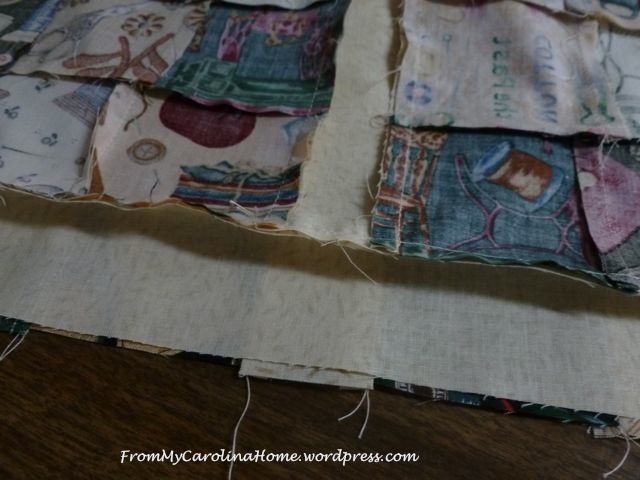
Sew the sashing vertically between the blocks first, then add the horizontal sashing strips.

Add a border in the same fabric and width as the sashing, matching up the vertical sashing. Press towards the sashing if it isn’t too light.
Continue with the side sashings to complete the frame around the blocks.
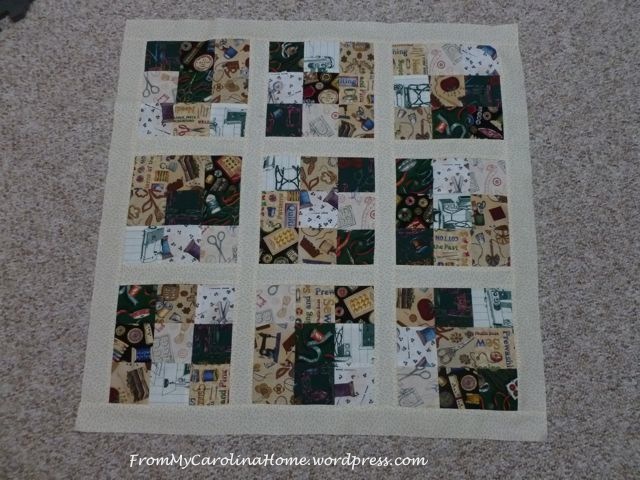
Add an additional border either one of the prints from the blocks, or use a completely different fabric as I did.
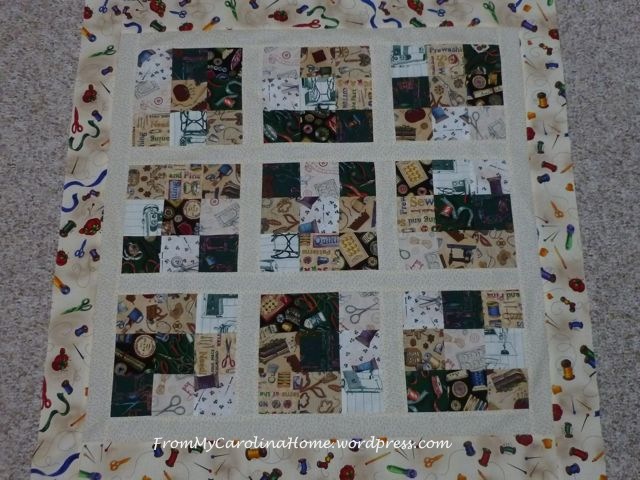
Here are a few close views of the corners, no repeats!

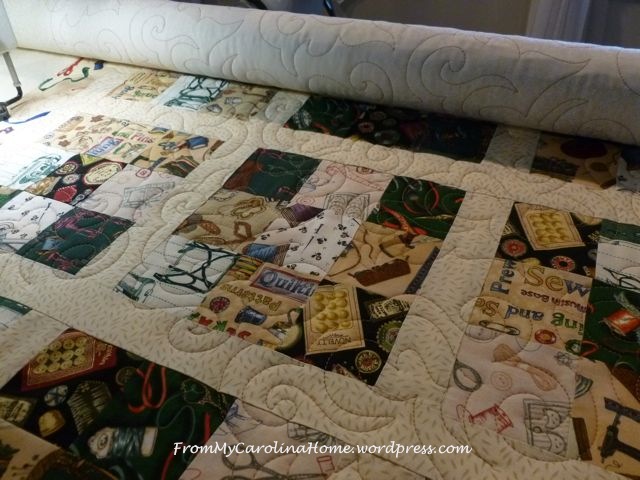
Quilt as desired. I use my longarm, but this is small enough to easily complete on a domestic machine.
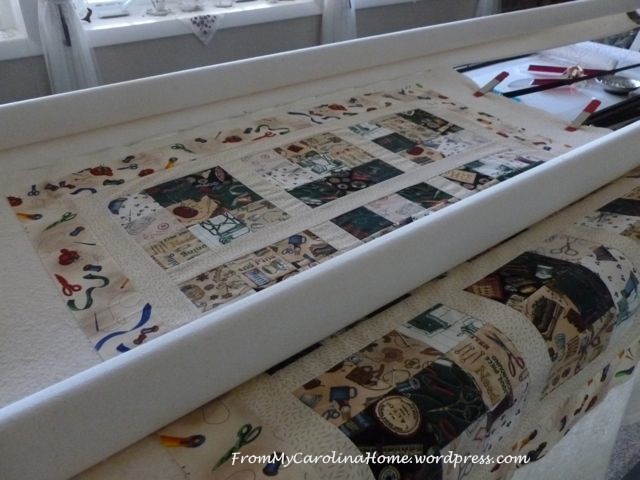
I used a swirly pantograph to add some curves to an otherwise all square piecing design.
Bind in the usual way. I used the same print as the outer border.
Display as you like.

This has huge possibilities for every season!
Use red, gold and green prints for a Christmas table topper.
Fall prints for an autumn beauty.
Red, pink and white or cream for a February decoration.
Pastels for spring.
Brights for kids.
Red, white and blue for patriotic holidays.
Any combination you like for holidays or themes like the sewing motifs. The possibilities are endless!!
Happy Quilting!!
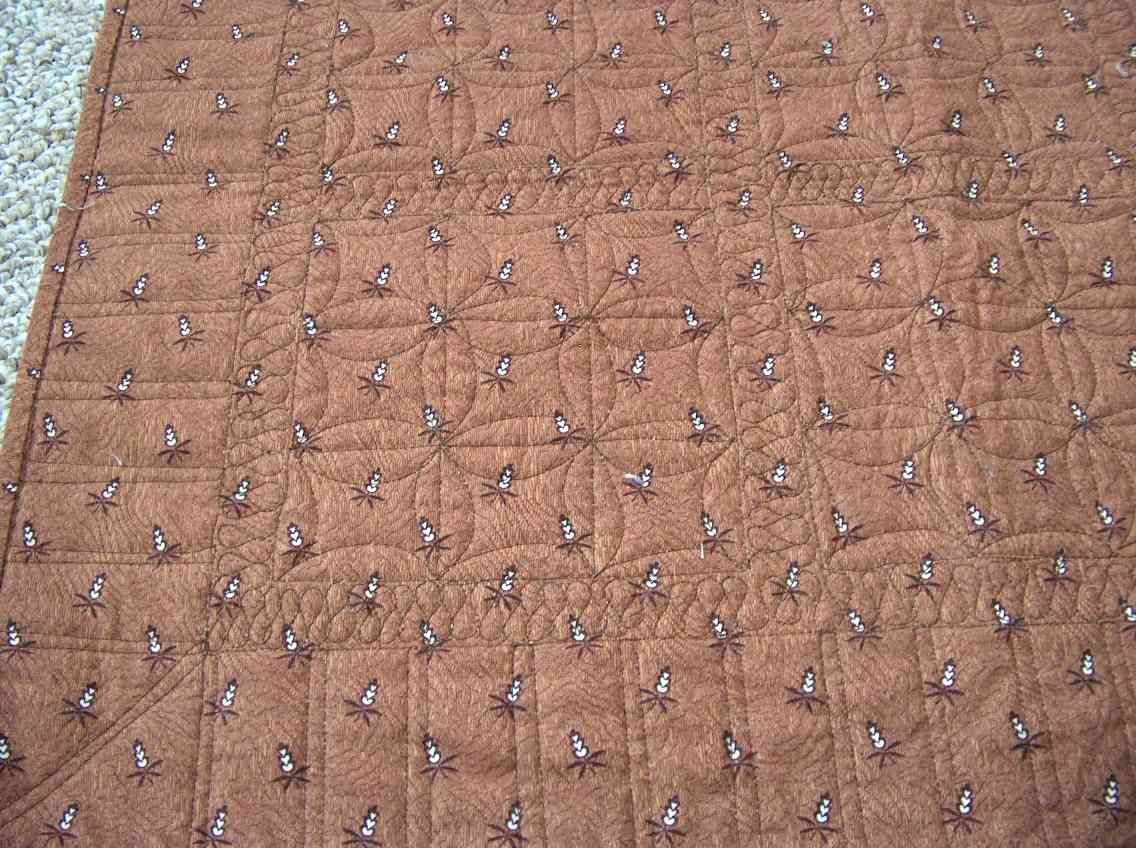
Here is one of my other sudoku table toppers. This one has an autumn theme.

Here’s the back, it was quilted with a custom design, twist in the squares, ribbon candy on the inner border and beadboard on the outer border.
My blog is a variety of subjects, quilting and sewing, tablescapes and recipes, book reviews and hand stitching, crafting and mountain living. If you are visiting from Fave Quilts, All Free Sewing, Pinterest, a link up site, or just found me, please stay a bit and have a look around, my tutorials are gathered at the top in pages to make them easy to find. Lots of fun is had here, and I invite you to follow with any of your favorite methods, see the sidebar for ways to follow. My mystery quilt along begins in January, see the sidebar for projects in progress. Click on the blog title From My Carolina Home to see the latest posts on the blog.
Using my affiliate links helps me to bring you free patterns and fun giveaways, I may receive a small commission if you use the link and make any purchase. You still use your own existing account if you already have one. Thank you!
Fat Quarter Shop Daily Flash Sale
Amazon Prime Deals!
Shop Amazon – All-New Kindle deals
Great Bargains on MadamSew’s Wool Press Mat, Ultimate Presser Foot Set

I am delighted to be one of Fave Quilts Top 100 Quilt Designs for 2016 with this design! It will never go out of style!

Do you think you will make one of these Sudoku quilts? What color scheme or fabric print family would you use?

Rosemary B here:
I love this. I love sudoku…. well, I really only like Samuri Sudoku for some reason.
So, you could make one of those next…. haha just kidding.
I love how this turned out. I love the colors.
I am fast approaching your ten machine count. I am about to bid on (and probably lose)
a 55 Featherweight. I would love to have a little long arm set up too, but I think I should get a little more confident about that sandwich thing and ….
I am very happy I found your blog a few months ago. I read all of your posts but do not always have time to respond
❤ have a happy day.
I love sudoku, so I really love the idea behind this quilt! I will definitely have to keep this in mind! 🙂
Great tutorial and fun interpretation of the theme! Thanks for linking to le challenge! The quilt and mini both look great and I like your suggestions too 🙂
I love sudoku too. This is a very clever but interesting way to use fabrics and have it all blend well together. Awesome idea. Love it.
thank you for sharing your tutorial
Great tutorial, Carole! We used the sudoku pattern back when our quilt ministry first started because it was easy to kit up, and our newbie sewists didn’t have to worry about which fabrics to put next to each other. And they got comfortable with putting prints together before they started pulling fabrics for their own. It’s a super charity quilt design because you can make them up so quickly! Thanks for sharing…
What a genius idea, and I love the sewing notions prints.
Fantastic idea, great quilt. I might try to make one!
This is a really interesting way to put a quilt together! Your quilting looks great!
Great tutorial. My mother did one of these recently and she gave each number a fabric and a quilt design. It was pretty neat!
Fascinating quilt pattern and choice of fabrics! Great tutorial! My mind kept thinking how do you make sure a same block of the same fabric not land in the same row or column. Your diagram with the numbers was quite helpful to see how that was possible. I have seen a Sudoku pattern that has frames in the nine blocks. I really prefer your version!
What a clever quilt pattern! Yours turned out beautifully! I was thinking this would be great gift for a lap size quilt for a man who does the Sudoku puzzles!
Sudoku puzzles drive me nuts, I always get stuck and keep on trying even though I know I am not getting anywhere. However, I think they work out beautifully in colour for quilts. I particularly like your autumn colours quilt.
I love the fabrics you used here…the quilt looks great, and I enjoy doing that quilting pattern
I have to say that the picture of your sewing machine was what made me click on your link. I love vintage machines. But I do know someone who would be thrilled to have a Sudoku that’s already been solved! (It would save him from his morning frustration.) I’m so glad to see that you have the pattern mapped out for the quilt. I was afraid that the piecing would actually be a Sudoku puzzle to figure out. I might need to try this. My husband could use his own throw quilt. It would also make a good charity quilt–maybe in colors/patterns that would appeal to a boy since those are always in short supply.
Thanks for the tutorial! I think I would have mixed everything … Your labelling system sounds heat. Thanks for participating in le challenge!
I love the idea of a soduku quilt, even though I am rubbish at soduku
I don’t quilt, but it’s interesting to watch a friend of my daughter’s do a lot of hand stitching to her quilt and to hear how she’s getting along with her project. She’s very meticulous and she’s South Africa (I’m an American mom raising 4 kids in South Africa), and quilting is more common in the States than here. I think it’s great that you included photos of how you made a mistake and corrected it. That’s the kind of tutorial that stands out as it’s super helpful. Thanks for linking on Amanda’s Books and More!
I’ve always wanted to make a Sudoku Quilt but never got around to it – you have inspired me to get to work on one.
Your quilt is beautiful and I really like the table topper. ^^
This is such a neat idea to use Sudoku for a quilt pattern…Brilliant! Thanks for sharing this on TGIFF!
When I made my Sudoku quilt I used an answer to a puzzle in a Sudoku puzzle book I had for the layout. It was a fun and easy quilt to make.
I love Sudoku – I should make one of these. Love the sewing -theme fabrics!
Super tutorial and it is on my “want to make” list. I am addicted to the Sudoku puzzle in the paper every day…love the challenge!
Love this! Sudoku is such a fun game and to see it as a quilt is so fun1
I like to work on the Sudoku puzzles when I take a quilting break. This is such a clever idea! Your fabric choices just add to the fun! Thanks so much for sharing the tutorial. The pictures are lovely and your instructions are so detailed and easy to follow. Well done!
Great quilt and tutorial! Thanks for sharing.
Beautiful! love the tutorial and step by step photos!
I absolutely love it when ladies like you take the time to not only create something that is stunning, but take plenty of photos for someone like me to actually consider trying to create something similar. This is a beautiful quilt pattern. I would have never thought to use a suduko pattern on anything but the number game! Very creative. Thank you for such a thorough tutorial! It makes it possible for me to see that I could actually do this too!!
Thanks for the hints for keeping the blocks properly oriented. The fear of mixing them all up was the only thing that was holding me back. Now I have no excuse, and will be starting one in the New Year. (Visiting via Val’s Tuesday Archives).
Hi, it is a pretty cool idea to translate a sudoku into a quilt… and it looks great! Kind regards, Annett
Fun quilt….sudoku is a perfect name for it too. I shared this post with my daughter as she is a beginner and your step by step directions would be perfect for her! THANK s!!!!! I love the quilting in the fall one…simple but very nice. :)V
I love your quilt, I love Sudoku and I love how you combined them here! But most of all, I am new to your blog and I love your sewing machine! It takes me back in time to the old machines my grandmother and aunt used to have. My mother had a machine with a handle that one turned manually and she always wanted a treadle machine, but she never did get one. And I am still wondering why I didn’t have the brains to buy her one. But I have kept her old machine in her memory.
One of these days I am going to make your Sudoku quilt. Thanks for the tutorial.
Love the idea. How big is the quilt? Did i miss the dimensions?
You can make it any size you want, just make all the squares the same size. Mine used 3 inch squares, but they could be tiny one-inch or huge six-inch, up to you. Thanks for asking!
I love these quilts of yours, I plan on making one s soon as I am done with a few other projects. But, where did you get all the sewing notion fabric? I want some Thanks
Love the sudoku interpretation, I have seen one done by Jenny Rayment using plain cream calico where the numbers are replaced by different folded patterns. , awesome. I have always wanted to do a code words or crossword quilt. Using 26 different scraps of fabric., but never had the time as I have been teaching patchwork for the last 13 years.
Lovely Sudoku quilt, now i think i will try it. Thanks
Hi Carole, I have made two small sudoku quilts – one for my husband’s birthday last year, and one for my brother this year. Both using Japanese fabrics. Can I send you photo’s via email?
Cheers, Cora
Hi Carole, Love your sudoku quilt and table cover. Will be making them for sure. Thanks for sharing
I just discovered you this morning thanks to Stitching Grandma. I love your quilts and crafts. This sudoku quilt is looking like my next adventure and will eat up some of my great stack of collected chicken fabric. (yes, it is a problem) 😉
Thanks for all the great ideas you have. I do Sudoku puzzles every day, hoping to keep my old brain useful. I cut material for a Sudoku puzzle quilt several years ago, but have been working on quilts for each of my granchildren. Mine will have empty spaces and the squares that go in the empty spaces will be separate with velcro on the back. Visitors will be invited to do the puzzle.
Comments are now closed due to a high volume of spam on posts older than 2 years. You can always ask me a question using the form on my About Me /Contact page.