
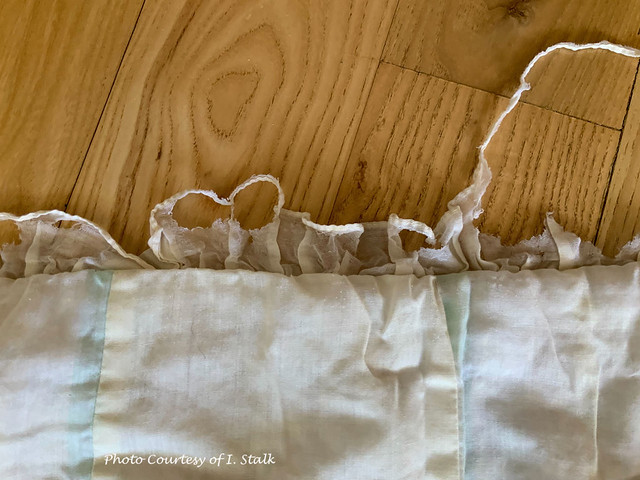
Most of the repair requests I’ve received recently have been referred to my list of quilters who are willing to do repairs. But, when I got this request, I decided to do it as it was a different kind of repair than the usual with some unique challenges. First, the lace insertion was almost destroyed from heavy use and washing. The fabric had shrunk and crinkled without any quilting. There was very little batting left inside. The quilt had a few lines of stitching through all the layers where there were previous attempts to fix popped seams.

The lace was put in like a pillow edging, with the lace between the layers of fabric, then turned right side out like a pillow would be. This would need to be replaced, yet I couldn’t do it the same way or I wouldn’t be able to quilt it on the longarm.
The only way forward that made sense was to take it apart, and requilt it to a new backing, with a new layer of batting. So, I began work to separate the layers from each other. I found several seams needing to be restitched. Taking it apart made this pretty easy.
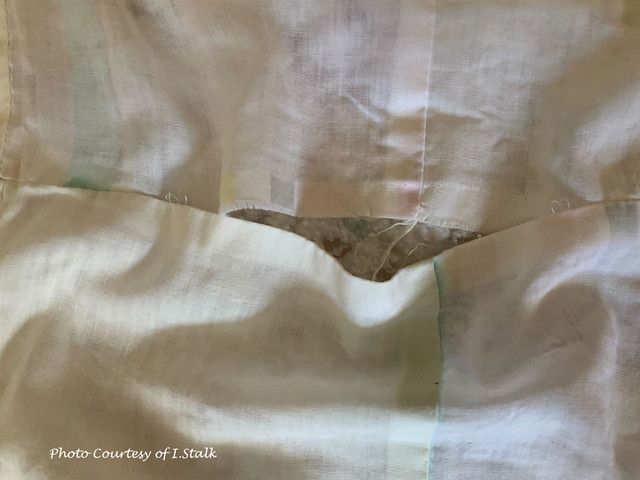
I knew the fabric was a bit fragile, but I was still surprised to see how very thin it was. You could read a newspaper through it. This would need to be addressed, as the quilt remake was destined to be given to a grandchild for use.

So, that fabric would need to be stabilized. To do this, and to keep the quilt soft, I used a fusible knit on the backside. This is mostly used in clothing construction, to add bulk to delicate fabrics to hold a collar in shape, or stabilize buttonholes and front plackets softly. This will add stability to the vintage fabric, and give it something substantial to hold the quilting stitches. I warned the client that he would need to wash in cold water only and not put the quilt in a dryer, or the fusible would release. I pressed the top well, using some steam to get it as flat as possible before fusing the knit.

Then I loaded the new backing supplied by the client, Hobbs 100% Cotton batting, and began the quilting with white cotton thread. I used a pantograph that looks like clouds.
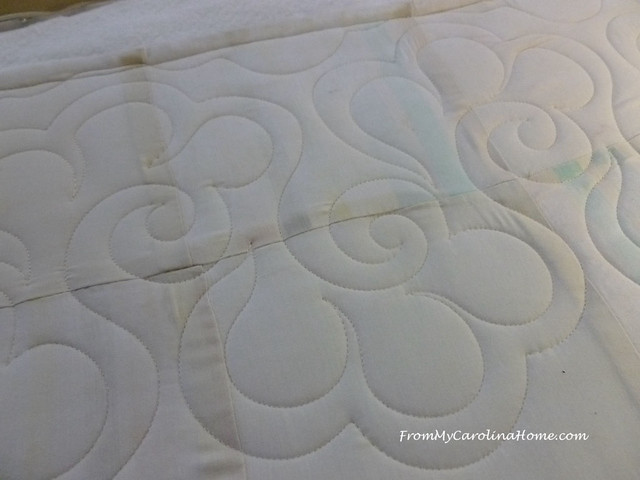
The quilt was small, so it didn’t take long to finish that part. I bound it by machine using the leftover backing fabric.
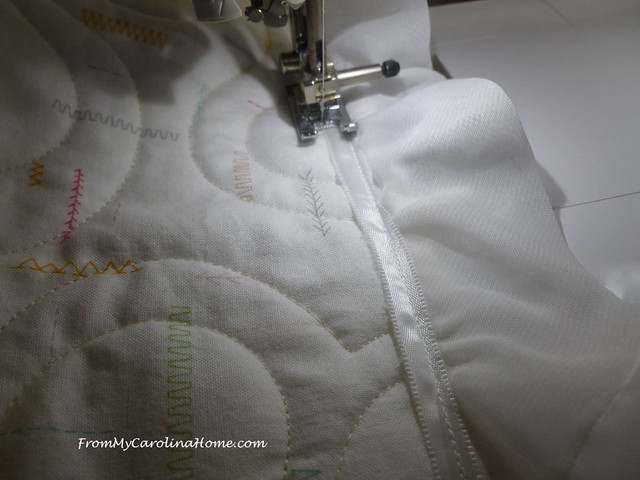
I intended to stop here, but the client had sent a length of edging he wanted me to use. I didn’t think it would work, as I couldn’t insert it with the standard way of quilting and binding.

But, I knew he wanted the quilt to be as much like it was before as possible. So, I got the edging out, and decided to topstitch it to the backside, just inside the binding.
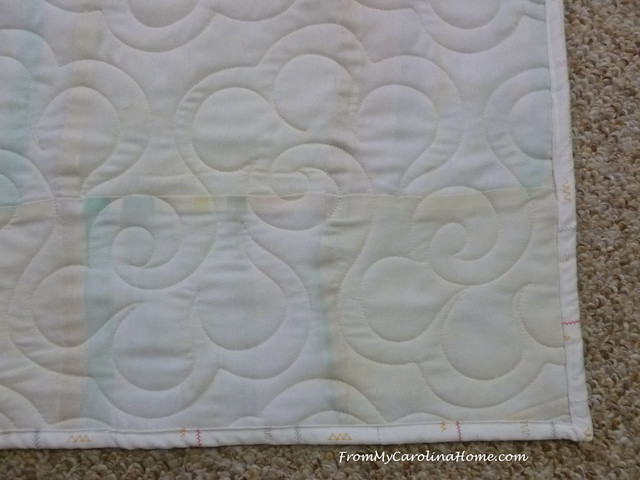
I was happy with the way it turned out, as it is close to the original.

Here’s a close up of the corner. The delicate pastels of the original fabric are echoed in the backing choice. The edging is not as fussy, and will likely hold up a bit better.
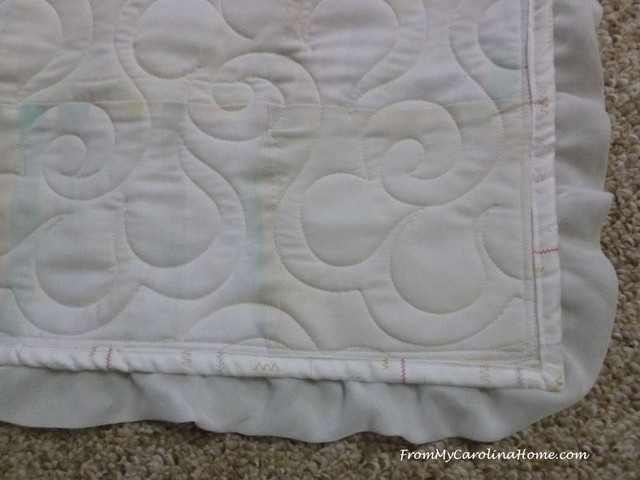
This quilt should hold up to a new generation’s use, provided it is washed right.

The client was delighted, and that is the most important thing!
Are you sewing this week?

Wow! Such an amazing job! I love how you did the edging. It really does look like the original, just better.
Beautiful job! Well done.
This is quite remarkable, Carole. What a wonderful job you did!
What a step back in time! Beautiful job❣️❣️
Wow Carole…..that’s an impressive amount of work and dedication!!
You did a gorgeous job!
What a lovely restoration! The poor bedraggled original had been loved almost to death, but you gave it a new life.
So sorry I didn’t get to meet you at the DOQ meeting last night. I had my first head cold in years and sciatica in my hip (old age is a real bummer) so driving was a real challenge. I hope you had a good time. And a safe trip home.
Mary Ed
That restored quilt is adorable.
I was wondering where you were! I thought you might be one of the Zoom participants, but I couldn’t see all the names. I had a great time, fun group!!
*Carole*
*FromMyCarolinaHome.com *
Carole,
You do an amazing job fixing damaged quilts and this one is no exception. It’s just beautiful. Thanks for sharing.
What a terrific repair, well reconstruction you did! I can see why the client loved it.
That was a huge challenge to take on with a wonderful outcome! Thanks for sharing the steps!
What a super transformation and what a thrill it must be for your customer to pass along this gem!
Jo Anne Seccurra
I have been doing this same type of repair to my daughter’s original blanket over the last 28 years. Each time, I’ve added a bit more embellishment which enhances the original blanket. Hopefully my last repair will last longer since she loves it so much!
You have an amazing amount of patience, and you are a quick thinker. Great job!
Wow that came out fantastic! What a great job you did. Thanks for sharing this.
You are a miracle worker. That little quilt is wonderful.
What a gorgeous outcome! I am always impressed by your repairs, but this one takes the cake! The fabric was SO thin, I cannot imagine anyone else would have even attempted it. It is no surprise that the customer was pleased!!!
This is a remarkable makeover, and I’m sure your client will be elated, I hope it gets tender care and lasts for another generation.
Really lovely remake. I am currently quilting an entry into the California State Fair crafts competition.
Really lovely remake. I am currently quilting an entry into the California State Fair crafts competition.
This is so wonderful that you took the time and made such a beautiful memory turning back the hands of time. Thanks
Thank you for sharing the remake of the heirloom baby quilt! I have my dad’s original baby quilt that my grandmother made for him before he was born in 1935! It was hand embroidered with various animals in the center of each pastel quilt block of yellows, soft blues and greens. I also have my original baby quilt that was made by my paternal grandmother as well in 1964. I hope to repair them in the same way you illustrated.
I have a repair in progress this week as well. It was easier to just take it all apart in order to repair and put it back together again. This one doesn’t have batting but a very thick backing. There are pieces that were completely missing that I’ll have to replace but it should be pretty straightforward. I enjoyed reading about your repair job.
That’s just brilliant!
The client better be delighted after all that! Amazing, Carole. You are a wizard.
Gosh your good to be dedicated to do that……I would say out it in your treasure box it’s too old……..
Saving such an important heirloom is a wonderful gift to this family. Your sewing skills are matched by your patience!
That was a fantastic save Carole! I am working on BOM stuff and my Alaska quilt, then some sewing repairs, and a lot of personal piano practice!