
I finished the tiny cornerstones on my last post on this quilt, and now was ready to assemble the blocks into the little top.

This is an exercise in patience, as these little blocks have to be precisely pinned. It is tedious work and took an entire day to get the assembly completed. First, I took two blocks and pinned through the corners on the top side. I used clips as well to keep the edges straight.
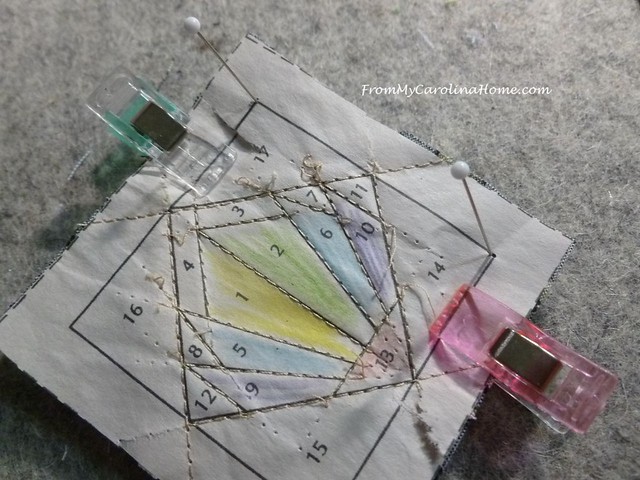
Looking underneath at the block on the bottom confirms the pins are holding the corners together and in alignment. Note that the pins are only put in straight. If I pin as usual, the blocks will shift and won’t remain lined up correctly. That is where the clips make a difference.

I did several at one time so I could chain stitch.

First two done.

Then soon, I had eight couplets. I pressed the seams open to reduce bulk.

Next, the couplets were pinned to make rows of four blocks. Using lots of clips this time ensured the edged remained aligned.

Sewing slowly, I made sure to stay right on the line, removing the pins at the last possible moment, and moving the clips as I went.

Four rows completed, ready to be sewn together.

Now the real nail biting comes in, sewing the rows. I carefully pinned and clipped again, trying to make sure the fan points and the seam lines matched.

Sewing the rows carefully, I still managed to get a couple of seams off.

I removed a partial seam and re-sewed it. Most of the points came out well, a few are just ever so slightly bent. But it was the best I could do. I put the tiny cornerstones down, and measured for borders.

A short time later, and the little top is finished.

Next week, I’ll show you the quilting and finishing.
What are you working on this week?
It is the final week for the It’s Sew Emma Books of the Month 30% off, and also 30% Off the Notion of the Month Kimberbell notions at Fat Quarter Shop! Get 20% off the Basic of the Month, Blossom by Christopher Thompson for Riley Blake Design. And while you are there, check out the Flash Sale, something new at clearance pricing everyday.
For the cardmakers in the audience, Impression Obsession has 25% Off their Featured Category all month. Shoes! Both Dorothy and Cinderella will tell you that shoes can be a fun thing!!
C&T Publishing has added new books to their Sale Offers!

This is turning out sew very cute, Carole!
Brilliant! Pinning straight down into a foundation is not something that comes to mind but it sure paid off.
This is just so lovely!
I just love paper piecing, the miniature quilt is just beautiful, I just love seeing your post
Completely adorable. Looking forward to seeing how you quilt it! Still sewing oven mitts.
I love how this is coming along.
Your mini is looking great! I do miniature projects occasionally, and appreciate you sharing the details of how you put this together….thanks for the tip of using the clips!
Beautiful mini quilt. Thanks for the step-by-step. I’m making string tumblers in shades of pink and blue.
I love how that is turning out, Carole! What you did is very tedious, but looks like it was worth the time and effort. I’m not working on much this week because my mom is in the hospital after a fall. Hoping to get her moved to a rehab facility today.
It is coming together brilliantly! Great sewing tips with the pins straight down. Reminds me of lining up 6 layers of fabric for one block wonders….gasp….. All I can think is that you gave yourself a huge challenge and you DID it! I guess once the borders went on you are ready to remove the paper. Tweezers and a spray bottle of water for the stubborn bits? Well done!
Just the thing for a steamy day, small projects. So beautiful like little tiny gems in a jewelry box! Thanks!
I think you did an excellent job getting all those points to match up! Sometimes I like to use a basting stitch that’s easy to remove before final sewing paper pieced seams together. And sometimes I just plain forget to do it.
It looks wonderful!
Beautiful mini quilt, your care in sewing together paid off.
It is looking great.
This is fascinating to me and just beautiful!
Where do I find the pattern for the miniature quilt that is paper pieced in the article?
It is in Carol Doak’s book Easy Paper Pieced Miniatures.
That was a day of hard work and very well done! Hope you enjoyed something nice after!
OMG so excited to see this one coming together they look great……