
Sometimes the excitement of finishing a project gets the better of me and I do something careless in my haste to finish. Well, that happened with the Scrap Dance Mystery Quilt. How is it that I can look at a quilt for weeks on end, do this mistake early on and miss every possible time to catch it? The mistake was made in the original unit construction, yet I didn’t see it then. Nor did I catch it when I assembled the blocks. Or when I put the blocks together. Or when I added the bloody borders! Or when I loaded it to be quilted, and then quilted it. Didn’t see it when I added the binding either. I only noticed it when the whole, entire quilt was finished. My stomach sank.
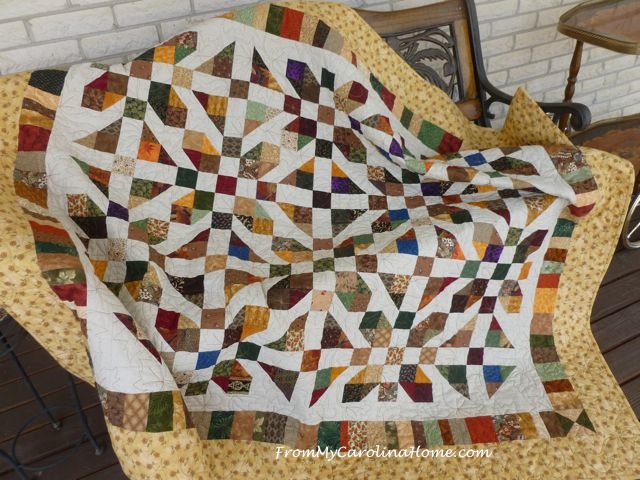
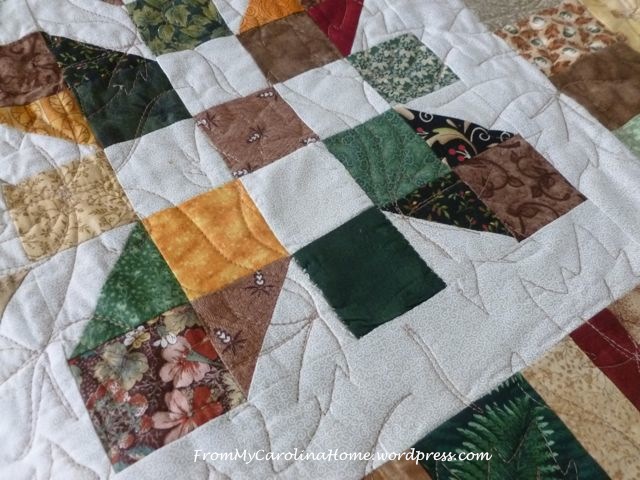
I thought, well, I’ll just take clever pictures, no one will see it. But I saw it. Every time I looked at the quilt the stupidity of my haste glared back at me. So, it had to be fixed. Here is how I did that. First, here is the mistake. Did you find it in the last post? Bottom right, the the dark green patch and the white background patch are switched. The green should be to the outside.


I began with placing a piece of Golden Threads paper over the top to trace the quilting that was done.
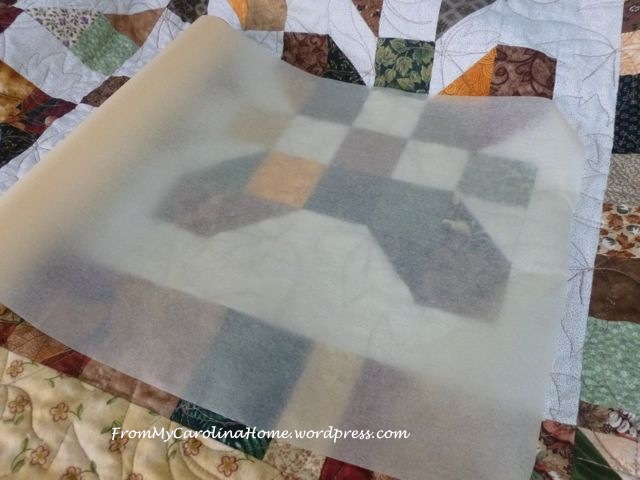
I traced over the quilting I had already done, going out to the surrounding patches for lining up later. Then I carefully began to unstitch the two patches that needed to be switched, taking up only enough of the quilting to get the patches up.
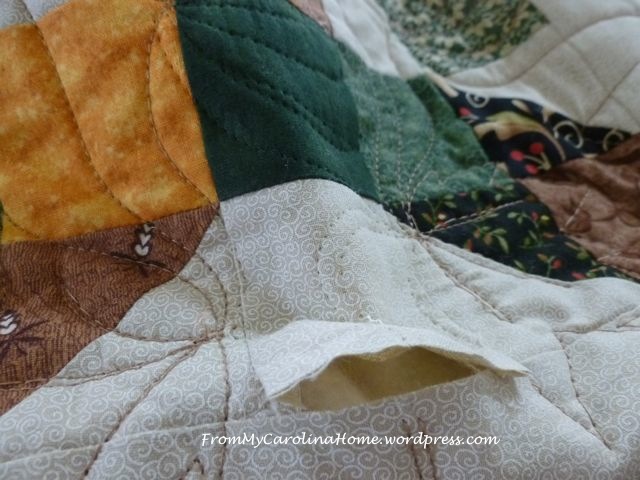

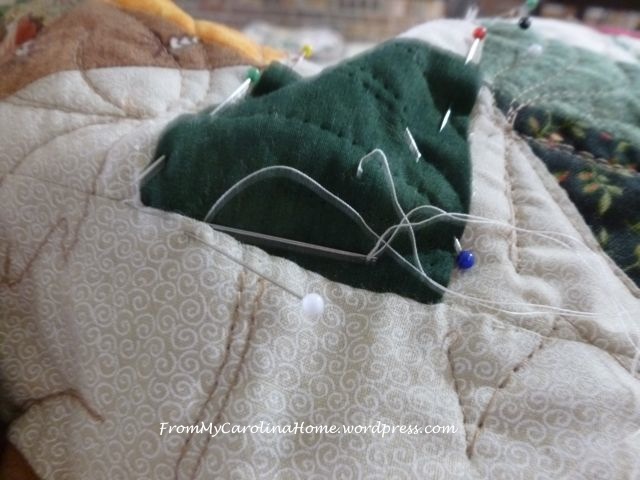
Next, switch the patch positions, and carefully pin and hand stitch back into the proper place.

Load the quilt back on the frame and lay the quilting diagram over the patches, matching up with the registration marks on the adjoining patches so it lines up correctly. I can’t use the original needle marks, because they are no longer in the right places as the patches are upside down now. So I tried to scratch them out with a brush and a fingernail. I put the tracing paper back on the patches.

Quilt the section again through the Golden Threads tracing paper. Try to do the start and stop in the edges of the quilting that is in the adjoining patches.

Pull off the tracing paper, getting all the little bits with tweezers.
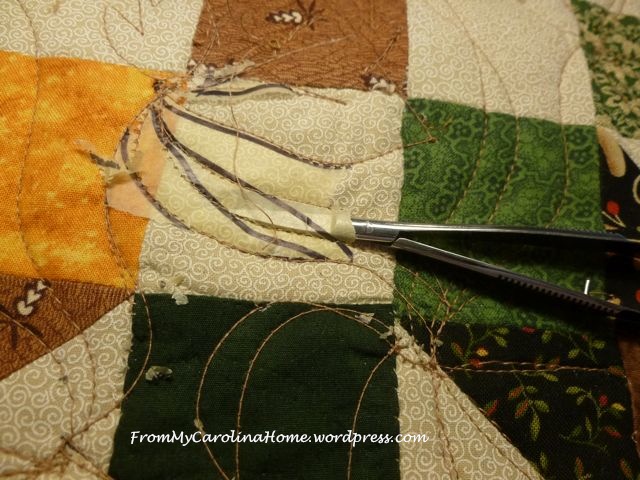
This part will take forever. I thought about using wash away solvy, but I haven’t washed the quilt yet, and I didn’t want to mess up the flatness of the quilt with water before showing it.

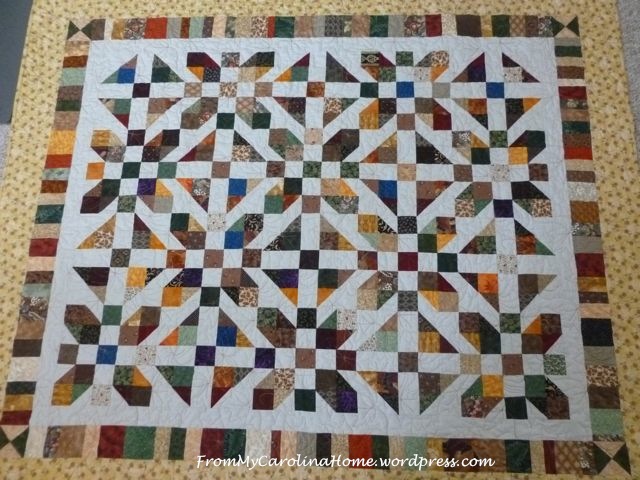
Here it is done, you can see the hand stitches if you look closely. Right now, finished is better than perfect! The best lesson this quilt taught me was to slow down, not get in such a hurry (difficult when I am excited about a project), and inspect the quilt flimsy carefully before moving on to quilting. From now on, I am going to take pictures of the tops more carefully to be sure there are no mistakes. Lesson learned!
In a future post, I’ll show you an even bigger mess that I fixed. Hope you learned from my boo-boo!!
Sharing
 .
. 

You did a fantastic job – things like this are just all part of the journey 😊
You have the hands of a surgeon. Actually, I was told that too many times back in days of olden when I was a nurse.
I think your repair was a success!
With each trial we learn, we get even more fantastic!
This quilt is soooo pretty
You did a great repair job – looking forward to seeing your other repair ‘mess’, to see how you dealt with it (although ‘looking forward’ is the wrong expression!). I’m new to sewing quilts but ‘taking a photo’ was one of the first tips I remember ready about last year – also helps me to see my progress on what I’ve achieved 🙂
What a great scrappy quilt. You did a wonderful repair job. I have learned to send a pic of my quilt top to my son in law and he finds any mistake I may have missed!!
I would never have noticed the mistake that was glaring at you. I can understand your eagerness to fix it, though. Congrats on a lovely job.
Hi Carole, great fix ! Just wanted to mention that (for what ever reason), rubbing white vinegar over the stitch marks with a Q-tip has shrunken the needle holes for me. (and removed the tough fold marks in the fabric) I use it at the ironing board. Lots of vinegar and iron dry. Don’t know if it will work but you could give it a try. Do you have one of those itsy-bitsy little irons?
What a great tutorial Carole! It is frustrating and a lot of time pull out the hair maddening when we discover a mistake during or after a quilt has been quilted. But I truly like the way you handled it and will be sure to try this. I still have not been able to get to Scrap Dance assembly; I have been trying to get a couple of other projects finished. Hopefully in a few days. Thanks for sharing and have a wonderful creative day!
Such a great quilt! And you did a fantastic job repairing the mistake.
The one and only quilt I ever made had me spend way more time fixing mistakes than actual sewing 😦 It was baby quilt for my first grandchild who started college last month. Guess what? He wants me to make it into a twin sized quilt for his bed …. this grandma is going to be a nervous wreck for sure 😦 Your quilt is beautiful !!!!
A great save. I likely would have a) left it as is or b) appliqued patches over what was there, rather than removing and replacing. One thing I’ve found is it IS easier to see things like that in photos than in person. For some reason they jump out more. Or if nothing else, you can go through block by block to confirm it’s what you want, crossing them out as you go. Hard to do that with the real thing!
Anyway, love the quilt. I totally get you were excited by it. 🙂
This is so bazaar. I just read this post yesterday, and today after putting the binding on my quilt, guess what? I noticed one block had the wrong central color. It wouldn’t have mattered at all, except it is an abstract heart and the color red here & there makes up the heart.
My thought process when something like this…
1. Leave it alone. The quilt is Two Hearts Intertwined, and I made it for our 40th Anniversary. If I leave it alone I can say the perfect heart belongs to my hubby, and the slightly imperfect hear belongs to me (case I’m still making silly mistakes after 40 years (LOL).
2. Follow the tutorial on this blog, of first tracing the quilting, removing the block, inserting correctly colored block by hand and then hand quilt it back again. My fear is I will screw it up worse and my anniversary is next week.
3. Then I happened on this reply that suggested I just appliqué over the wrong color. I had thought about that, but I’ve only done appliqué a few times. Still, it seems the less risky.
I think what I’ll do is 1) make a new block. 2) make a new red central piece as if I was just going to appliqué that. Then take it to my quilt shop where I had the long-arm quilting done. They have a come and sew every Friday, so I’m thinking if I take my quilt and these two pieces, maybe some kind soul with help me.
At any rate. . . thank you all for sharing. this post and replies were so valuable.
Hope you will post the photo some where so we can see. Sounds like a lovely quilt. Maybe a before and after photo?
What a clever fix, thanks for the tip. What patients, I would also have to correct a mistake however long it would take. This now tells me all is not lost if I get to the end to find one mane thanks.
Oh, I have done that, finished a very special quilt for my great nephew using fabric from his deceased grandmother (my oldest sister). I inspected the top so very carefully before I quilted it, and everything looked absolutely beautiful. Then when I put it on the design wall to take final photos after it was totally done, I noticed pieces in two adjoining blocks were going the wrong direction. It really messed up the secondary pattern. I was devastated, but had no idea how to go about fixing it, so knowing that he and his parents most likely would be none the wiser, I gritted my teeth and sent it off to him in another state. I wish I had known your trick at the time. Thank you so much for sharing this information. A couple of handstitches being slightly visible is certainly better than a ruined pattern.
Oh Carole. You are heroic for going to the trouble of fixing that. But you know, I could not have lived with it either LOL. Great fix. Well done.
What a lot of work to correct the mistake but it was worth it. If it had been my quilt, my eye would also have been drawn to the error. A very useful lesson in how to correct this type of error.
That is love 🙂 I get it about having to fix something that will bug you forever. Nice work!!
OMW! That is truly a labor of love. I just chalk mistakes up to “character in my quilt” :-0
I’m a firm believer in leaving alone the boo boos you can live with and fixing those that will drive you crazy. You did a great job of correcting the mistake. Your explanation and photos were excellent. Thanks for sharing!
I can get pretty hasty when nearing a finish too…..I ‘m so glad you shared this under our what goes wrong theme….so I can reread if…probably more like when….this happens to me. LOL!!!
I read this when you first posted it, but could not see the error at all. It’s wonderful that you took the time to make it right. I have two projects that need pieces of fabric replaced before they can be finished up – I am bookmarking your page to remind me of your patience and success!
You’ve won the linky prize. Please e-mail you mailing address to aftonwarrick@hotmail.com.
Thanks so much for this tutorial. I saw it today just after I found a mistake on my own quilt top. I would have already quilted it but I just couldn’t decide on which pattern. Just as you did, I have handled that quilt top so many times and STILL didn’t see it. Thankfully, as I was deciding on which pattern I saw it and it was an easy fix. I was feeling pretty low about making such a blaring mistake, so I am so glad you decided not to hide it with clever pictures. I don’t think I would have thought of tracing the quilting pattern before fixing it. Thanks again!
I have a beautiful quilt that I made and had to do this too. No one but me knows…..!
I wonder if the judges would have noticed! (I would have fixed it too!) Great job!
Excellent fix! I have already washed a quilt that I made and now I see an entire block turned the wrong way. Should I attempt a fix?
Totally up to you to decide, based on how much it bugs you and how much work would be involved. Good luck!!
Great tutorial on how to fix a mistake in a finished quilt. My suggestion is to use a ladder stitch to hide your hand stitching.
Thanks, 4 years after the “episode” and I just found it at a time that I needed it. Thanks again. I made a baby quilt, nine 12″ blocks and the center block made no sense, made me sick to look at it. “Ignore it it’s just for a baby.” they said. Oh yeah. So out it went. Best tip ever for tracing the quilting. Just the part that was keeping me up at night.