When we left off last time, I was in the process of making 160 flying geese. I was doing them in batches of 20 so I wouldn’t have to do the same thing 160 times at once. Here I have some in all three stages of piecing. I stacked the finished ones up in groups of 10 so I could keep count.

Seventy done, ninety to go.

I took a break from the geese to add a border to the quilt top. I thought it would be good to have a border between the pinwheels and the geese.
When the geese were done, I began sewing pairs together.

The key to perfect points is to sew through the x created by the previous seams.

Then, the geese are arranged into longer strips.

Because the quilt size is an even number, the number of geese fits the side exactly.

Sew with the pieced geese on top, the seam is lifted with a pin to be sure I am hitting the point correctly.

At this point, I went back to the bee prints and picked out four bits I could fussy cut for cornerstones.

Test fitting the long lines of geese, I made sure the seams lined up. I had to pick out this seam and adjust the geese row on the bottom as I didn’t want the same print on both sides of the cornerstone.

I added the geese border in round robin fashion for all four sides.

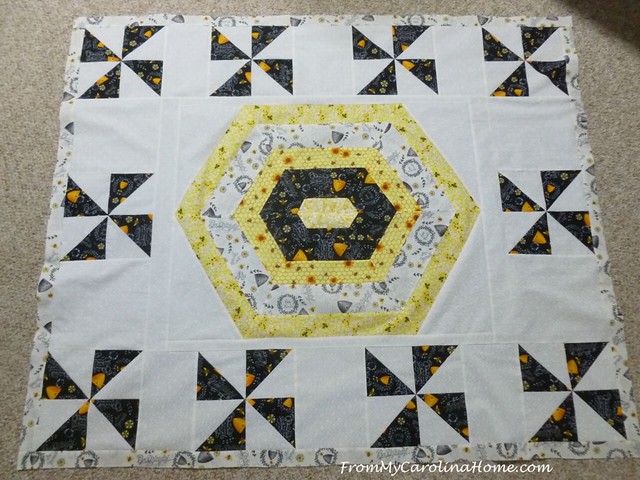
Sewing the last flying geese border with the last two cornerstones completed the top.

Then, a final border is added in black as a final frame.

Piecing finished! It lays reasonably flat considering all the bias edges in the medallion half-rectangles, the pinwheels and the flying geese. The bad news is that it only actually took 92 flying geese, so I had 68 left over. I’ll show you what I did with those later.

This quilt was begging for custom quilting. I’ll show you that next time. It took longer to quilt than it did to piece! Do you like the design?


You are so creative!! Your quilt is adorable!
Oh the quilt math!! I’m giggling about those extra geese. Can’t wait to hear what you did with them! Thanks for your detailed explanation on how you constructed this project!
I like this a lot. The colors are really perfect — especially for spring and summer — and they really pop. I can’t wait to see what you do with the other pieces!
You really did a good job. It turned out so cute! Can’t wait to see the finished project.
Hey! Been meaning to email for awhile now, but have been getting ready for and having out of town, overnight company which stresses me out!! Really glad you are back! Congrats on your quilt being published! That is really cool! And the one you are working on now looks great! Keep up the good work – Mary Anne
I love your design – that is so pretty, Carole! The gray background prints really caught my attention this time. And the final border – which connects us back to the center! Beautiful!
I love it. Good job.
This is really eye catching and gave me ideas on a couple stray projects that need to grow into a quilt. I’ve also overestimated how many flying geese I needed in a prior project so they’re in the waiting to be used drawer.
pretty and I love the corner blocks.
Wow! What a lot of movement you’ve got going. I can imagine all the bees buzzing around between the pinwheels & the flying geese. It’s beautiful. I’m blaming summer heat for the extra units. I made several strip sets too many in July, and I had a pattern to follow. You were doing this all on your own.
I was wondering if you ended up needing more or less flying geese than you had calculated based on the comment you made about the number in your last blog post. I would have wanted to have different prints by the cornerstone, too. I think it looks great and I look forward to seeing your beautiful quilting!
Your quilt is beautiful. I can’t wait to see it finished. Hope you have a good weekend.
I love it! How wonderfully creative. You were very ambitious with making that many flying geese. Can’t wait to see what you do with the extras.
Your post on this project was so perfectly timed it’s jaw dropping. I have five of these table toppers that have been on my nerves for over three years. Now I know exactly what I’m going to do with them!
THANK YOU!
Fabulous!! Love to see you post about those in our Facebook group!
This is one fabulous finish! I love the center, the pinwheels and the flying geese. The cornerstones are perfect, too. I can see why you want to custom quilt it!
What a creative solution to hexagon overload! The quilt is lovely, like a summer day.