
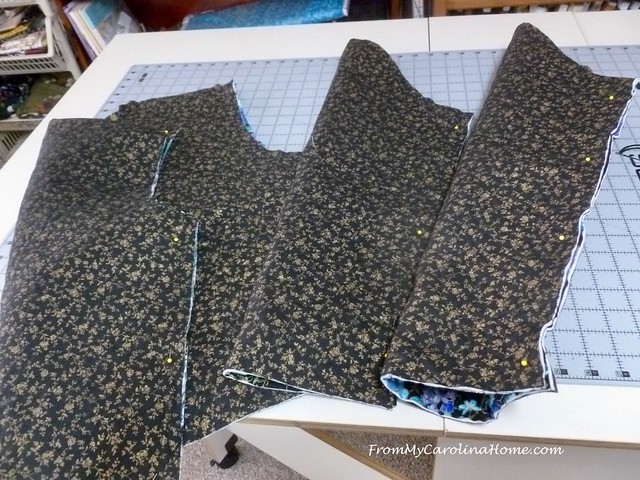
This week we get to the part many sewing artists dread, assembly and fitting a garment. Truly, this isn’t hard, as long as you take it one step at a time, and just go carefully. Don’t rush trying to get done, that is when you make mistakes and get frustrated, especially when sewing in sleeves. When we left off last week, the pattern was being cut out of the quilted pieces of fabric. Here is my right and left front.

Assembly is pretty simple, two shoulder seams, two side seams, and the sleeves. I pinned the sleeves for sewing the seams first.
Remember that garment patterns are designed with a 5/8-inch seam allowance. This is really important to proper fitting of the sleeve into the armseye. So, be sure you know where this line is on your machine. My machine has markings for 5/8-inch, but it measures to the left needle position. I sew with the needle in the center, so I put a piece of painter’s tape on the machine bed to guide me.

I sewed the sleeve seams.

After I did the sleeve seams, I cut some lining fabric strips to cover the seams. I sewed the strips to the seam allowance on both sides, tucking the raw edge under the edge of the seam allowances.
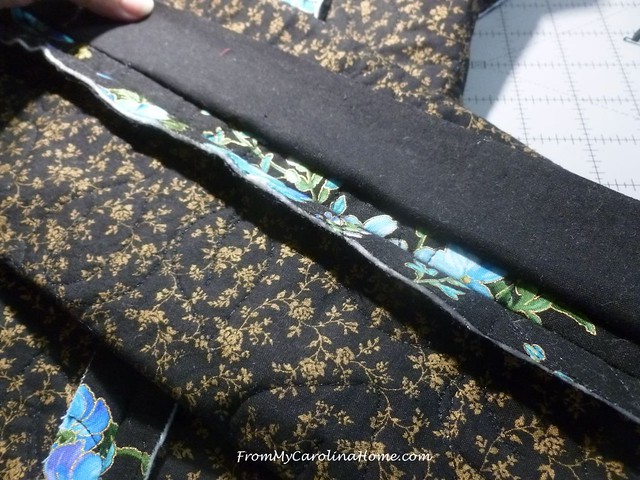
Bring the strip over the whole seam, tuck the other raw edge under the other side of the seam and pin.
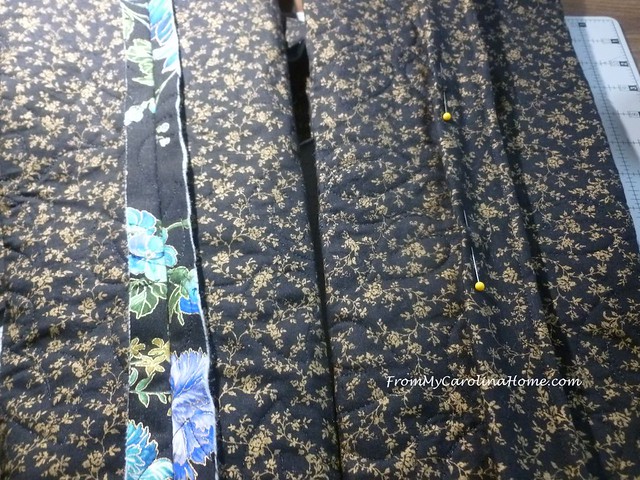
Sew in the seam allowance only. Later, I’ll go back and tack the edges down by hand. You don’t have to do this, you could just press the seams open and leave them as they are, or finish with a serged edge. But, I want my jacket to be completely finished inside, and I am willing to do this couture technique.

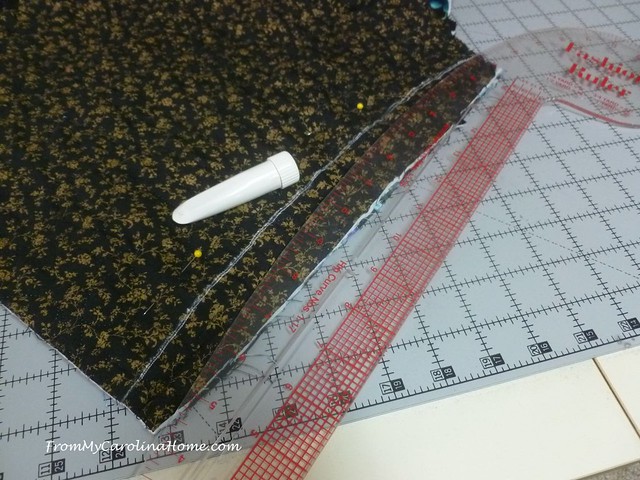
Next, sew in the shoulder and side seams, and look at the fit. I had extra fabric in mine, and it was a bit too boxy, so I did a fitting trick I learned some time ago. Try on the jacket inside out, this will allow you to pull in and pin an adjustment yourself, then take it to the table to mark a new sewing line. Note that I used a dressmaker curve to pull in the waist just a bit to give the jacket more shape.
I sewed the new seam line, tried it on again, and was happy with the fit. I cut away the excess and covered the seams with fabric strips. For the side seams and shoulder seams, I was able to topstitch though all the layers eliminating any handwork for those seams.

Next, pin the sleeves into the armseyes, matching notches to be sure you have the right and left side in the right places. Center the top on the shoulder seam, and match the sleeve seam to the side seam. Pin as needed to ease in the fullness at the edge.

When you sew a 5/8-inch seam, there won’t be any puckers in the sleeve. I sew with the sleeve side up as it is easier to manipulate the layers through the machine. Take your time here, sew a few stitches, then stop and readjust the fabric. Continue slowly until the sleeve is fully set in.

There is an alternate way of assembly that reduces the amount of sewing in the round. You can sew your shoulder seams first, then pin in the sleeves before the sleeve seam is sewn. Then, sew the sleeve seam and continue down the side seam in one continuous seam. I prefer to do this in the round as I think it is easier to ease in the fullness. Plus I can do the fitting without the sleeves first. Choose the method that works best for you, there is no right or wrong way. Here it is, assembled and fitted.

I’m working on finishing this week, and hope to have it all done for you next week. If I can get it done by the end of the month, I can enter it into the Mountain State Fair clothing competition. This was so fun, I am thinking of doing another one!
How’s your jacket progressing?

Your detailed and documented instructions will be so helpful for readers who are new to garment making.
Beautiful! I only sew the sleeves before the side seams when they don’t curve as much as your pattern does. The style of your seam results in a much better fitted jacket. The covered seams really elevate your jacket, very professional finish. It’s the best way to finish when you don’t have a separate lining. Having a tailoring heritage in my family, I love sewing jackets. While the hint here is helping quilters adjust to the larger seam, moving to that skinny 1/4″ seam is what I had to overcome. My first quilt was made with big seams.
LOVE IT! I seldom sew clothes anymore but every Halloween I have two little (big) boys to sew for. Last year required a quilted jacket (some warrior). Wish I’d had this tutorial then! Thanks for all the closeup photos, they really help. Thanks
I love your quilted jacket!
I hope you can enter it because I think it would win in a heartbbeat! Good luck!
Like how you finished the inside seams! Ingenious!
As I changed patterns and got off to a slow start, I simplified my patchwork and quilting plan. I ended up doing a flip and stitch quilt as you go with alternating 1” and 2.5” strips. I’ve got the pattern cut out and now ready for assembly.
Your tips and photos on assembly and fitting really help. THANK YOU!
Think your garment would do well in the competition. Go for it!
It looks great, Carole, and the added touches of the seam coverings will be perfect.
Beautiful! Good luck in the competition.
Look at that – so pretty! Seems like your jacket went together very smoothly!
You will be in style for sure. So pretty.
Great tutorial! I love the simple, step-by-step way you explain your process.
On a different note, several years ago you posted about how to make shopping bags from bird seed bags. Could you direct me to those instructions? I have saved several bird seed bags to use for this but I cannot find the instructions. Thank you for your help!
Here you go, Susan! I used Carole’s search box in the right hand sidebar.
I do like your Jacket, I think it is very smart. Will you be able to wear it reversed as you have covered your seams?
It’s a long time since I have done any proper dressmaking. I just play around with existing clothes and make alterations.
You will look ‘the bee’s knees’ in that lovely jacket. :))
Beautiful and fine quality. It is a wonderful thing!
Your jacket does look wonderful. Mine is almost finished as well.
Wow! Loving the look!