
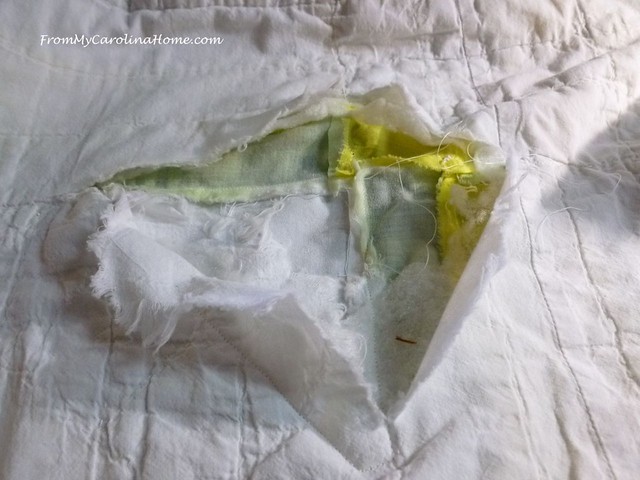
Bringing a well loved quilt from tatters back to usable is always a gratifying project. Recently this one came to me for some tender care. It is certainly well loved, with three sections ripped through to the back, and the entire binding shredded or missing. It wasn’t quilted, it was tied, which does contribute to the extent of the damage as there isn’t a lot of thread to hold it together or provide more structure for heavy use.

The client provided several pieces of fabric to use for the repairs for this quilt, plus one more quilt needing rebinding.
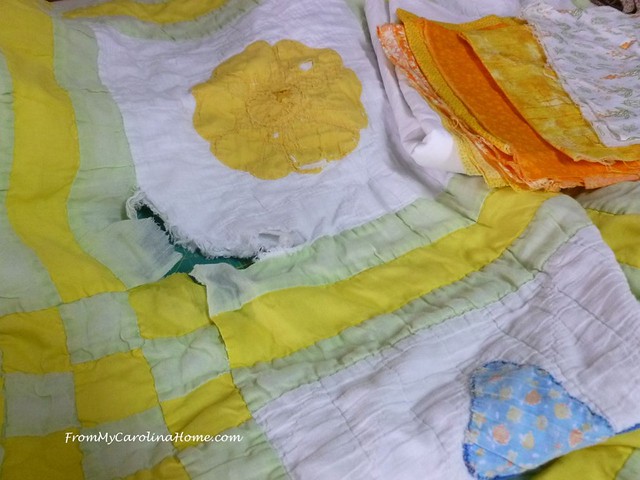
You can see the binding is just disintegrated. I believe this quilt has been washed in a machine a lot of times.

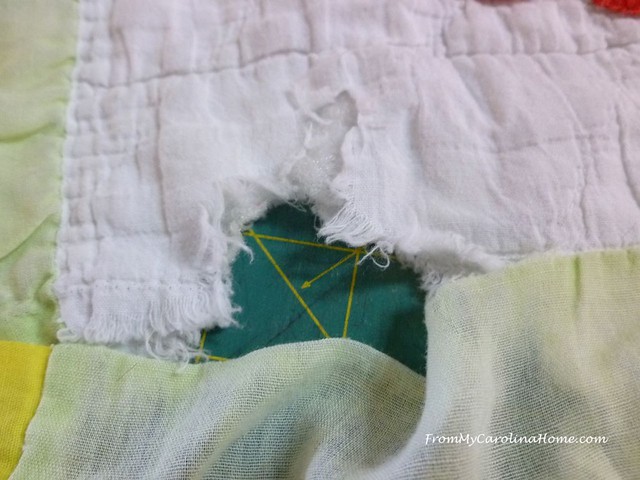
I began with one of the easier spots to repair. The green strip is still intact with the folded over seam allowance still there.
I made a patch for the white, then arranged the green over it in line.

The patch is top stitched in place.

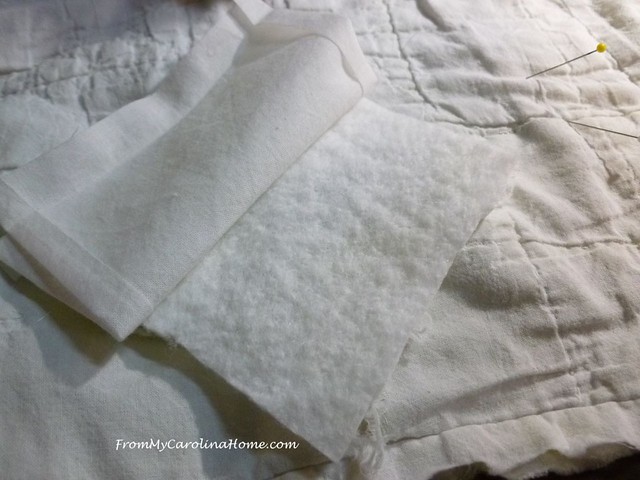
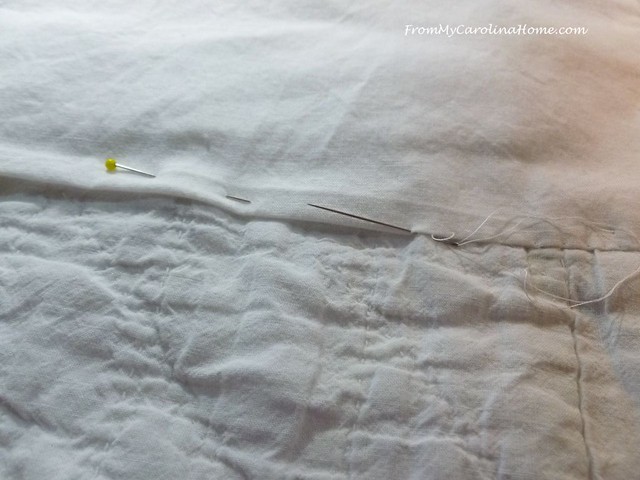
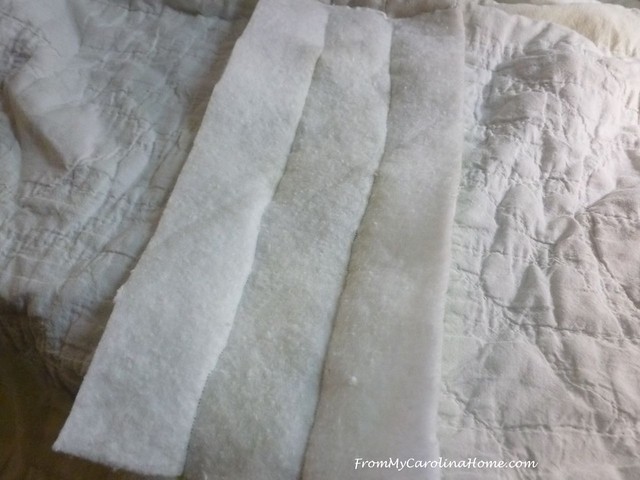
Then on the back, a bit of batting is added to even out what is missing, and a patch placed over it.
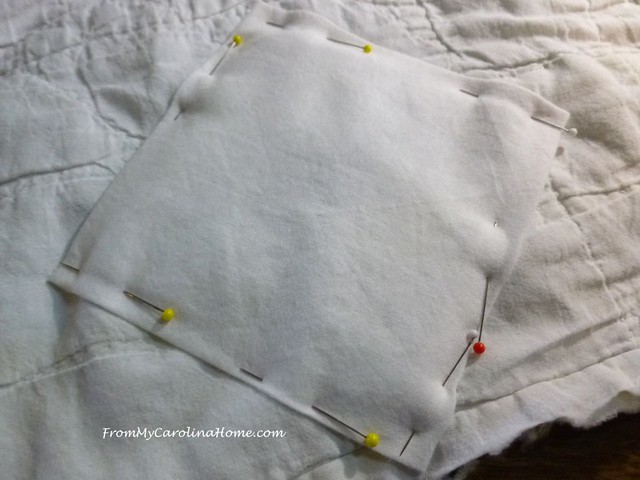
It is pinned into place.
Then it is hand stitched in place so this part of the repair doesn’t show on the top side.
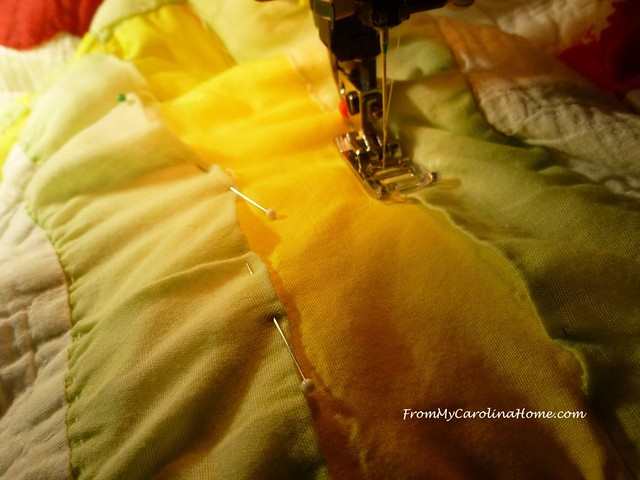
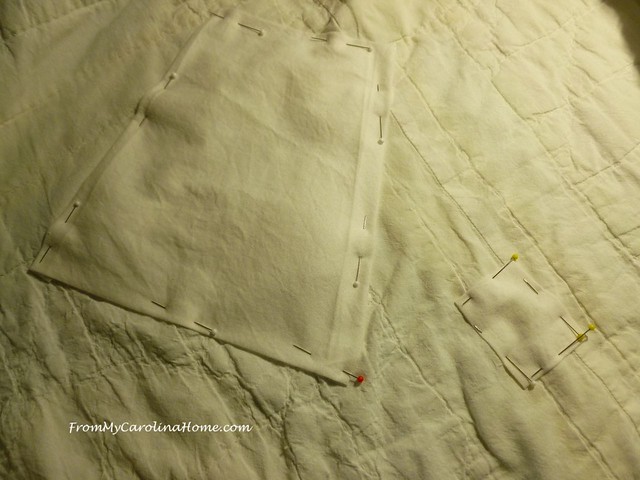
Next, the largest repair section needing repair is tackled.
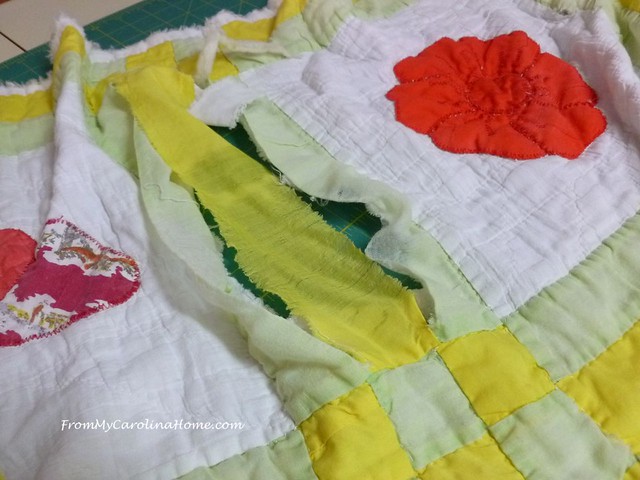
The yellow strip is beginning to ravel, but the green strips again are intact.
I pin the pieces together on the top side, and place a bit of batting on the back side.
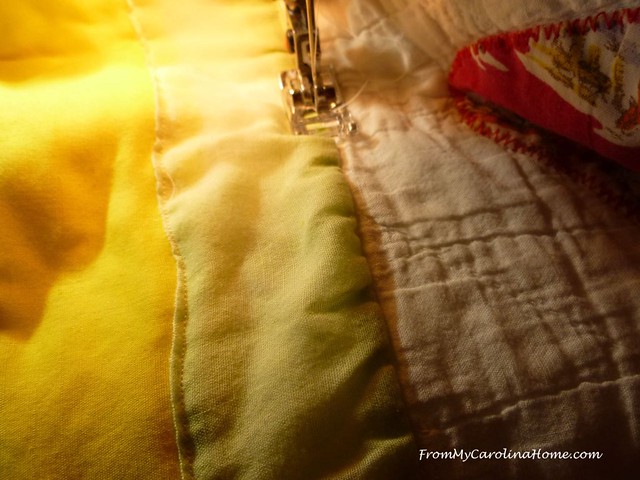
Top stitching the strips, it catches the batting at the same time and gives the stitches more to hold onto as the fabric is pretty thin.
On the top, the stitching alone was enough to close the rips.
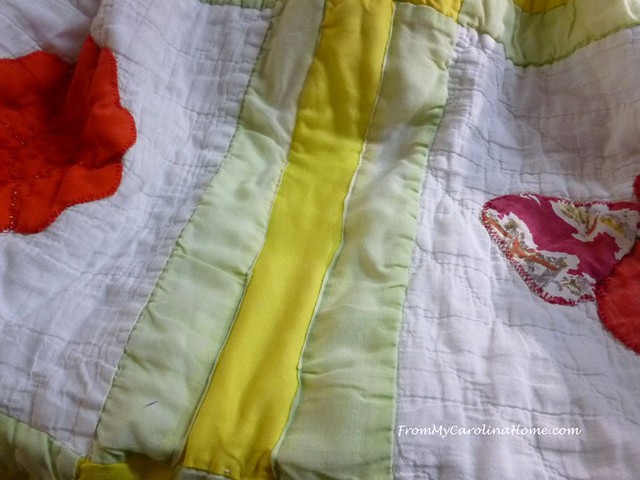
On the back side, the long lines will hold the batting in place, as well as make the top strips better able to handle the stress of use.
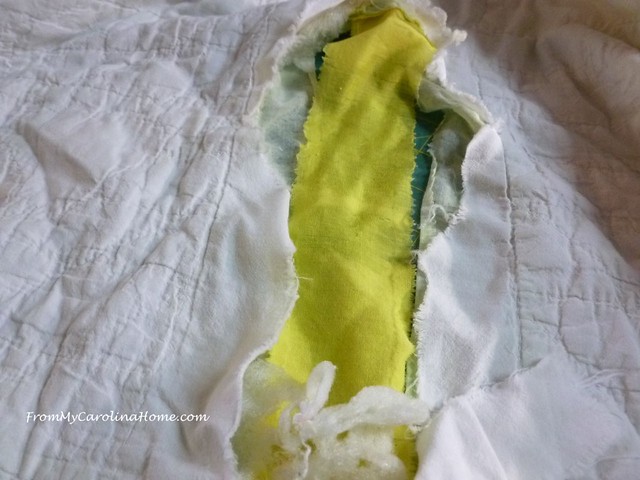
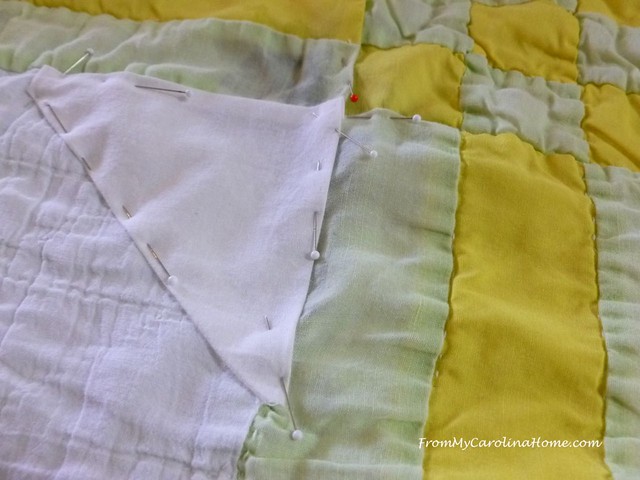
The last hole was repaired in the same way.

I pin down the lifting green and yellow patches, then add a white patch and top stitch the patch.
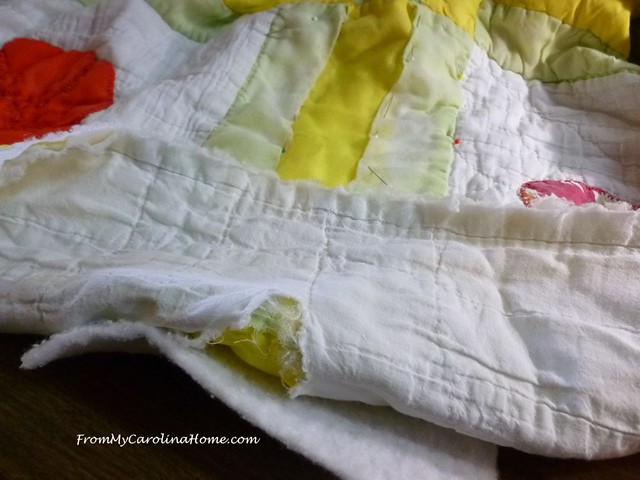
Then I turned it over.
A piece of batting is cut to fit the space where it is needed, then I fold the edges of the backing over the batting and run a whip stitch around by hand to hold it in place.

A patch is added and hand whipped as before. I found another little hole that I put another patch on as well.
On the top side, I add a bit of stitch in the ditch where it is needed to hold things together.
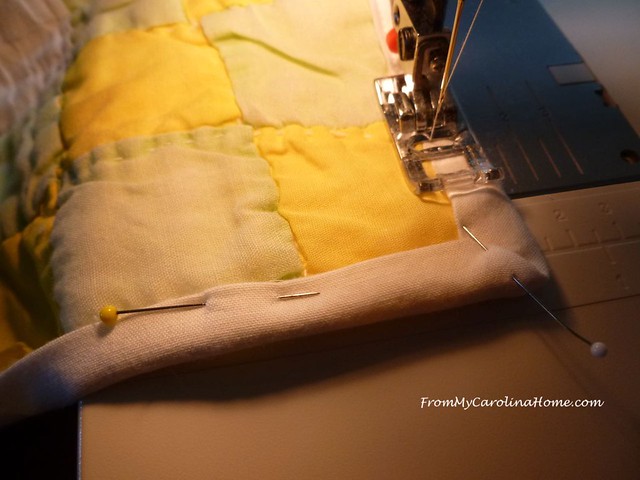
Next I remade the white binding and attached it by machine.
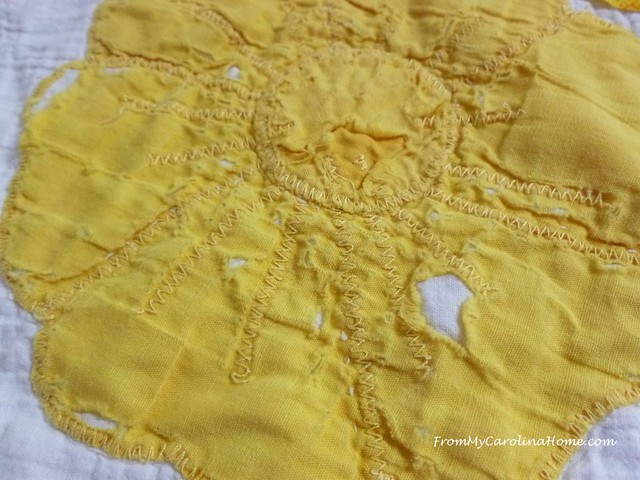
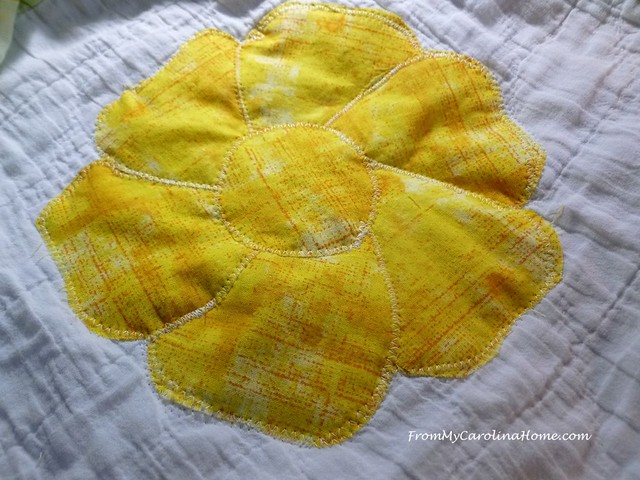
The last section was to address the appliques. Most of them I could just restitch with a zigzag where they were lifting up. This one was just too far gone to do that, with too many holes to patch individually.
So, I made templates for the petals and center.
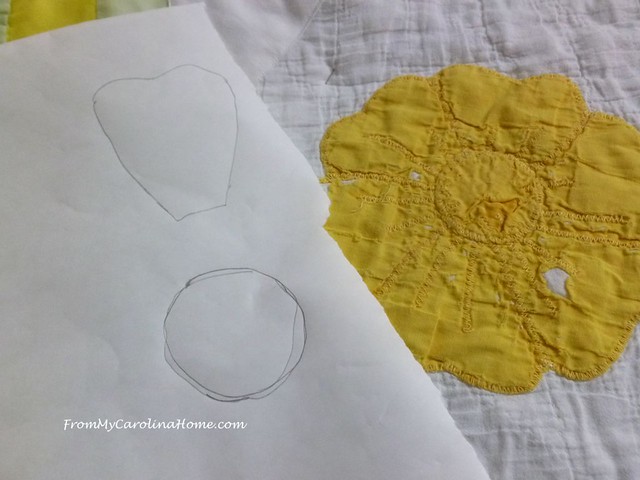
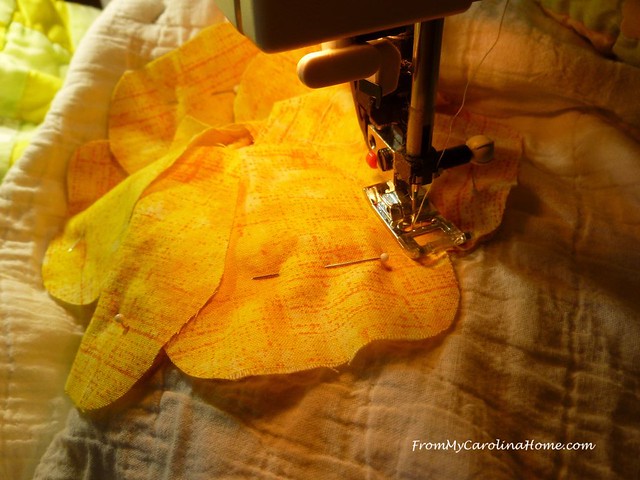
Using one of the prints provided, I made another flower and placed it directly over the existing one.

I zigzag stitched it in place, doing each petal individually.
Then the center circle is zigzag stitched covering the middle.
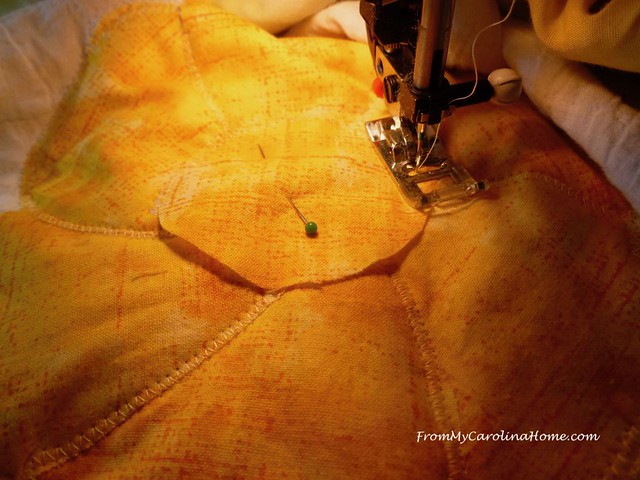
The style and color match the rest of the quilt, so it won’t be noticeable as new.
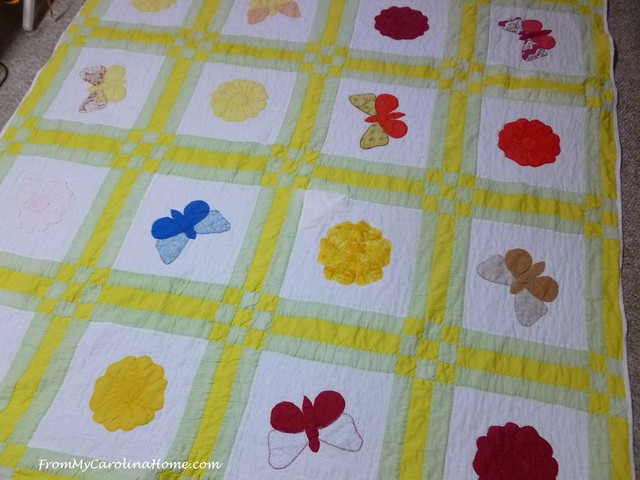
And there it is, all ready to use again.

If you have a quilt needing repair, see my page Well Loved Quilt Repair at the top of the blog.
Do you use your quilts for beds and cuddling, or mostly for display?
Don’t forget my Sample Sale, many things are still available. The post will be taken down soon, but you still have time to shop.

Wonderful job of repair and restoration on this quilt. I was asked to consider repairing a quilt. Unfortunately it was beyond repair. Only 3 blocks were intact and the rest was worn and torn to shreds. I suggest taking the 3 good blocks out of the quilt and framing them. Then present them to their children as gifts. Not sure what the outcome was.
Well done, I bet the family is very happy! I have always used the quilts on the beds rather than display or snuggle with them, except for table toppers. But I grew up with folks who believed you should not wash the quilts much, and on the bed, sandwich them so they are not exposed and the sheet is folded over to absorb some of the pulling. I remember the conversations about one aunt(in-law) of mine, who scandalously “washed all her quilts to death”. That was a big no-no to my grandmother! Ha! I try to not sit on the quilts either – to avoid abrasion and all.
What a huge but rewarding job! I’ll bet the owner is over the moon after being reunited with her treasure.
your quilt repairing is INCREDIBLE! the patience to do this is beyond my patience level and/or skill set. I love seeing the before/after photos and the process to get there. Thank you for sharing!
Good morning, Carole.
For some reason, I am unable to leave a comment on your posts now. I will try to reply to this email and see if it works.
Your repair on the quilt made such a difference. It will be much more stable and ready for many more snuggles.
I also wanted to ask you a question about your tablescape. Do you set your table so beautifully and leave it set with the dishes throughout the settings?
Happy weekend, Mary
Replying to the email worked, thank you!
On the tablescapes, yes we eat with those dishes. Then we either wash them and put them back on the table for the next meal, or pull extras from the cabinets. So, it stays set all season.
You mentioned it was tied, do you do an all over quilt on it then?
Half of my quilts are on beds and half are for cuddling in the living room.
Some years ago, I repaired my daughter’s baby quilt that had been shredded by a dog. I found a companion fabric that was used for the larger sections that had been destroyed.
I do love seeing these well-used quilts repaired. I ‘m sure it means so much to the owner also.
Another great repair. This is why I really dislike tying quilts. They just don’t last and all that work is for naught. This repair also underscores the need for quilt-quality fabrics in quilts that are going to be loved to death…thin fabric just doesn’t hold up to all that loving!! I’ve actually quilted a quilt that was tied and the person wanted it to last, so I put in on my longarm and quilted it…clipping the ties as I went. It turned out great.
How satisfying to bring a well used and loved quilt back to life again. I would enjoy the process myself. You do a lovely job of restoring damaged quilts and I like to see your process. Thankyou for sharing with photos of each step. The owners must be thrilled with the result. :))
Thanks for sharing all of that. It was a very tedious process. I sure hope they appreciated what it took to get it back to being useable again. Surely, they will just lay it over the bed or put it over a quilt hanger to enjoy. You did a fantastic job. I wasn’t sure it was salvageable.
You did a fantastic job giving new life to that quilt!
For years every quilt that I made was given as a gift…I didn’t have any of my own so a friend (who was in the same position as I was) and I decided to start letting some quilts live with us for a while before giving them away. Now I have quilts as art, on beds on sofas for snuggling and folded in my studio as samples.
I’m always impressed with your quilt repairs, Carole! This looks fantastic, can hardly tell the new spots from the old.
Your quilt repairs are so amazing. You truly have a gift for bringing the quilts back to life.
I really enjoy reading all your posts, but your quilt repair posts and pictures are especially heartwarming to me.
I know it must bring such joy to the families that have brought their quilt to you for “rescue”, when so many would otherwise just throw it away. Thank you so much for sharing this journey with your readers!
Carole! Thank you so much for the fabulous work on my well loved quilt! It was given to me by my mom and I cherish it so! Thank you for bringing it back to life so we can love on it for years to come! Your talent is immeasurable! I cannot thank you enough!
That’s an amazing repair. I’m so glad you were able to give it new life for a little longer. I hope it will get gentle care now.