
Don’t you just love dogs? They are bundles of furry love with doggie breath, and sometimes they like to chew on things. Recently, I was contacted to repair a well-loved quilt that had seen its share of doggy attention.
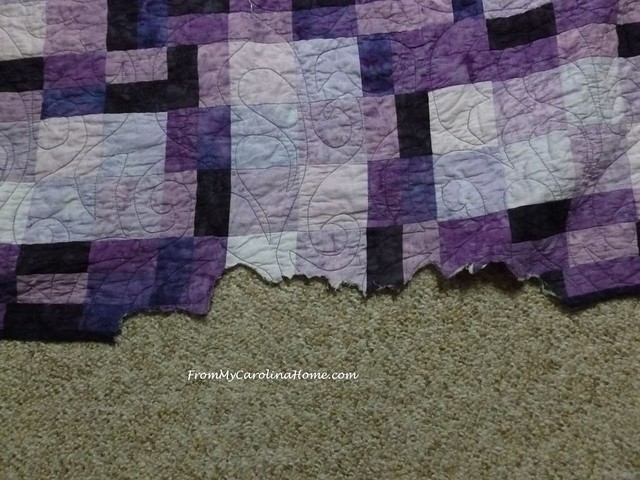
Two of the corners were chewed off completely. This one was on one end.

This was the opposite corner.

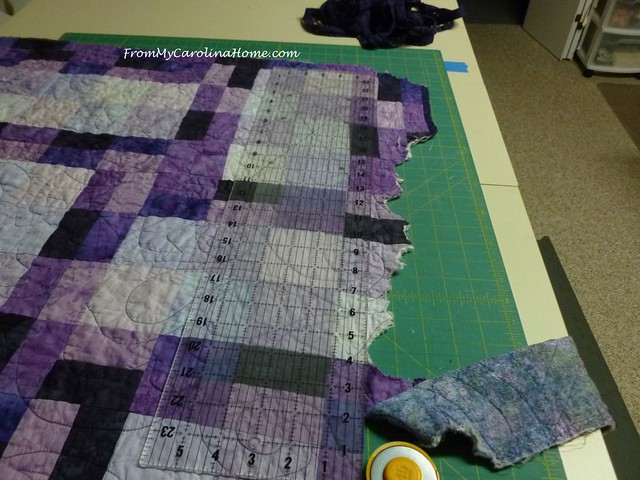
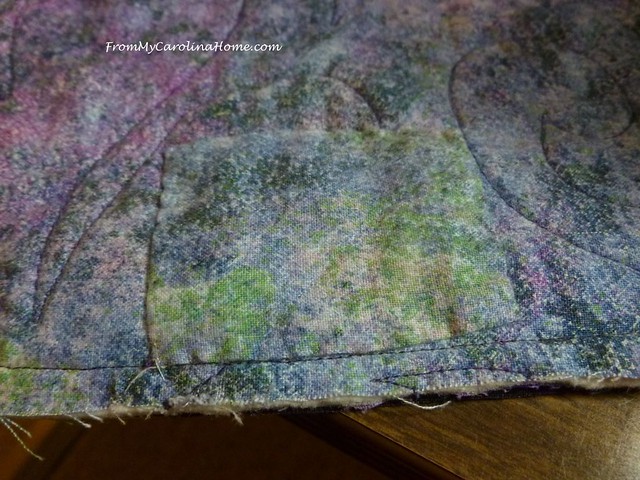
The easiest thing to do was to simply cut off the most damaged area, as there wasn’t any of the original fabric to make new blocks. Using a ruler and rotary cutter, I cut a straight line as close to the damage as possible.
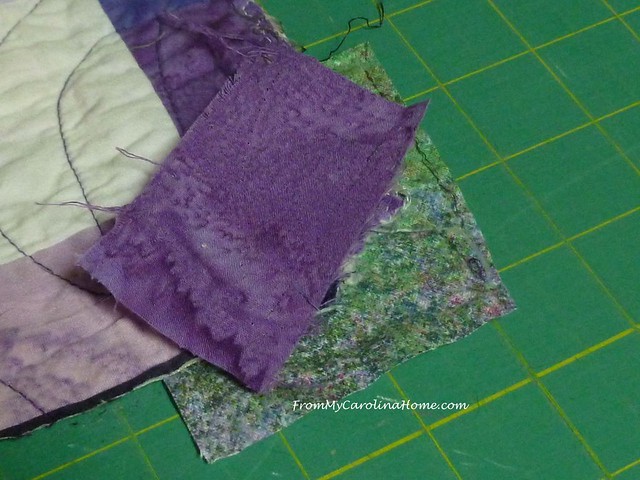
The advantage of this is I now have bits of matching fabric to make the rest of the repairs. I matched the corner color on the top, and the backing fabric on the back, placing the pieces right sides together with the quilt corner. This is the first corner.
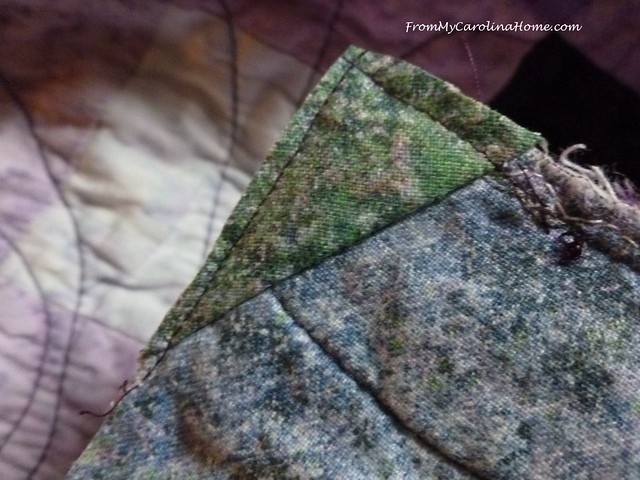
Sew a diagonal line across the corner, showing the second one.

Trim the original quilt past the new seam to 1/4 inch, and add a bit of batting to fill the corner.
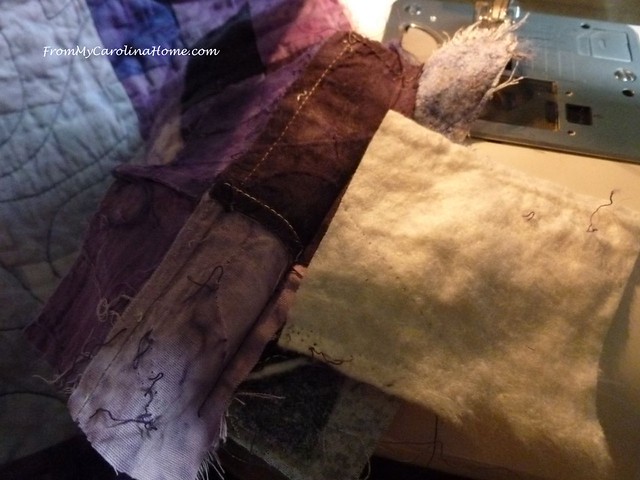
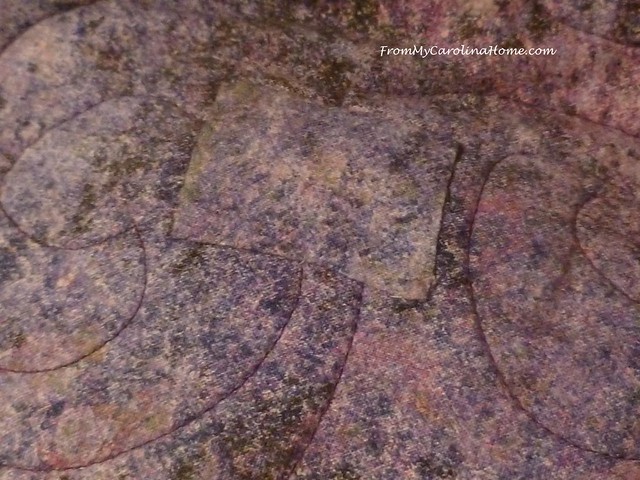
Then, topstitch to define the corner and stay stitch the repair.

Trim to an even point, using the sides as guides.

The back looks nice too, with matching fabric.
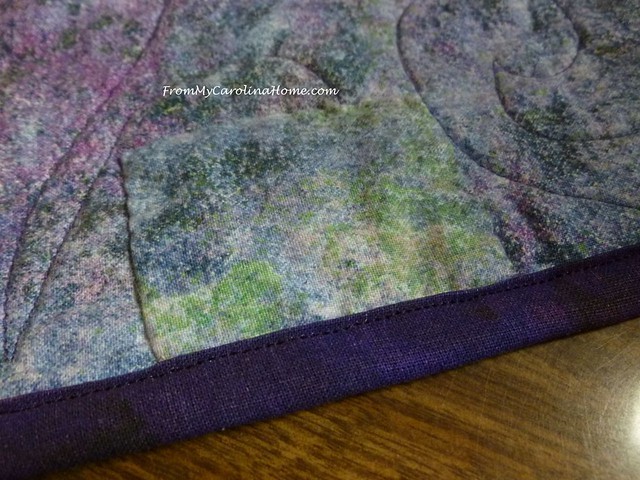
I removed the original binding, and made new binding for the entire quilt, for consistency. This was the quilt owner’s idea, as she wasn’t able to match the original binding color. She had purchased a new purple fabric that worked well with the other fabrics in the quilt.
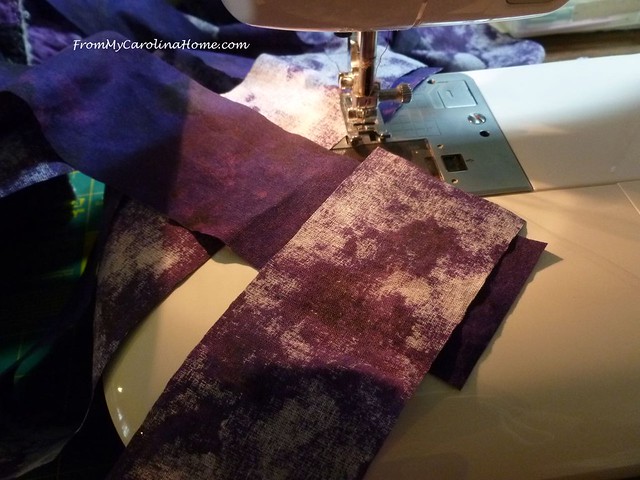
It was sewed to the quilt front, then turned to the back and machine stitched.

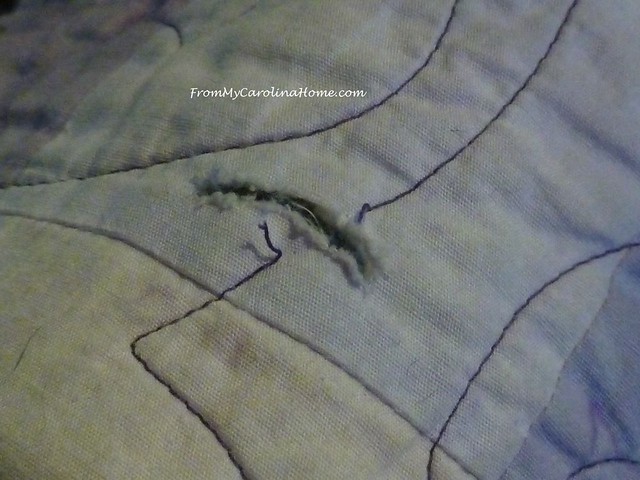
As I was doing the binding, I realized this hole would need to be repaired before finishing the binding as it was so close to the edge.
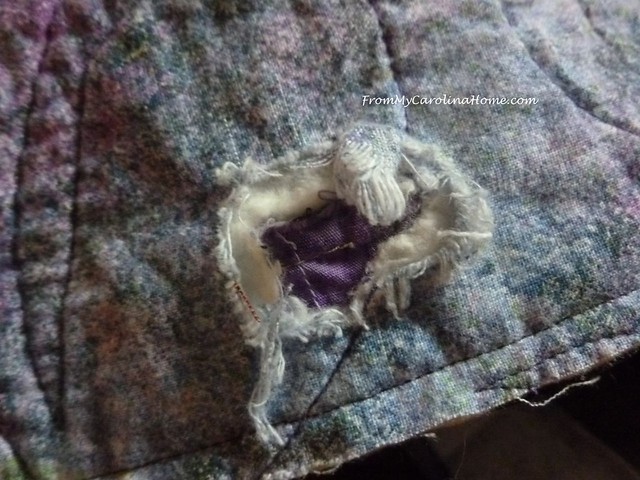
The top side of this hole didn’t have much damage, just a few threads missing. I hand stitched those, but wanted to add a bit of stabilizer to the back since I could. So, I added a bit of fusible web, and a circle of batting, then trimmed the stray threads.
Using another bit from the piece I cut off, I matched the backing color and made a patch. This was sewn by hand.

All done with the hand sewing, it is barely noticeable. I pressed it from the top side to be sure the fusible web adhered.
The binding went over the edge of the patch as it was so close to the edge.
I then made patches for the other torn areas.
After the patch applique, two more tears fixed on the top side.
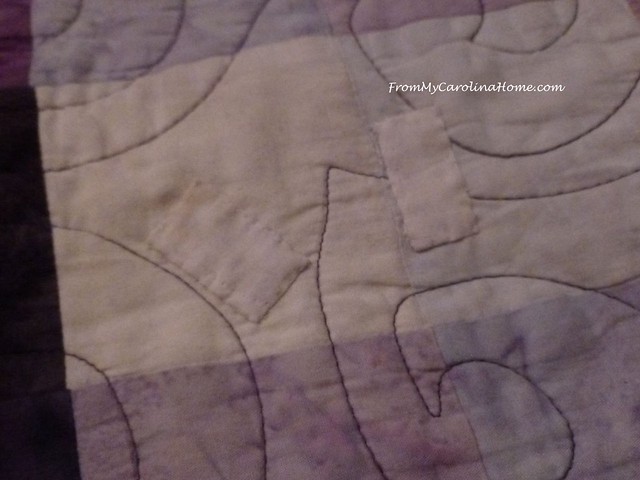
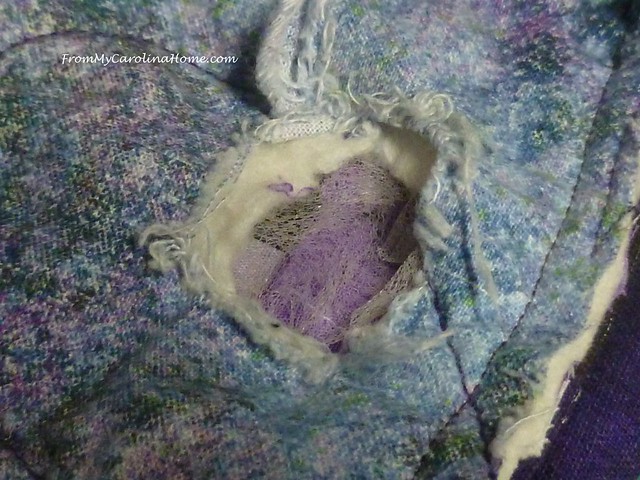
Then this one on the back was stabilized in the same way as above.

Here it is after the applique. It really helps to have the matching fabric, as this doesn’t show at all from any distance.
So, now if you really look closely, you’ll see one edge has fewer squares in the border.
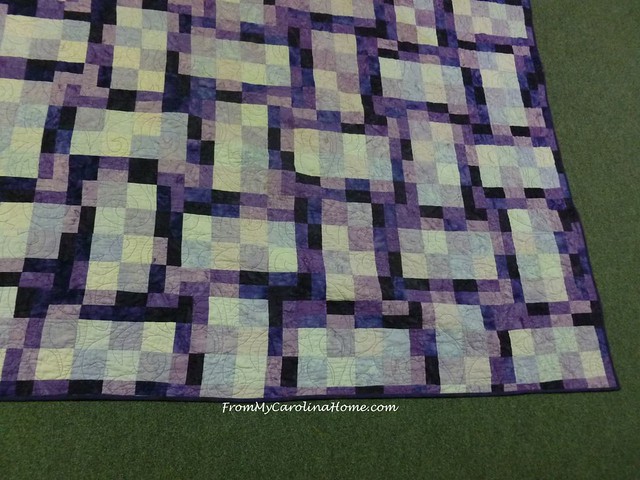
But it really doesn’t show to the casual view.
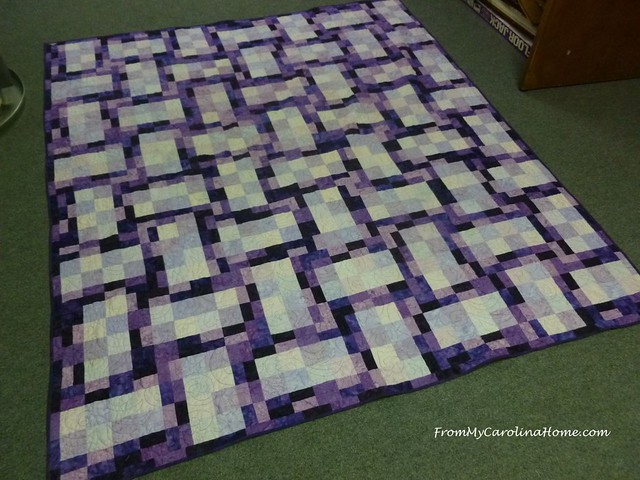
Now there is one more happy lady who has her quilt back. And one more dog that has to find a new chew toy.
What are you working on now?
If you have a quilt needing repair, see my page Well Loved Quilt Repair at the top of the blog.
Fat Quarter Shop’s Check out the Valentine Specials!! Basic of the Month is Andover Fabrics Scribbles, a great blender 20% off! Today’s Flash Sale!
Sharing – Whoop Whoop Friday.

What a great job to restore the quilt so well. I looked at the pictures and thought “Oh no!” but the finished repaired quilt looks just fine. A big round of applause for you. I’m clapping even though you may not be able to hear me Carole.
You did a really good job. Thanks for all of the tips and pics. I have 5 well-loved quilts that are over 50 years old. My mother bought them from some women in a housing project. They are totally made of scraps and not the best of fabrics but my boys remember those quilts well. I recently washed them and they didn’t come apart so maybe there is hope for repairing them (for display only from now on!)
Oh my, that was one “tasty” quilt there. You did a great job of repairing for the lady.
Nice repair work on this one…that is a much-loved quilt for sure…hugs, Julierose
What a rescue! Well done. I am sure the owner is pleased.
I enjoy seeing your repairs. My daughter just got a puppy, but so far she is leaving all quilts and afghans alone. She has destroyed her own bed, but not her fleece blanket. I hope that continues. I am glad that you were able to salvage this pretty quilt.
great job on that quilt. I hate seeing that kind of stuff 😦
I love all the different lessons you share. Thank you for taking the time with each project to share the steps you used. Barbara
You are amazing! I never would have thought that was repairable
That dog sure went to town on the quilt! Nice repair job …looks as good as new!
The surgery was a great success!
Thanks for sharing your process of mending this poor quilt. I have a quilt that I put a small tear in, so this was helpful to see as it will give me some ideas for fixing mine.
…..And the quilt wins! Nicely done, Carole!
Fantastic fixes. Trimming the edge and using the scraps to fix the rest of the quilt was a perfect solution. I bet your client was beyond thrilled!
You are a miracle worker!!!! Great job on the quilt repair!
Great repair job! I really appreciate your sharing of the process so well—in case (heaven forbid!) I ever need to do a repair like that.
You did a fabulous job repairing such a well loved quilt. Thanks for taking us through the process. Personally, I wouldn’t have gotten past cutting off the major damage area.
Nice work. You’re right – looking at the quilt as a whole, you hardly notice those little squares are missing.
Hello Carole, You did a magnificent repair job on this quilt! Just cutting it straight off and repairing with patches and new binding were all great solutions and the quilt looks fabulous once again! Our beloved fur babies do cause damage. We had a quilt for years that slowly got ruined by Miss Dodgers Nails. It was really quite insane how the damage was not really seen and then just all of the sudden it was in horrible condition. Now we keep another blanket over the top of our quilt. Thank you for sharing and for showing us how to repair damage! Have a fantastic day!
What a wonderful repair job.
What an amazing restoration! The owner must have been so pleased. That quilt must mean something really special to her.
You are a kind friend to repair a quilt that was as damaged as that one! I tried to do that for a friend one time, and had to give up because I just couldn’t figure out how to do it.
Wow….another repair that knocked my socks off! Thank you for sharing. Beautiful job!!!!
This looks wonderful. Your mending the quilt makes it look as if you wanted it to look.
Thats a lucky lady. I had to re -embroider a block in a quilt that im hand quilting. I counted myself blessed that it was only one.
Gosh, I wish I had known you years ago when I DID have a dog and he DID chew a favorite quilt gift! But now I don’t have dogs, and my son has cats. They can do their own kind of damage, but he put his quilts away and just has a cheap coverlet on the bed. Your repair is remarkable.
You are very patient to do this. There is a lot of fiddly work involved.
Great result.
Fabulous fix, Carole! While a cat may have nine lives, this dog just got a new one! Lol!
Hi Carole, I repaired a quilt like this a few years ago! The customer still had some fabric, so I re-did the affected areas and appliquéd them in. What is it with dogs chewing the corners? The one I did was all flannel, and I had quilted it for her a few months earlier…a re-visitation, of sorts. I love it when the quilt looks good as new and the customer is happy! Great job with this one.
You do such careful thoughtful work, beautiful.
I’m doing a hand project, using collars and cuffs off my late husband’s shirts. I cut the shirts apart years ago, plan on a lap quilt for me. haven’t used it, but saw a thoughtful project to make a tree wall hanging out of the collars and cuffs fabric, basically turning them in to layers of 60 degree whatever’s as close to a triangle as I can get and the layering covers up the top. I think I will end up with about 4 feet by 4 inches wide, and I have star buttons to put on randomly. The original I saw had an adorable tiny yo yo wreath made out of tiny bits of the leftover fabric and I plan on that as well. About 50% finished, the tree part is almost done, just the embellishment and a few rows to go… The fact it isn’t traditional christmas colors means I will leave it up all year I’m thinking… I have the spot chosen.
Fabulous job! I want to keep the post for reference! I thankfully have never had one like that to repair but much of how you did it could be applied in many situations.
What a great repair job. I will. Keep this handy. As my daughter has 3 dogs. So far no torn quilts. Thank you for sharing your talents.
Great repair job! You saved the quilt and it looks great!
Can you please tell me what year you started Scrap Dance Tango? I think it was 4 years ago but I cannot find it in my log. I would like to make a label for mine that is almost finished.
Thank you, Lindi