
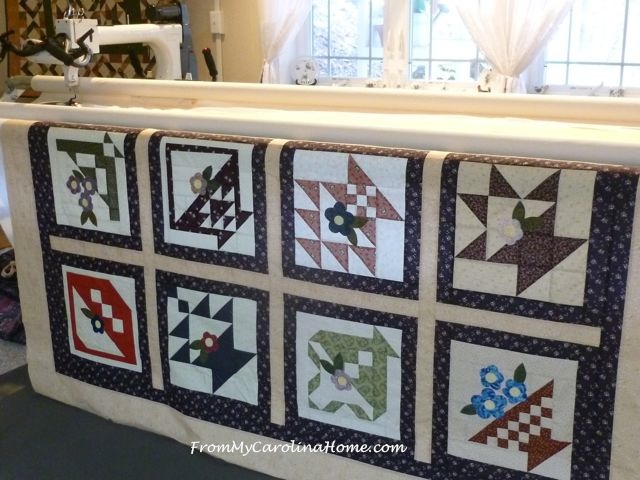
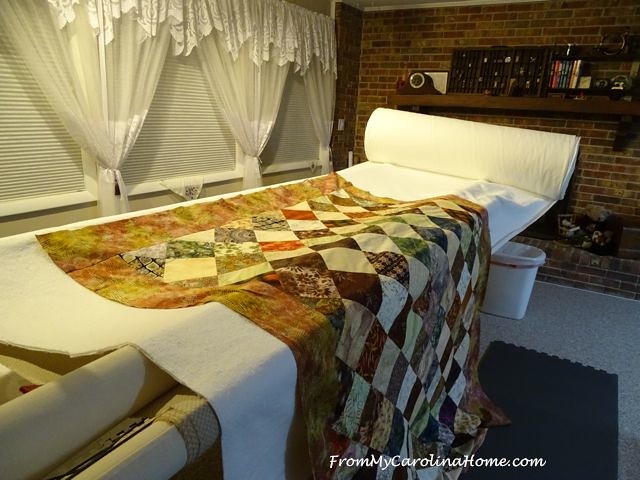
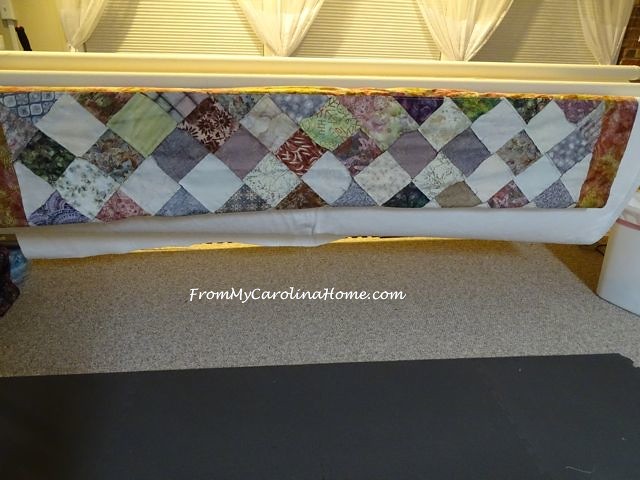
A lovely group of ladies in town make larger quilts every year to give all at once to a deserving charity. This year they are making twin size quilts for Mainstay, the local women’s shelter. It is difficult to quilt that size on a DSM, so I have agreed to do the quilting on six of their quilts. I have already done one, and three more have been delivered. I thought this would be a good time to talk about what it takes to get a quilt on the longarm frame, and why we need certain things. I may do this differently than some, but most people I know do it basically this way. This one was the first I did a few weeks ago. It was beautifully pieced and the borders were flat as pancakes!
The next quilt had a few issues. The first thing to know is that from the time I pick up the top in my hands, to the time that it is ready to begin quilting takes roughly an hour, and sometimes more if I have to deal with a problem. I start by inspecting the top and backing. I sometimes find this – uneven edges. These have to be cut to even, or the tension will be off where the edge is dangling.
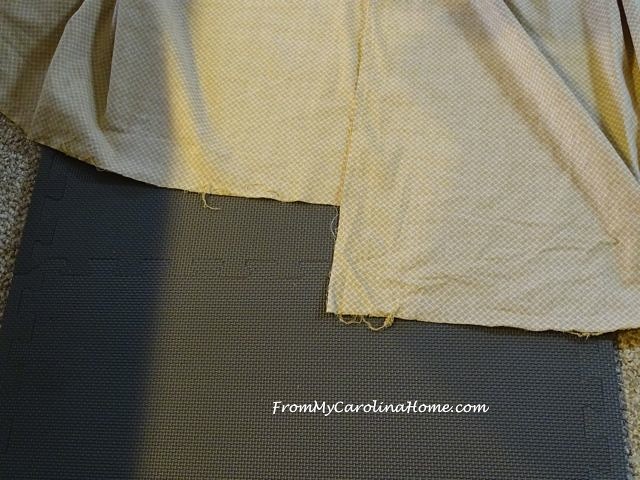
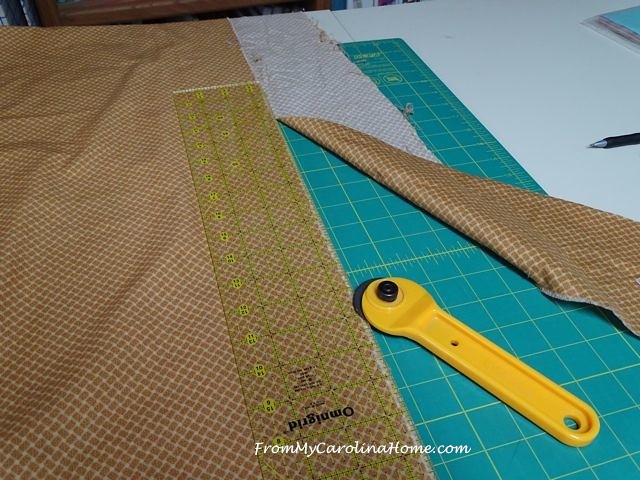
So I line it up and cut that bit off.
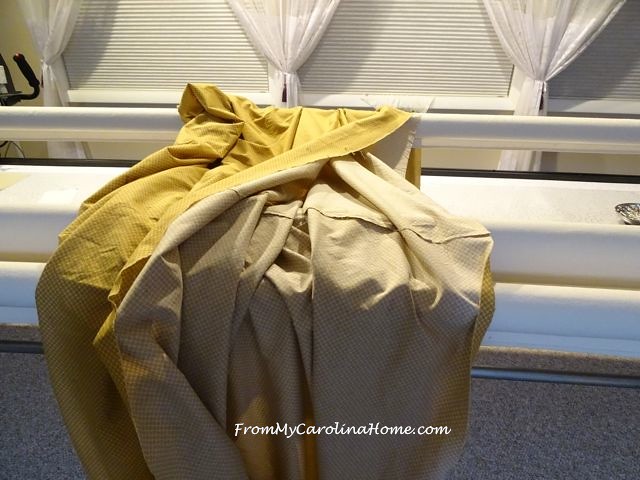
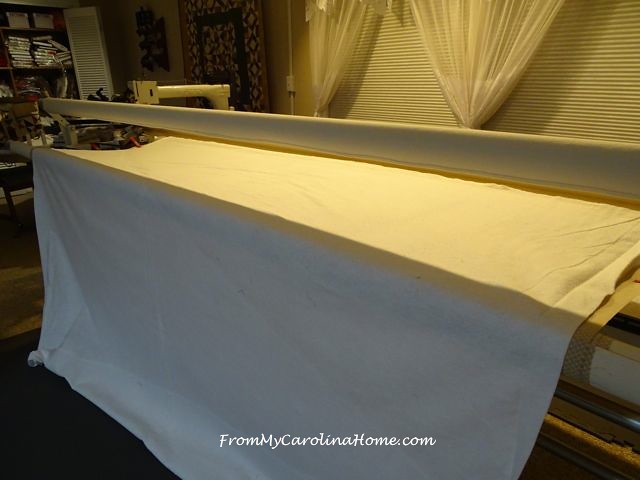
Determining where the middle seam is, I plan to load it with the seam parallel to the rollers. I fold the backing in half, and line up the halfway point to the halfway mark on my leaders, and start pinning. The backing is loaded right side down.
Using long corsage pins, I put one every two to three inches. Some quilters use snap on thingys, or zippers, but I don’t have those.

Running the backing under the upper bar, I then pin the other edge to the front leader using the same pins, lining up the middle to the mark on that side. This helps keep the backing straight and on line.
Once it is fully pinned, I look to see if it is hanging straight, not pulling to one side or the other. If it is, then it is off grain, and I can repin with some adjustments to compensate. Luckily, this one looks good.
Now, I roll up the backing on the front bar, smoothing it with my hands as I go, keeping it straight.

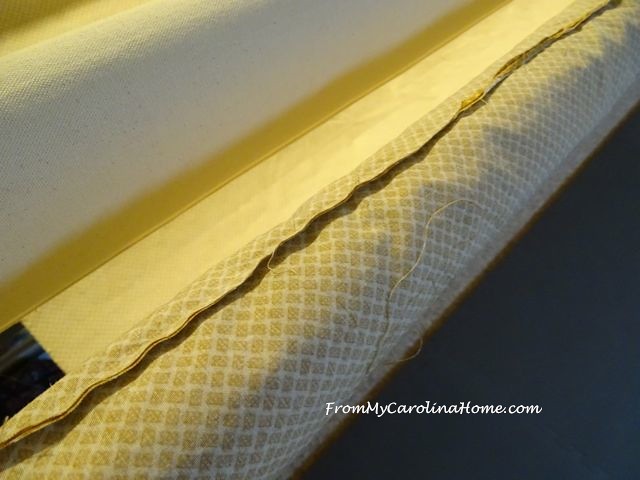
When I reach the seam, if it comes over the bar in line, then I am doing good. If not, I unroll it and start over. This seam is really too thin for a backing, only 1/4 inch. It should be at least an inch wide and pressed open. This may come apart during quilting, and the bulk will be all on one side instead of distributed. If it was a nice wide seam, I would press it open, but since it is small I’ll leave it as is in case a thread breaks.
Have you ever wondered why you need to provide backing that is 8 inches longer and wider than your top? Here is why. The needle plate and the clamp take up space. Less than four inches means the base may contact the clamp and cause a jiggle or boo-boo in the quilting line. It startles the quilter to hit the clamp, and may also cause broken threads or a broken needle, which will require the quilter to stop to fix those issues. You need two inches for the base, and an inch for the clamp, and an inch for clearance. You’ll need even more if the quilt is to have ruler work which requires a larger base to be added.
Now I need to measure and cut the batting. I usually use the longarm to hold the roll, and lay the top on top of that so I know how much to cut. I’d like to acknowledge the wonderful support of The Warm Company, who generously provided the batting for these charity quilts for us. They have a warehouse distribution center near here. I like Warm and Natural, and Warm and White, always good quality batting and a joy to quilt. This roll is 90 inches wide, which means I just need to cut the width of the top plus 8 inches. While I have the top spread out, I’ll look for stray pins and threads to take care of before loading.
I raise the upper bar, and place the batting needled side up on the backing. I need to get it placed right and straight, then smooth it out. I usually put the excess over the bars under the table to keep the batting off the floor.
Placing the top on the batting, I need to get the top edge of the pieced top in a straight line, and be sure it is straight along the sides, perpendicular to the roller bars. Otherwise it will migrate to one side during quilting. I float the top, meaning I don’t pin it to any rollers, I will put a line of stitching at the top to hold that down, then use the upper bar for tension to keep it straight.

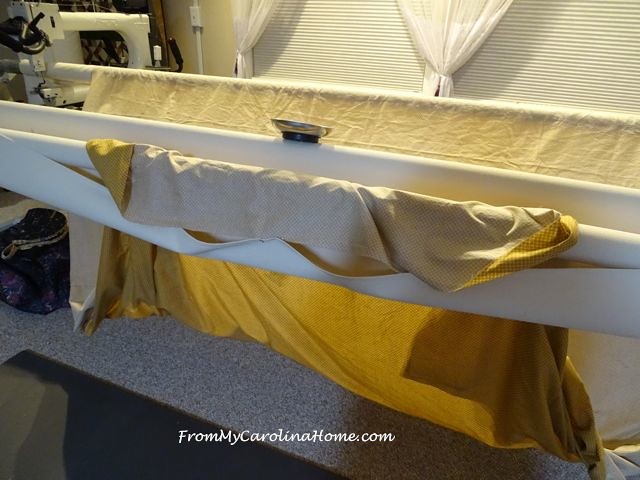
Uh oh, looks like this quilter used the slap and sew method of border attachment.

See the excess fullness?
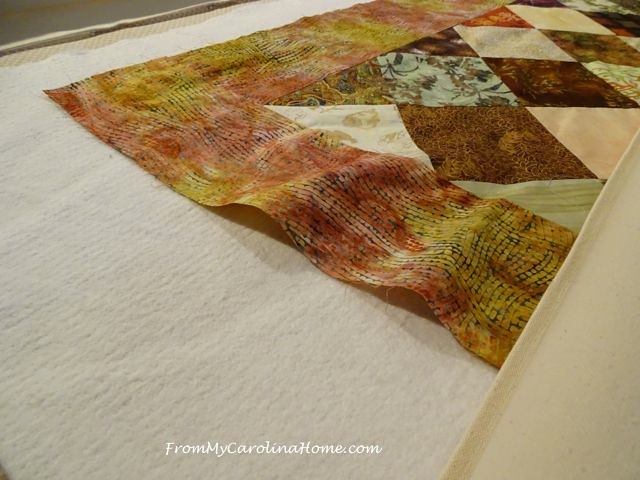
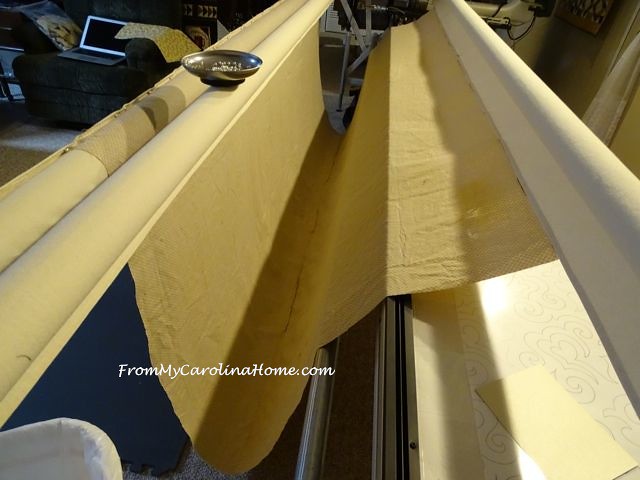
I get the iron out, and warm it up. I try to steam out some of that fullness while it is on the frame before the quilting starts. Sometimes it will take out a little, but there is no substitute for correct sewing of a border. See my tutorial Quilt Borders Tutorial Understanding the Why. Not all the fullness came out with steaming. Batiks are really bad about this, you cannot steam them into shape like quilting cottons. But that is their appeal, not shrinking, isn’t it? All the more reason to measure borders and cut them to length.

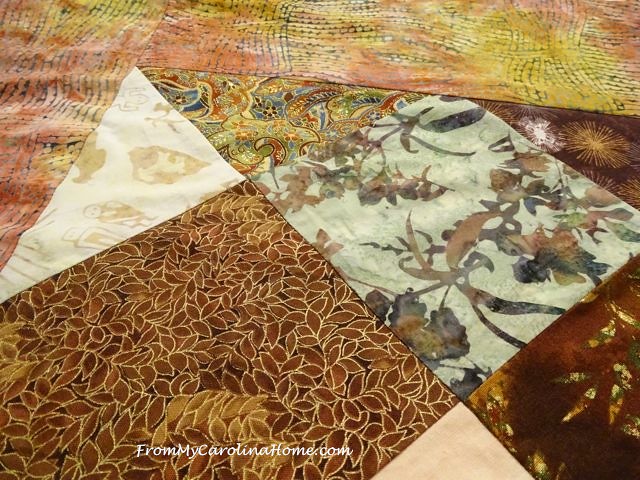
There is some fullness in the blocks too due to bias edges, but not as much. I hope the quilting will disguise this.
Here’s another telltale sign that the borders are too big. When the top is folded up, lining the edge of the border up with the edge of the roller, the middle of the fold will bow upward like this one, indicating that the middle of the quilt is smaller than the edges. I am going to have a bit of a problem with this quilt, but will just do the best I can. The borders are at least 2 inches longer than the quilt top, and the left side is longer than the right. Please use the proper method for measuring and adding borders, not the slap and sew method. It saves a lot of headaches and heartaches, both for you and for your quilter.
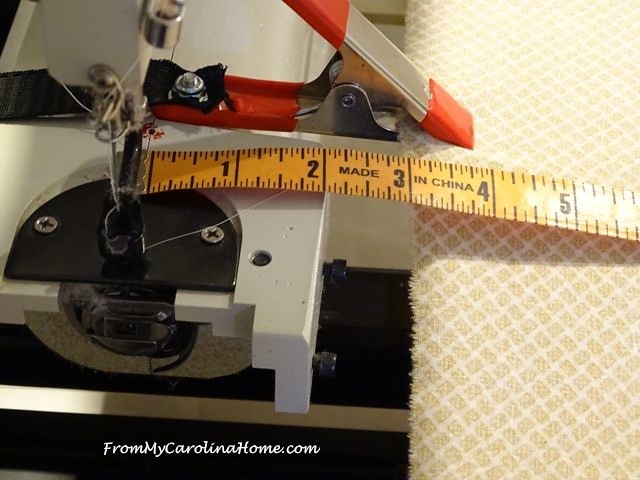
After all this, I still have to wind some bobbins, chose a pantograph and lay it out, thread the machine, change the needle, and do a test for stitching integrity. I may have to adjust tensions to get the stitches balanced. Then I’ll be ready to quilt. I hope this helps your understanding of longarm prep and some of the problems we face. Let me tell you, nothing is more joyous to work on than a perfectly flat quilt top with properly applied borders, a hefty backing seam pressed open, and zero stray threads or pins.
I have several tutorials on preparing your quilt for longarm quilting with more explanations, proper application of borders and understanding why it should be done the right way, and more. See the links at the top of this blog for Quilt Basics Tutorials, and How to Prepare for Longarm Quilting.
Do you send your quilts to a longarm quilter? Or do you quilt them yourself?
Sharing – Tips and Tutorials Tuesday – Longarm Learning

I have a longarm and quilt them myself. My process is similar to yours, though I don’t use an upper bar at the front. I’ve quilted a few donation quilts and don’t usually do that anymore. My joy of giving is stretched too thin when facing the types of problems you noted. Not having a well-made back, poor piecing on the top, batting supplied that is too small… I would rather make my own quilts to give with an open heart, than quilt others that leave me with a bitter taste. Kudos to you for taking this on.
i do both. I send out the ones my machine can’t handle. Thanks for making a check list for me as i am just getting started with charity quilts.
Goodness sakes. I truly had no clue that this is such a big job. Thanks Carole for explaining the long arm process.
Great tips for getting a quilt ready for your long arm quilter. Probably my biggest mistake is not sewing a wide enough seam on the backing. My long arm quilter will probably thank you when I start doing this correctly! I do quilt my small quilts on my domestic machine most of the time, but anything with much size goes out!
oh my gosh…I am so guilty of the slap & sew method of borders! I just looked up your tutorial and had an ‘ah-ha’ moment…or a ‘duh’ moment! LOL Thanks for sharing!
I’d never heard about 1/2 inch seams for the backing, but then I have not sent a quilt out to a long arm. I guess I did get the message about having larger backing and batting, but have been cutting off so much that I was going smaller for my next quilt, but since I’m doing on my home machine that will work out. Thanks for the reminder about how to put the borders on! This was an interesting post to read. Thank you for sharing.
What an interesting and informative post. I must admit I have been guilty at times about adding borders the slap and sew method. Will take better care in the future. I will also adjust the size of my backing seams and iron open. Never thought of this but thanks to you, I can see the logic behind this step. Thanks for all the information and tips. The only requirement I’ve had from my long arm quilter is to be sure the border is wide enough.
Terry in So. Calif.
Good Morning Carole! Reading this post was truly an eye opener for me. I do all of my quilting on my domestic machine, but have always wondered about the process. Plus, just yesterday, I mentioned to Deanna that a lady at the Project Linus meeting mentioned having a long arm and I revealed the fact that I would really like to have the Double Wedding Ring quilt done if the cost was not to much. Miss Deanna whips out her little cell phone and texts away and the reply was that no she would not do it, but that I was more than welcome to come over and do it myself! Deanna and I were both so excited and the ideas started rolling….LOL.
So your excellently written post/tutorial was definitely an eye opener for me and I will be reading your tutorial on Borders. It really surprised me about the information you provided on the Backing Seam. Just reading your thoughts and the possibilities of disasters that can occur for not sewing a bigger seam made me sit up straight and pay attention. What a dreadful ordeal to encounter while quilting that the backing should come apart because of using a tiny seam and not pressing it correctly. You positively taught me another lesson today on that one.
Carole, you are a exceptionally talented quilter with A plus teaching skills. If I could give you an award of some sort I would! Instead take my (darn it) far away hug and great big ( Carole taught me cool stuff today) grin! Have a fantastic creative day!
The basket quilt brought back memories, yours is beautiful just like all your quilts. You are so talented!
I hand quilt my quilts on a large three roller system something like yours except it is for hand quilting. I just showed a post recently on how to load a hand quilting 3 roller frame and it is something like how you do your long arm. Interesting to see the similarity
What a great post today, I never thought of laying out my batting to cut this way…..totally awesome! Hanging the top to see if it is straight is another tip that will help me. I only like quilting for myself just because of the challenges I’ve encountered while doing it for others. Your pictures are worth a thousand words and will be so helpful, thank you Carole for sharing your many talents with us, bless you.
I send my quilts out and have a wonderful friend who does them for me. She told me from day one about 12 years ago, how she needed the quilts to come to her and I have been diligent. I have made half inch seams for the back but will increase them after reading this. Thank you Carole for you patience and expertise.
Thank you for all the valuable info! I have a personal long arm that I enjoy using and I can relate to a lot of what you do for set up. I saw the panto you had on your table, will you share which one it is?
Very interesting and informative about long arm quilting. I have always known you have to have things a certain way, but seeing it in action makes even more sense! Thank you!
Nice of you to quilt these Charity Quilts. Some people just want to get the quilt done, thinking it is for Charity.. I send mine out to be quilted, but it is getting expensive. I may have to hand or machine quilt. Very informative.
Oh mercy. I have a friend with one of those but I didn’t know it’s called a longarm. I can surely understand why.
Quilts are beautiful! I’m so glad there are people like you continuing such a wonderful tradition.
Thank you for sharing this at Thoughts of Home on Thursday. We are thrilled to have you!
This was so interesting! From what I’ve seen on other blogs, what you go through to load the quilt seems similar to loading one to a hand-quilting frame, as in, it is rather complicated in both situations.
I have never sent anything out yet…I generally hand quilt and occasionally tie quilts, depending on the use they are going to get. I had to go check the tutorial section about the borders since I didn’t know what slap and sew meant.
I often would like to SLAP MYSELF when making a stupid mistake when sewing though 🙂
Pingback: Donation Quilts | KatyQuilts
Thank you for the great tutorial! I try to do everything I can to make things easier for my long arm quilter. After all the end result is a better looking quilt.
Hi I’m a beginner quilter and as of right now the quilts I make are being tied. I do have a big question. When I make my top I do a slightly larger seam or seams for the backing…I use around an inch because I have been taught to do it that way. But my question is When the seam is larger and then pressed how do I keep it from bunching up underneath the quilt top? I usually just tack it every couple inches down the seam…I suppose when you quilt a top it gets sewn down but since I tie my quilts is there any other method that I could use to make sure the extra seam fabric stays flat and still? I would appreciate any info you can provide. Thanks
Wonderful information.
I stumbled onto this post after finding your tutorial for serging corners, on another website. I’ve just started making my first quilt, so I decided it would be a good idea to look through your other tutorials as well. I was curious about longarms, and… here I am!
For some reason, I thought it would be a good idea to have my first quilt ever, be a king size. When I read your opening statement about these women sending off their tops, since it’s difficult to sew such a bit top (A twin, no less!) on a domestic machine… my heart sunk a bit. In any case, your tutorials have been a big help!
Thanks for excellent information! I do have a question. When you mention to lay the batting needled side up on the backing. I have no idea how to tell what is needled up or down on the batting. Please shed some light on this. Thanks. Karen kthurn(at)bektel(dot)com
Thank you! The needled side will look a bit like a waffle, the “wrong” side will look kind of slubby like a pilled sweater. This is true for Warm and Natural, and most Hobbs, some Quilter’s Dream. Not every batting will have this appearance.
This is really fantastic! You are very thorough and informative in all your posts and tutorials! I was going to suggest Red Snappers – they save a ton of time loading and unloading! Quite reasonably priced too!
These are great tips and thanks for linking up with Tips and Tutorials Tuesday!
Wow, this is fantastic. I’ve been a longarmer for 15 yrs & people still don’t understand what I do. And, customers really don’t get how important squaring up & flat quilt tops are. Thanks for this & I hope you don’t mind if I share.
Those photos of the second quilt on your frame do such a good job of showing what happens when you try to load a non-flat, wavy bordered quilt onto a frame! A picture is worth a thousand words. I encountered a couple of tops like that when I volunteered to quilt a couple of tops for the quilting charity at my church. “Ask for charity tops to practice on” is common advice given to new long arm quilters, right? But having to deal with an out-of-square, wavy-edged, non-flat quilt with C-cups and accidental open seams is a nightmare for someone who is just learning how to load a quilt and how to operate their machine. It really takes skill and experience to know how to deal with these “problem child” quilt tops.
This was a wonderful post, I wish I had found it when I first brought home my LA. It would have saved me so much wasted time on google.