
When we left off this project, I had the vase, the stems and leaves, and the newspaper done. Next was to sew the flowers for the amaryllis. Because I have shifted to a dimensional plan, I put some red mottled fabric right sides together and drew petal shapes. Roughly cutting them out, I sewed the edges together along the drawn lines.

I trimmed the seam allowance to a minimum.

Then, the curves and points were clipped, and the petal was turned right side out.

Folding the raw edges under, the edge is pinned with a nice point.

I made five for each flower, and pinned them together.
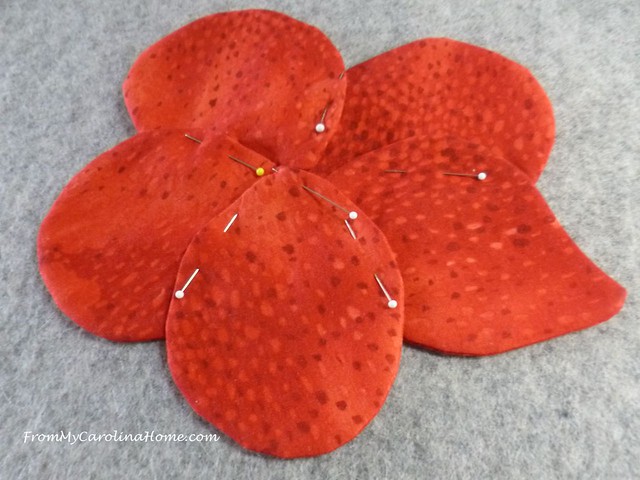
Fifteen total petals for three flowers.

Flipping them over to the back, I hand stitched each one together, closing the openings as I went. I only stitched the overlapping center from where the needle is here to about the same distance on the other side of the point.

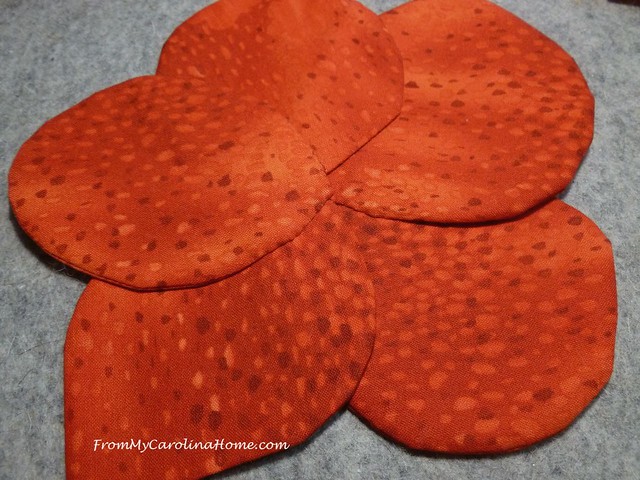
All the petals were joined to the adjacent ones. When that part was done, I had a nice five petal flower. On the front side, the top petal makes a nice point to the center.
Next, embellishment in the form of beading. I looked up an amaryllis and found the stamens were red on the base and gold or yellow on the tips. So I got out some beads that might work.

It took a few tries to figure out the best way to do the strings.

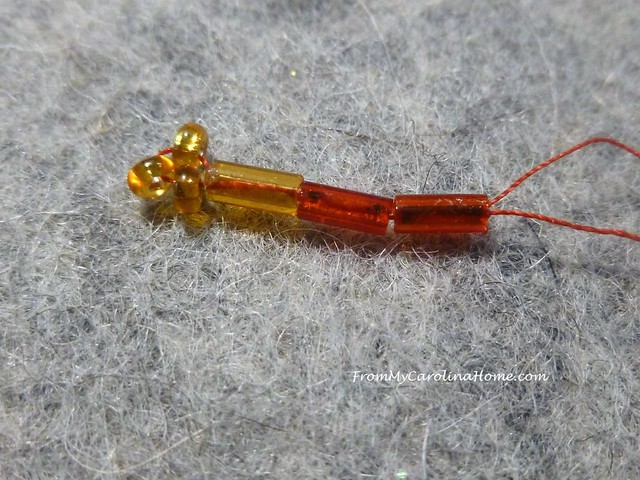
I wanted them to also be dimensional, and not to be sewn down to the base. In order to get this effect, two red bugle beads are strung first, then a gold bugle bead, followed by three gold seed beads. I photographed this for you on my grey press mat so you can see it easier.

Then, the needle is put back through the bugle beads, creating a loop of seed beads at the top.

Pulled tight, the beads make a dimensional stamen.
On the flowers, I brought the needle up from the backside in the center, and began stringing the beads in the same manner.

Pushing the needle to the backside in almost the same spot created a nice stamen that is only anchored at the bottom. Then it is knotted off on the back. I used 40 wt cotton thread.

I put seven in the center of each flower. They move around since they are loose.

Seven per flower meant doing this 21 times.

Now, the flowers are ready for the base. I’ll show how I did that next week. Are you surprised that I am completing the flowers off the base first?
PS – did you see the amazing news on the Safelight Project on Tuesday’s post?

Certainly looks familiar, great use of the techniques I developed for my books years ago……!!!
The flowers look great. It’s fun seeing this evolve!
I love the bead work! It has been ages since I have done any of it, but you make it look easy. Wise woman doing it before its on the piece where it is always a little more difficult to move about!
Your flowers are going to be beautiful! I love the beads you’re adding – that’s a great way to show the center of the amaryllis. Looks like you’re enjoying this project!
Beautiful flowers!!
This is going to be a real work of art. Love the way you’re using the beads.
I love this kind of work – used to do this – when I had a stain, you know the coffee that makes “footprints” all the way down, I’d make a chain of leaves and flowers, I did a quilt for a neice with applique! Although I never did the fancy bead work – it’s wonderful! Thanks
Love the beading. The dimensional effect really makes it stand out
Carole ..
Could you put up a link with the pattern for the safelight makeup bags ??
I had it from before and darned if I can find it !!
And the beading on the flowers is gorgeous!!
I did see the amazing Safelight news…I’m so happy people were so generous. I have found quilters especially to be the most generous on the planet. Your dimensional stamens add so much to the flowers. I can hardly wait to see the finished quilt. Well done, as usual! Blessings….
The dimension on this project is going to be stunning. And I love the color of the fabric for the amaryllis. great job!.
I love that by going a bit dimensional with the stems it is influencing other decisions as you go now. The bead work looks perfect to me!
Oh the addition of the beads is wonderful!! This is going to have so much dimension!
That is a very effective way to create a flower. I would be happy to have them in my garden.
gorgeous
Very good tutorial on the beads! Thanks Carole