
Thanks to wonderful readers, I have several Safelight quilts in process right now. The mountain peaks quilt is coming off the frame soon with maybe two more passes yet to do. I’ve just been too busy with holiday fun to get it finished. But, when I had a bit of time here and there to just sew, I put another top together with more of the red and white blocks. This time I wanted to do a different setting, so I laid them out in an offset diamond pattern.

With this setting, it is important that each block be in its space and oriented the correct way. So, the web method of assembling the top was in order. I got down on the floor, folded the second column of blocks over the first so the sewing edge was on the right, then stacked them in order top to bottom. Then I stacked the third, fourth and fifth columns top to bottom.

Taking the first group to the machine, it was quick work to chain piece the first pairs.

Picking up the third column, I went back to the top and unfolded each pair, chain piecing the third block to each row without clipping threads.

Continuing with the fourth and fifth columns, the entire top is webbed in short order.

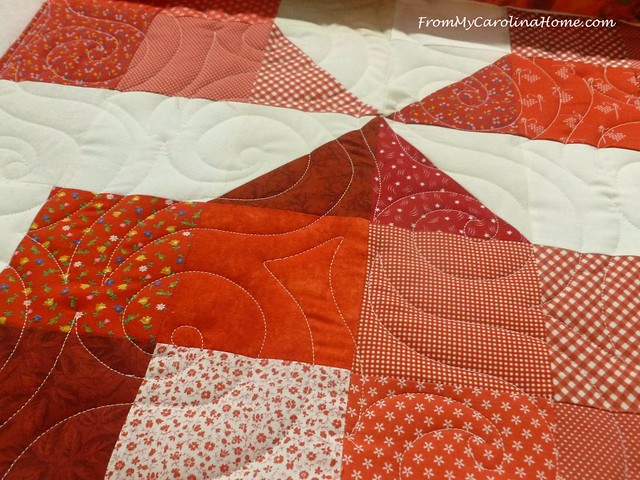
Then, pressing becomes simple as each row is pressed. The block seams on even rows are pressed to the right and odd rows to the left.

You can see how these will nest nicely.

A few pins make sure the rows line up.

Since I don’t have to get up and reposition between rows, I can sew almost continuously until the top’s horizontal seams are done. Really fast! I made a quick backing from stash fabric, cut some batting, and handed all of that off to my friend and fellow longarmer Linda to quilt. She will get it back to me after the holidays.

I have enough blocks to do my rainbow stripe that I had in mind from the start, plus another one of earthy tones in a bargello setting. So plenty to do when I get down to the sewing room. My Sweet Babboo and I have been playing a lot of pickleball, which is a good thing with all the holiday cheer around, LOL!! I made some of my Cranberry Biscotti for our group, and everyone enjoyed the treats between games. This time I left out the nutmeg and rum flavoring, doubled up on the vanilla, and did the drizzle topping with chocolate. Yum!! I totally forgot to take a photo of the full tin, and this half piece is all that was left.

I have enough students now to hold a January class on Well Loved Quilt Repair. Well Loved Quilt Repair pulls together my tips and tricks, and organizes the program according to the types of repairs needed. Everything from small holes, and dog chewed corners up to major damage is covered, with advice on starting your own repair business. Class time runs about 75-90 minutes, class fee $30 invoiced from Paypal in early January. If you’d like to register for the next class on January 12, 2022 at 2 pm Eastern Time (Central time 1 pm. Mountain 12 noon, Pacific 11 am), click HERE.
So, back to the frame, I’ll hopefully get the quilting finished on this one soon.
We have more Christmas fun coming up in the next couple of weeks, so not a lot of time to get to these quilts. But, I don’t need them done for a couple of months.
What are you working on this week?

That quilt looks amazing and yes, a bit tricky with the arrangement. You did it just right though! I’m glad you have enough students for a class Wonderful! They are lucky to have you as a teacher:)❤️
Hello, please tell me whee to find the mountain peaks quilt square pattern. I would love to start this one with the new year.
I’ve linked this a few times on previous posts, but here it is again – Safelight Quilts
What am I working on, you ask? I will be spending the holidays making more Safelight Blocks! I am still embarrassed!
Mary Ed
The red blocks are so pretty!!! and I LOVE this diamond setting! Can’t wait to see more of the creative settings you come up with for these blocks. Dropped some blocks in the mail this week for you. Thanks for sharing!!!!
That offset diamond setting is beautiful!! Makes me want to do one like that. Hmm, it may be awhile. But thank you for doing do much for Safelight!!
I have always loved this pattern and it is so pretty in red!
Your webbing instructions are my go-to for quilts that have a special layout that I don’t want to mess up! You describe how to do that so well. This red and white Safelight quilt is gorgeous, Carole!
Interesting, I’ve seen that pattern called Split Nine Patch; I made it years ago. Yours looks pretty and it’s really interesting how you lay out the pieces to sew. That looks to be helpful to try and figure out. Normally, I sew two blocks and a time and keep laying out the quilt on a bed. It’s way less efficient with my time, but I do get a lot more steps! LOL
See the step by step tutorial on a previous post on my blog – Speed Quilt Assembly
You do so much for the community. Thank you. There are 3 babies due this January so I am busy with Eye Spy Quilts. Found a pattern that uses 2″, 4″ and 6″ blocks so I can use the tiny 2″ blocks for the mouse and 6″ for the horses and elephants. I made this pattern for one of the mothers (Sea Glass version) so the baby will have the baby size. p. s. We have Pickleball across the street! I can hear them playing and laughing, listening to music while they play. Hugely popular in this area. Tournaments every day 4 pm to 7. Stop by!
I am interested in your Well loved quilt class- I saw a notice about one you are offering in Jan, but now cannot find the info. Are you having the class on Jan 12? I would like to join online if it is still available. I have a quilt I would like to repair. I do a lot of sewing, but have never attempted this kind of project.
Lynda Duncan.
Thank you for the explanation of how you web the quilt top to put it together. I’ve seen that method referred to by other teachers/bloggers but couldn’t figure it out. Your instructions are very clear, and it’s easy to see how to do it.
The Safelight staff must be so grateful for all that you do!