
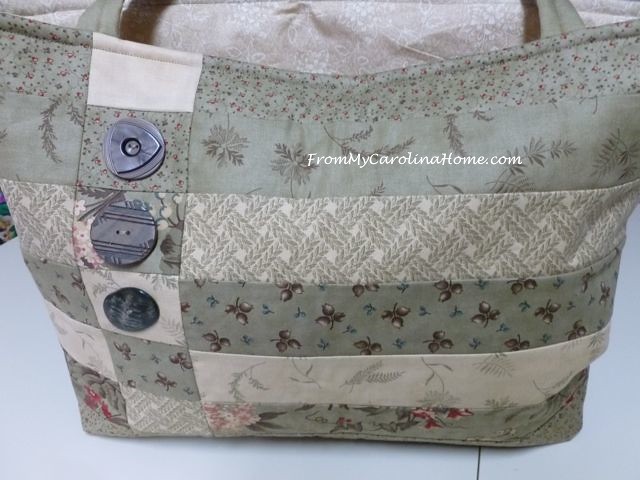
I had leftover strips from the latest jelly roll project, and I really liked the soft, sage green colors. I also had these wonderful large buttons suitable for a coat. Knowing I will never make a coat, I had an idea for using them on a tote. If you don’t have leftover jelly roll strips, just use 2-1/2-inch width-of-fabric (WOF) strips. I like the way this turned out, and it is very simple.
So here is what you need –
9 jelly roll strips
2 strips of batting 1-inch x 20 inches
Optional stabilizer, interfacing,fusible fleece or similar
Lining fabric 16 inches x 40 inches
3 large buttons
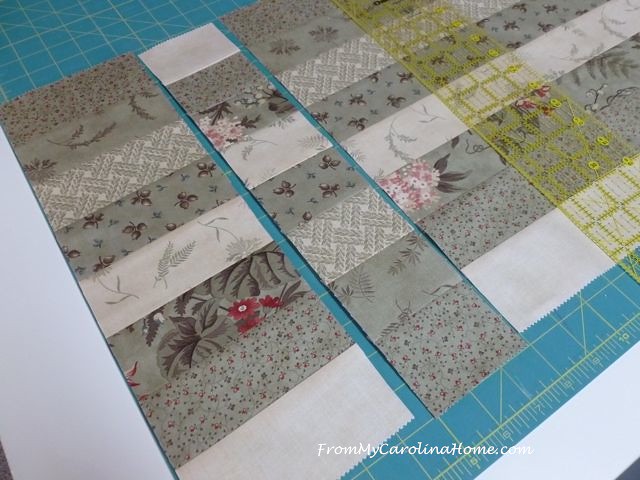
Select one jelly roll strip for handles and set aside. Arrange eight jelly roll strips in a pleasing matter.
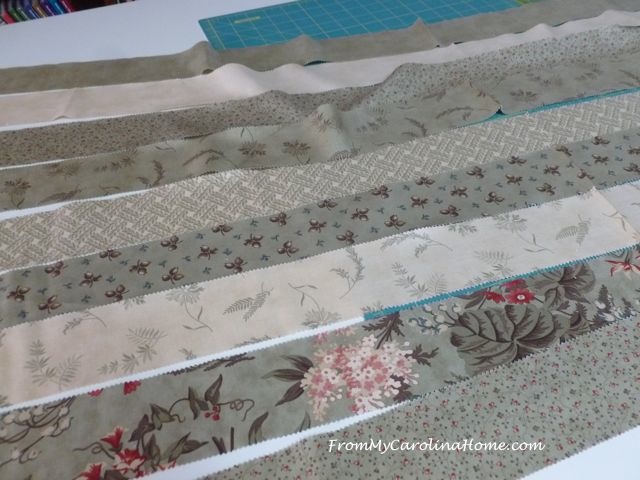
Sew together on the long sides to make a fabric piece 16-1/2 x 40 inches.
Press the seams in one direction. Remove the selvedge edges on one edge with a rotary cutter making a straight end.
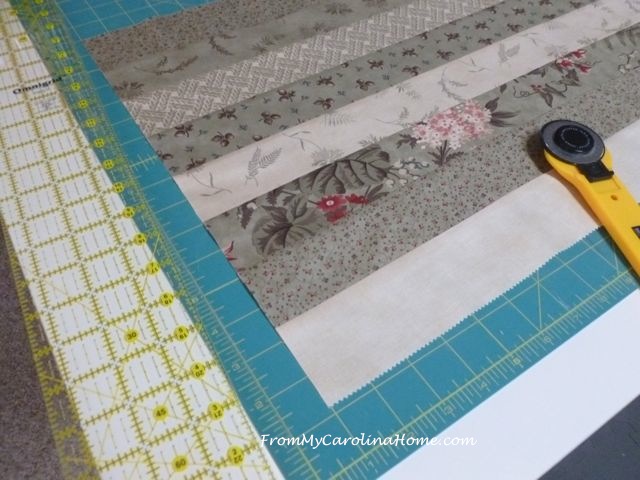
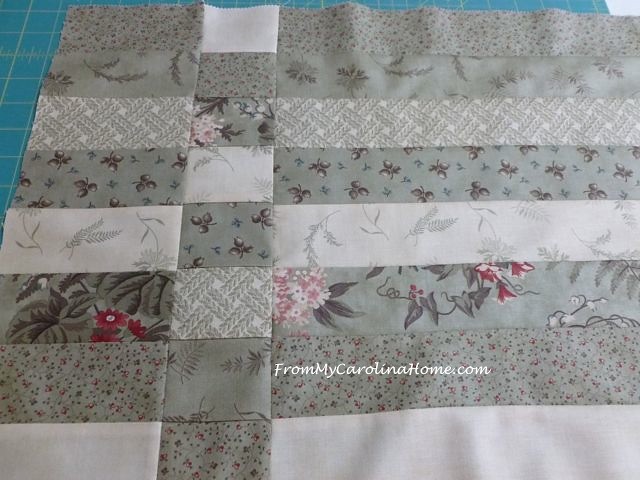
Measure five inches down and cross cut the strips. Measure three more inches and make a second cross cut. Reverse the direction of the strip created.
Sew back together nesting the seams.
Repeat for the other end.
Optional, add fusible interfacing or fleece, or other stabilizer to the wrong side of the strip piece to add body to the bag. If quilting is desired, complete that at this point.
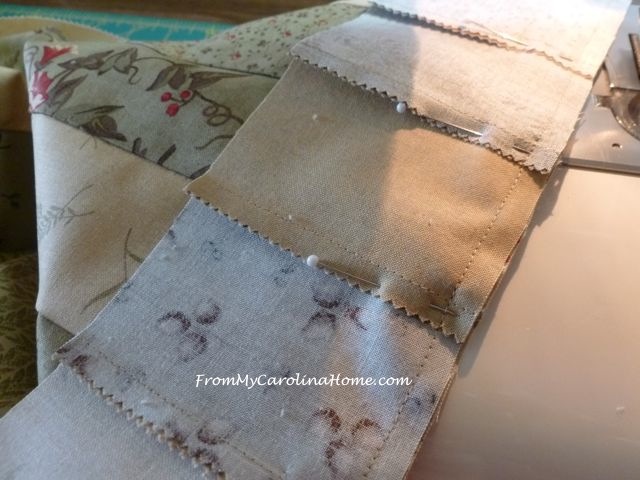
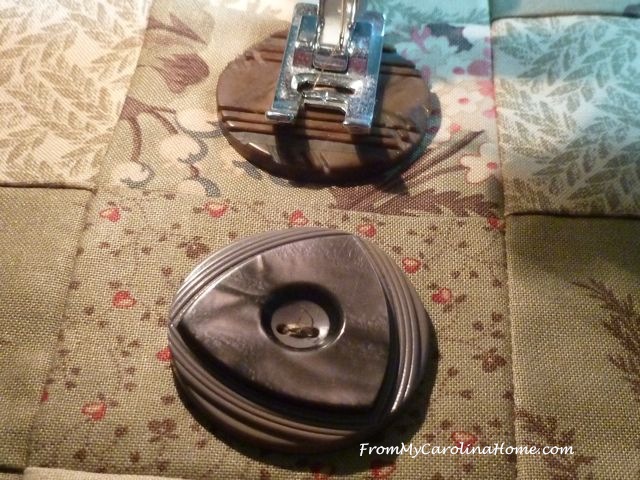
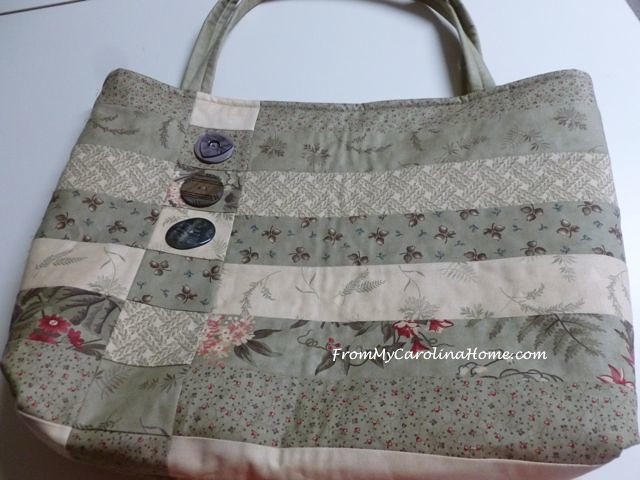
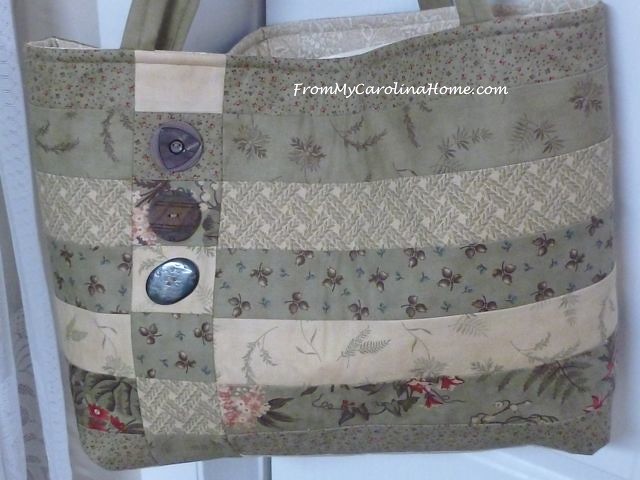
Add buttons or other embellishment if desired to three of the squares on the front side of the bag, leaving the top square empty, and starting with the second one.

I drop the feed dogs and put the buttons on by machine.
Sew the short ends of the strip pieced section together, and across the bottom of the bag. Leave the top open. Press seams open.
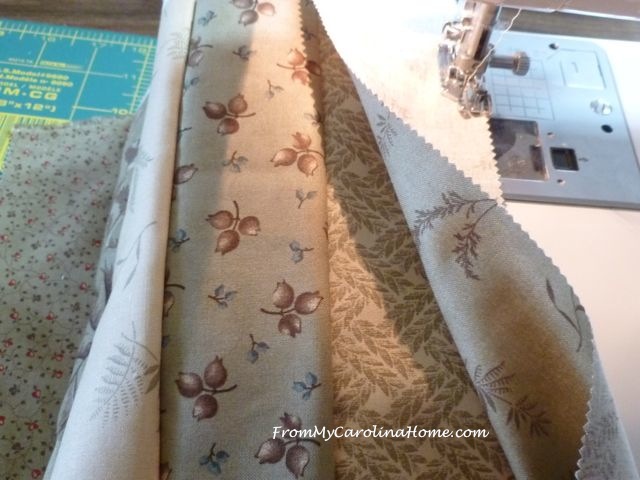
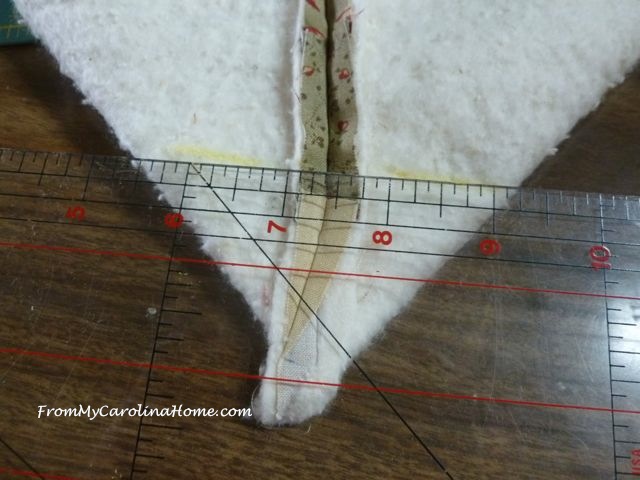
Box the corners by pulling the front and back apart right sides together, creating a triangle at the bottom of the bag and aligning the bottom seam in the center – see photo. Then, measure two inches in from the point, and sew a line of straight stitching across the corner. Repeat for the other side.
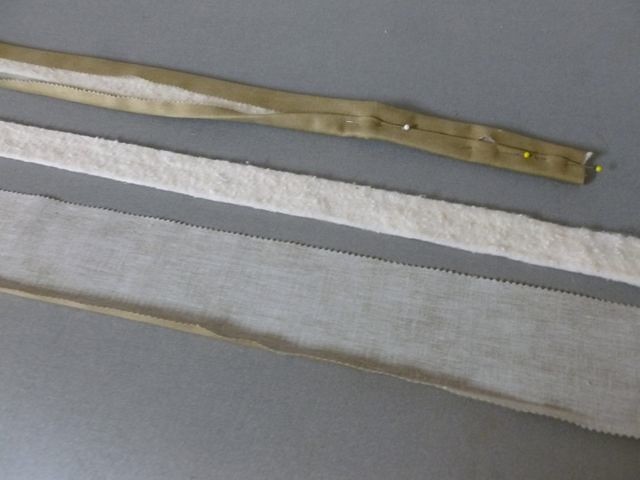
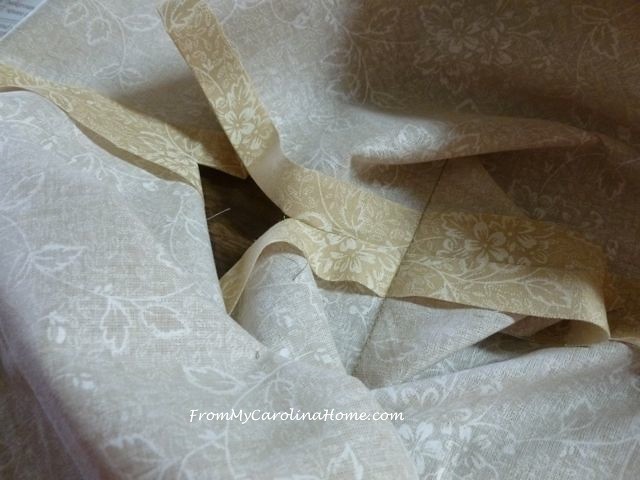
To make handles, remove the selvedge edge, and cut the reserved jelly roll strip in half crosswise.
Turn under 1/4-inch on one long side of each strip to the wrong side and press. Place a 1-inch wide batting strip in the center of the wrong side of the strip.
Wrap the raw edge over the batting and press.
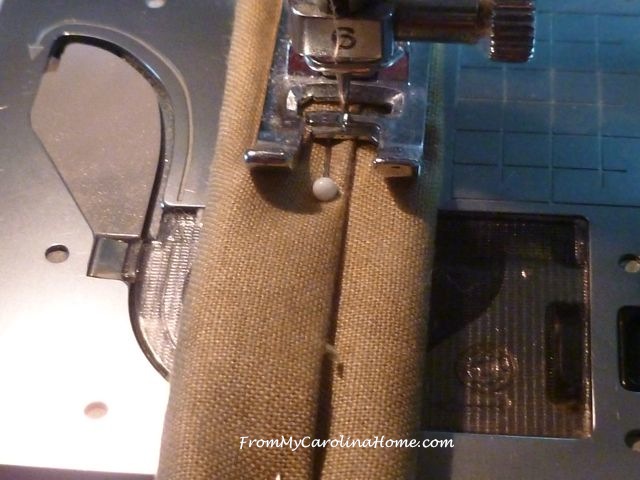
Wrap the folded edge over the raw edge to the center of the handle, covering the raw edge, pin and press.
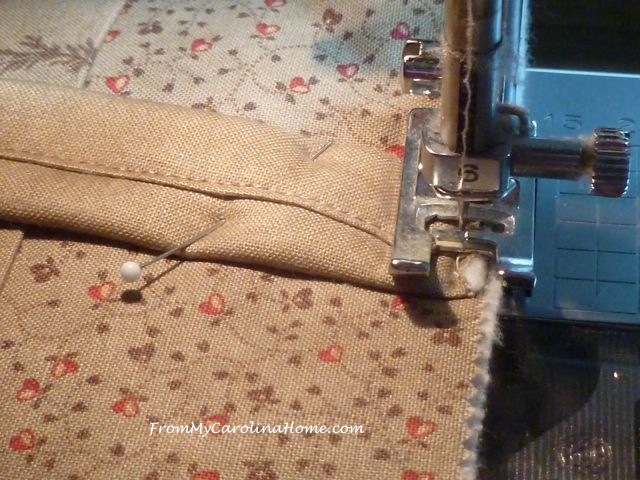
Sew a line of stitching along the folded edge securing the edge. Optional, sew additional lines on either side creating three lines of stitching for handle strength, and decorative interest.
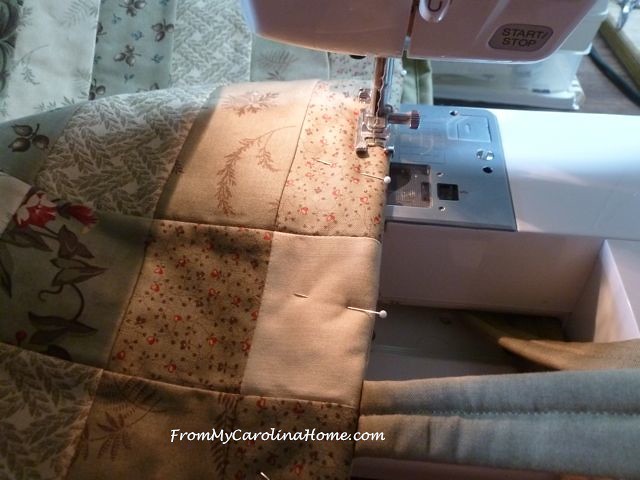
Place the handle ends five inches in from the sides on the front side, seam side up (right sides together).
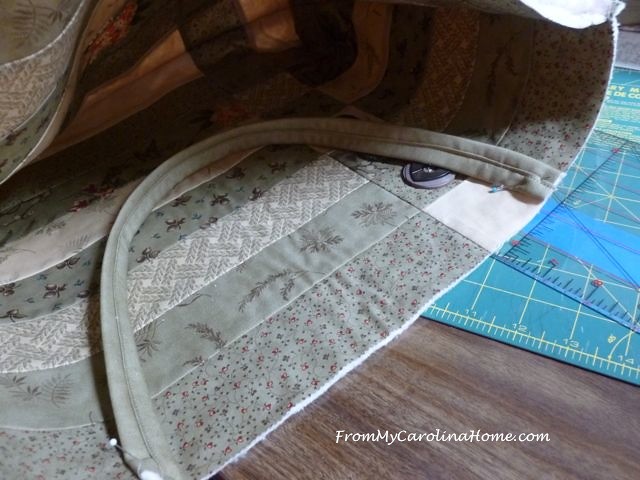
Stay stitch 1/4 inch from the edge. Repeat for the handle on the back.
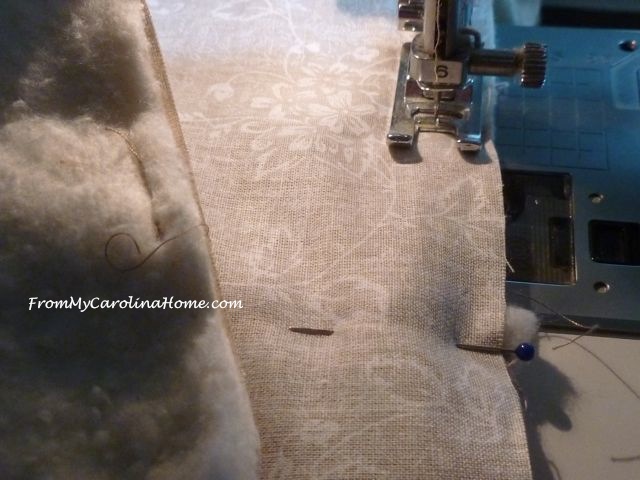
Sew lining sides and bottom, leaving an opening for turning. Box corners. Turn lining right side out.
Place the lining inside the bag right sides together, matching the side seam. Pin the top edge, and stitch with a 1/2-inch seam.
Turn bag right side out through the opening in the lining. Whip stitch or machine stitch the opening in the lining closed. Press the top seam.

Topstitch 1/4 inch from top edge. If a closure is desired, center hook and loop tape pieces on either side of the inside at the top and topstitch in place.
All done! This bag is simple and can be made in an afternoon! So why do I call it a Market Bag? Well, for my flea market finds, of course!!
So, what do you think of my Jelly Roll Market Bag? Do you have any leftover strips for a market bag?
Download the free pattern – Jelly-Roll-Market-Bag
My blog is a variety of subjects, quilting and sewing, tablescapes and recipes, book reviews and hand stitching, crafting and mountain living. I love to have new followers, too! See the buttons on the sidebar to follow by your favorite method. If you are visiting from Fave Quilts, Pinterest, a blog hop or link up, please stay a bit and have a look around, my tutorials are gathered at the top in pages to make them easy to find. Lots of fun is had here, and I invite you to follow with any of your favorite methods, see the sidebar for ways to follow.


See more of my Moda Bake Shop recipes on the sidebar, and more free patterns by using the pages at the top of the blog.
Fat Quarter Shop has a special 20% off Dappled Blues the Basic of the Month, 30% Off Mettler Thread, the Notion of the Month, check out the Precut of the Week and the Daily Flash Sale – something new at clearance pricing every day!
Amazon FreeTime Unlimited Free Trial
Shop Amazon – All-New Kindle – Our Most Affordable Kindle – Now With Touch
Sharing… Threading My Way Bags Tutorials, Lets Bee Social, Crazy Mom Quilts, Freemotion by the River, Now a Moda Bake Shop Recipe!, Now on Fave Quilts!, Val’s Tuesday Archives

Can always use a bag tutorial. Looks too cute to use at the grocery store! In our area, we are charged for each shopping bag the store gives us, so definitely could use it shopping.
So pretty, love the fabric, thanks for the tutorial.
Beautiful bag ♥
It is a beautiful bag. Thanks for the tutorial. Hope all went well with the surgery.
Very nice! Too nice for Flea Market Finds, tho! They are usually pretty grubby @ the ones I attend! I take a ratty one to those so I can just toss them in the laundry as needed! Best of luck on your surgical procedure. Fast healing!!
Thanks for this tutorial. Just to be clear that I read it right, is there just one main seam, down one side and across the bottom? Hope your procedure went ok 🙂
I really like the look of this bag. For me, it would be an everyday bag as it is so nice. I don’t have any jelly roll strips, but I can cut some. I pray you surgical procedure goes well. Thanks for the tutorial and the pictures to go along with the written instructions. Without them, I know I would have been confused about the cutting after the strips were sewn together.
Very nice bag and would probably be used for my crochet projects if I made one. I do love the big buttons….I LOVE BIG BUTTONS!!!!
It’s too beautiful to take to the market, unless it’s Quilt Market. Thank you for sharing the instructions. You’re too kind.
Good Morning Carole! This is a great tutorial on a beautiful tote! For some reason the variety of greys are really catching my attention like never before and my stash is almost null and void of greys. Tote bag tutorials are always a favorite go to project of mine when I just feel like doing something different than a quilt. It truly is amazing how many varieties are created with additions like turning your strips around and adding the buttons; making it totally unique and special. I know I will be making a few of your totes as gifts this holiday. Thank you for sharing and have a fantastic creative day!
Great bag! Thanks so much for the tutorial!
Lovely way to cut those strips to vary the fabrics. And large buttons, I have a lot, saved from when my Mum was a dressmaker many years ago.
I do hope the surgery has gone well, and you recover quickly, Enjoy some time of rest, and just to see those beautiful Autumn colours everywhere , is therapy in itself.
love it and you make it look so simple!
This will be a perfect Christmas gift! Thank you….love your muted colors, and the BIG BUTTONS!!!
That’s just lovely! And with the buttons and low-volume grays, it is a very ‘elegant’ market bag. I hope you are recovering quickly and easily from your surgery and are back to your sewing soon. Blessings.
Reversing the strip is such a great design element! You can never have too many bags! Thanks for the tutorial.
Great directions and photos as usual. I don’t need another tote but am planning a pattern hack of a messenger bag to make a new purse with several zippered pockets. Will downsize the MB bag directions, add one outside zippered pocket for my keys, one inside zippered pocket for my wallet/credit card case and an open one on the the inside back for my new iPad 6+S, subdivided to also hold a pen and a lipstick. Will see how this goes – I usually have a little bit of trouble making sewing something for me a priority, lol.
Best of luck for a quick recovery.
Wonderful project, Carole… Thank you!
… And, Best wishes for a speedy recovery!
Pat T.
What a pretty bag.
A great market bag!! Thanks for the tute on it. Hope you are doing well.
Thanks for the design. Simple & pretty. Hope sugery goes well.
REALLY CUTE!! And looks like something I could get finished!
I love the large buttons on the squares, Carole – a lovely tote.
What a beautiful bag! I love the button accents. Thanks for linking up to Elm Street Quilts Bag It!
Oh, how p-r-e-t-t-y! Thanks for the tutorial! Hope you are making out okay! XO
Great project. Loved the reversed stripe.
Thanks for sharing the tutorial.
Super cute!! So glad I found this through Val’s Link Up. 🙂
I always appreciate your tutorials. Your bag is so cute….perfect for school back and forth. 🙂 I like the added touch of the buttons. 🙂
I remember seeing this bag and tut before and glad to see if again. So classy.