
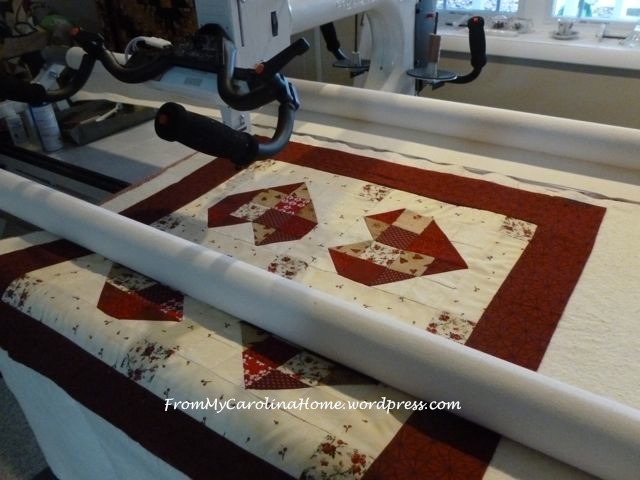
Quilting the Hearts Around Table Topper took longer than I thought. Click on Hearts Around to see the construction phase. The main issue was I couldn’t decide how to do it. After taking several free motion longarm classes last summer, I have yet to actually do an entire quilt with free motion. So, taking a deep breath, the ‘stand and stare’ began. I almost caved and put a pantograph on it, but I need practice with custom design.
The quilt was loaded on the frame just to be able to move forward, and the stand and stare continued.
For days.
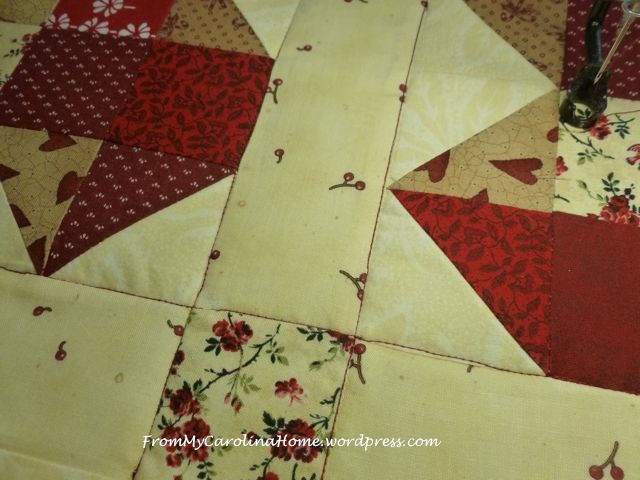
Should I use feathers? That really isn’t new as I have done those before. But if no feathers, then what? Ribbon candy, done that too. At least do one thing new! OK, for now, practice with stitch in the ditch. I am rubbish at this, but practice will build the skill. I got out my Quilter’s Apothecary straight ruler, and started in.
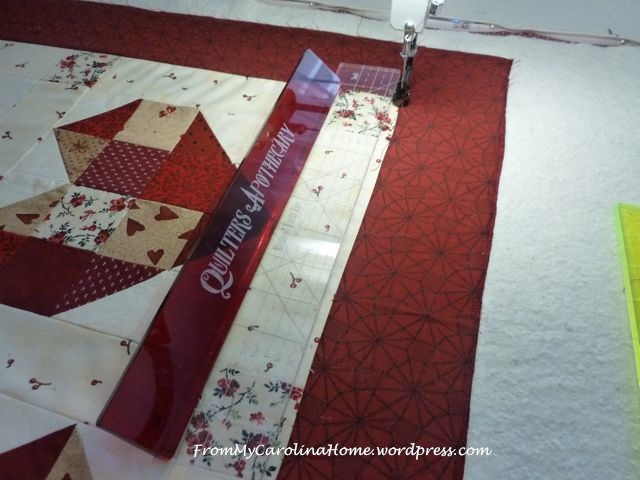
I have the smaller straight edge from A-1 for the interior smaller areas.
Ugh, what was I thinking! Red thread? The nice little planned outline didn’t go so well. Oh well, done now and I am not ripping it out.
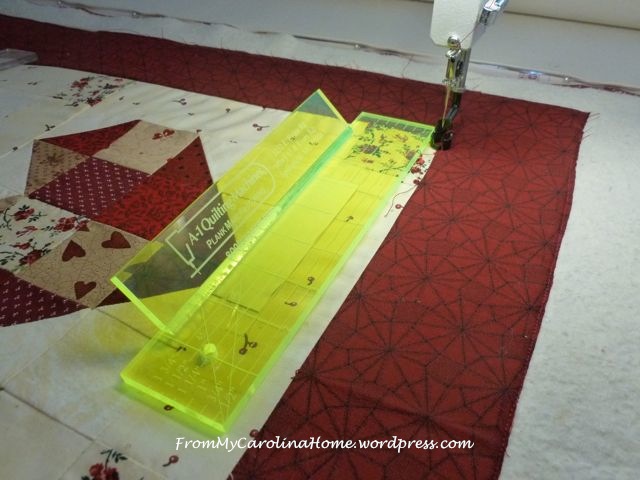
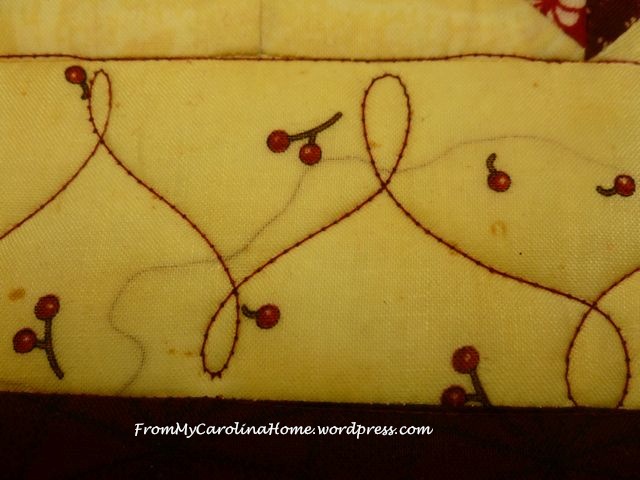
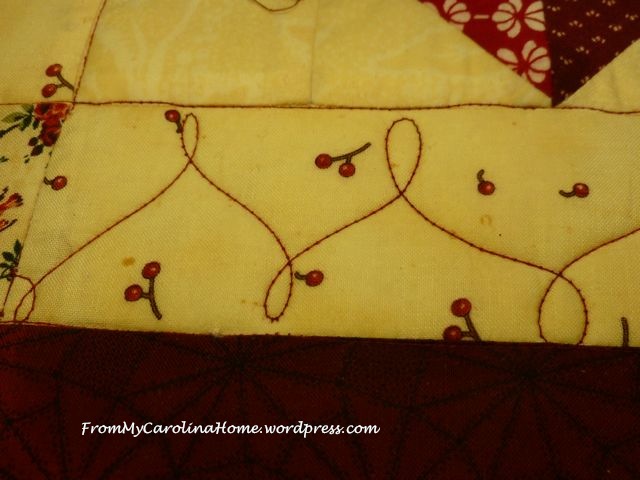
Using the paper method of marking intervals (no math!) I took another deep breath and marked my quilt top with the hash marks using water soluable marker. This is where I get scared that the marks won’t come out. But, with trust in Jamie Wallen, I did it.

Small hash marks made, just enough to show me where to loop.

Then I did the quilting, and oh crap! There is a dark red thread under the white sashing, and it sticks out horribly! The close up pics are somewhat yellow because I was using the longarm light for light.
So now what! I got out a tiny crochet hook, worked it through the fabric without breaking the fabric threads and fished it out.
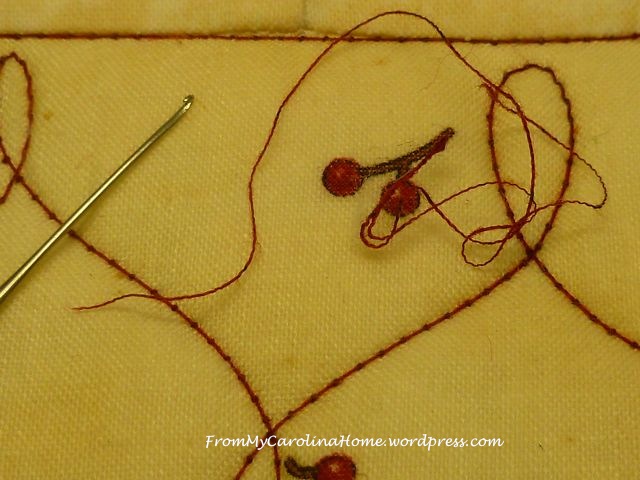
Then I scratched the hole with my fingernail to close it back up. Whew! It worked. I know I am supposed to trim the threads before I quilt!! I think I was too focused on the quilting and marking. I took the marks out with Sew Clean and water.
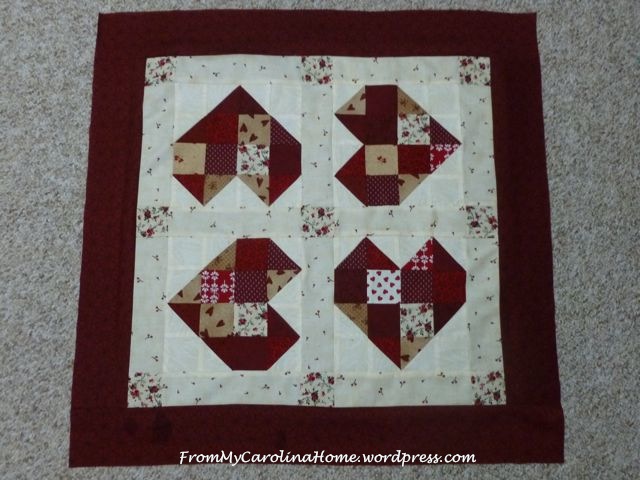
I marked the hearts with chalk, and quilted feather wreaths in each one. I started to make the feathers go to the corners of the background squares, but I had another idea I liked better. I wanted to stipple the background to make the hearts stand out more.
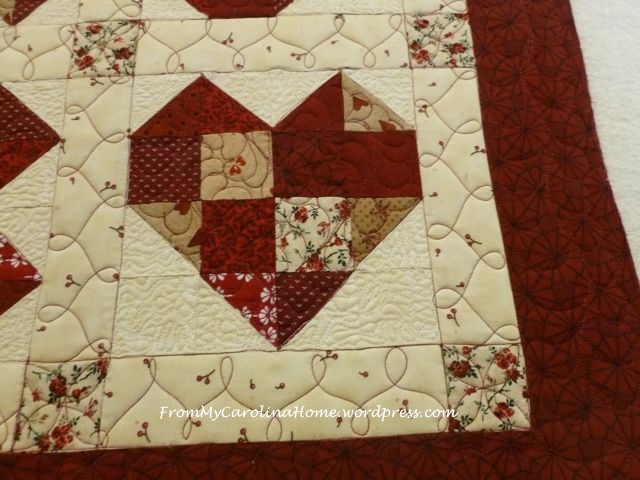
Here are the other hearts. I am still not good at this, many places have threads crossing over, but I am getting better.
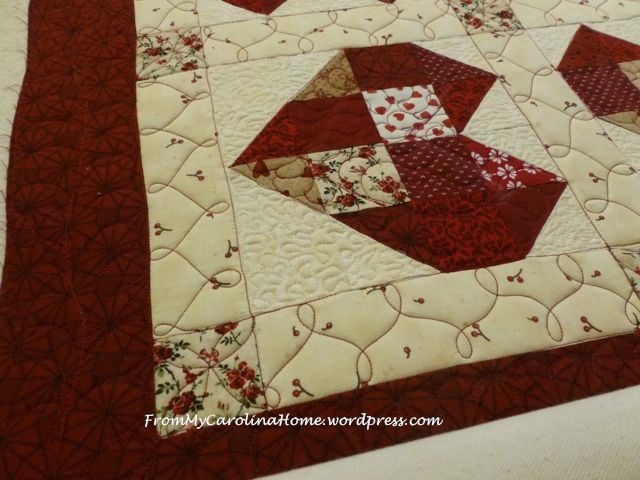
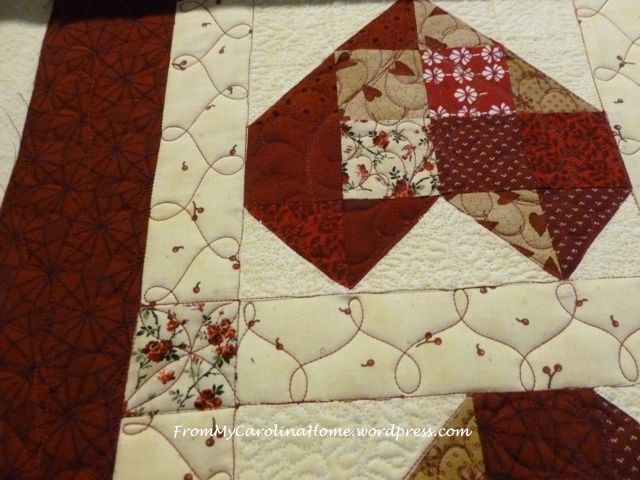
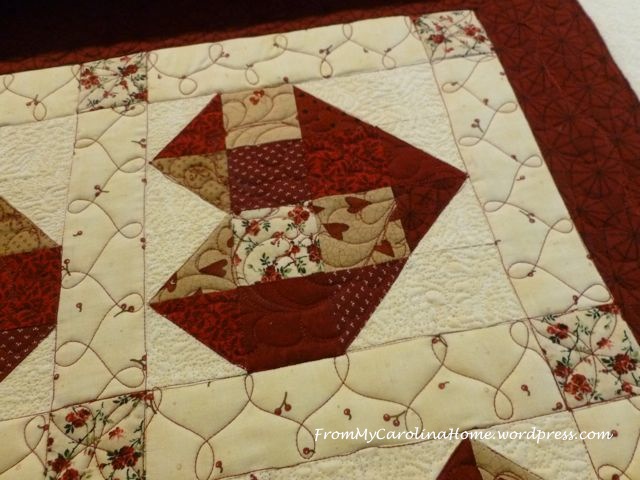
It is difficult to photograph, but there is a continuous line around the entire border of feathers.
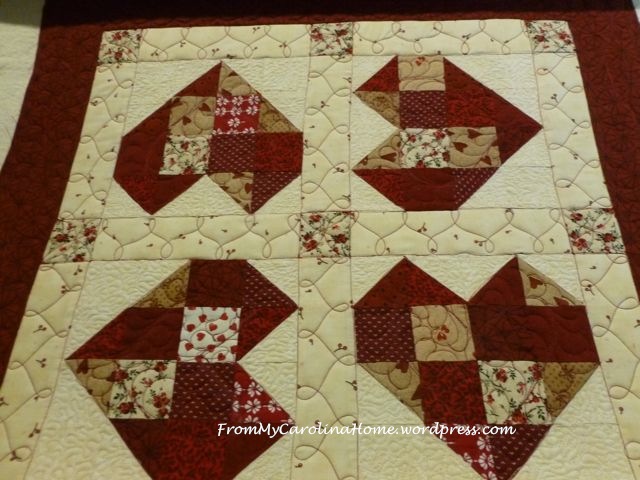
I used a different print for the binding, with a cream background for contrast.

This red-cream combination is so appealing to me right now. Think a whole quilt is in order? (Update – I did too!! See my Scrap Dance Waltz pattern in my Etsy store! Link on the sidebar.)
I am a FQS and Amazon affiliate, and may earn a small commission to support the costs of the blog from any purchases you make. You can use your existing accounts, and there is no cost to you. Thank you for using my links when you can. Click on the links on the sidebar to shop.

Great job, love your color combination… Scary taking that thread out….
Love it….the cream and deep red are so appealing and your quilting is great! What courage to do the free motion on a finished top….terror. You were very brave and it paid off!!!
It turned out great! Good job tackling your fears. I will be custom quilting my modern farmer’s wife soon and face some of the same fears. Following your advice, I think I will start with what I know: stitch in the ditch. Then try a block at a time.
Very nice hearts! I’m happy to know that I’m not the only one who has a stare down with her quilts 🙂
I’m pretty familiar with the ‘stand and stare’ method! Sometimes it just takes a while before the quilt tells you what it wants. 🙂 I think your quilting looks really good, and those colors are so nice together.
One of my quilt/art instructors called this step “refrigeration”. She put it in as an actual step.
I’d love to know the size of that crochet hook as I have had the same with black threads under cream fabric in mu Halloween quilt. Great that you were able to get it out. I had to smile at the stand and stare – definitely done that a few times.
It is a size 11 crochet hook. Thanks for commenting!
LOVE the red and cream… and I have loads of blue and white china, so to me, two color quilts make a lot of sense. When they get more than two I always think they need a punch in one of the colors! like red…. maybe that’s why I love the old fashioned log cabin with the hearth in the center, no matter what the other colors are, there’s always that punch of red!
Thanks for the encouragement on the mincemeat as well. I’ve had a recipe for years, always go back to Nonesuch, because that’s what Grandma used, and I love to make mincemeat cookies…. but butter instead of suet would definitely make sense for my vegetarian friend. I just never told him that mincemeat has a tiny bit of meat in there somewhere! and the jarred stuff really only has lard or suet just for richness. Very old recipes (I have one of those as well) truly has bits of meat, because it was made at the end of the butchering…
Sharon in CO
It looks great! You don’t need to fear the FMQ at all!
I think your quilting is awesome. I am really impressed and I am more impressed at how you got that little stray thread out. I would have been more frightened doing that than the quilting! Keep using your longarm – practice makes perfect (well pretty good cause no ones perfect). 🙂
Pinning this because I learned a whole lot of new things just now. The whole interval marking thing – genius! Totally going to try that with my next quilt. Like the others, I’m impressed that you got that stray thread out. Never thought of doing something like that!
I’m also impressed you got the stray thread out. I like that you share your anxiety with choosing what to quilt etc. The quilt looks great.
It looks wonderful and you know I have a teeny tiny crochet hook that I use for the same thing.
Would you believe I just learned to stitch in the ditch with a ruler last month!!! I tried that ruler with the handle and didn’t like it….think I like my hand flat. Soooo appreciate the tut about getting that sneaky thread out! LOve that I always learn something new from you Carole. 🙂
Carole, I am interested in learning more about that paper strip you used to space your quilting design.
Thanks for the tip!