
Recently, I was discussing borders with a lady after her quilt was done. I asked if she had measured the borders and she said yes she had. But they were too big, and it occurred to me that I have not yet talked about why you need to measure a certain way to get the result you need. I had Scrap Dance Waltz in progress, and used three blocks to illustrate this concept. So, do you ever ‘do the math’ when you are measuring your borders? I am willing to bet that 98% of you will say no. What I mean by this is figuring out what the border should be, then measuring correctly to see if it is close.
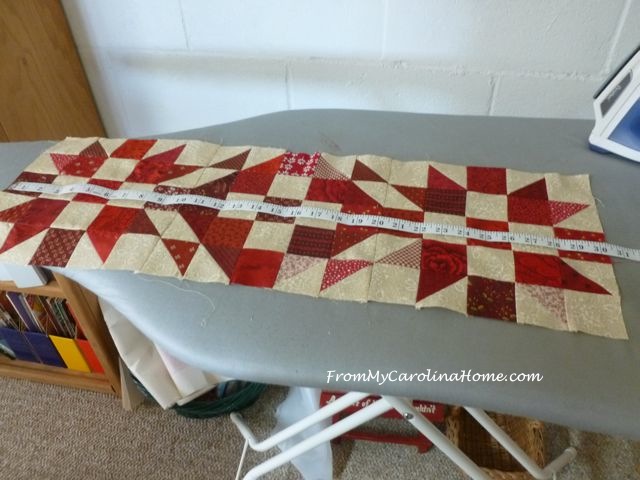
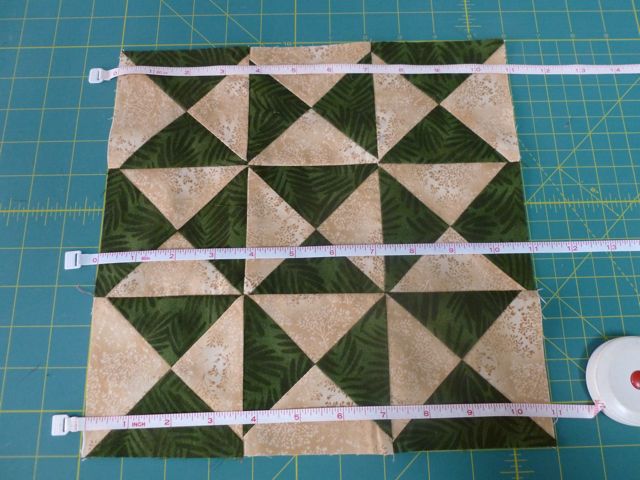
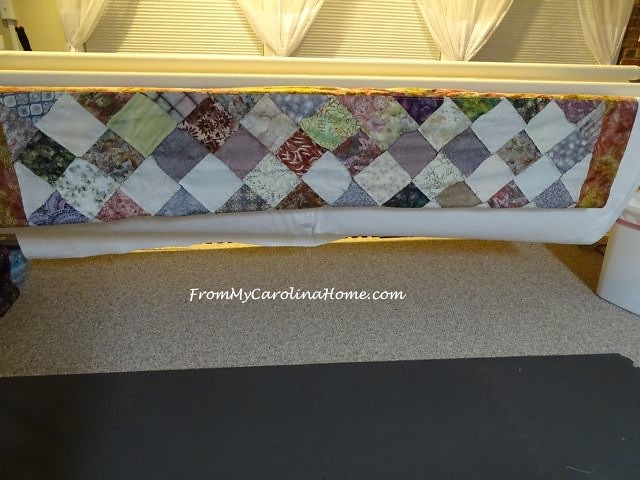
So here I have three blocks, each finishes at 10 inches. Three blocks x 10 inches = 30 inches + 1/2 inch for seam allowances (1/4 on each edge) = 30-1/2 inches. That is the target. So if I measure the border and get 33 inches, it isn’t right, not even close. So, I lay out the little 3-block quilt and measure in the middle. Guess what, just a smidgen under 30-1/2 inches!
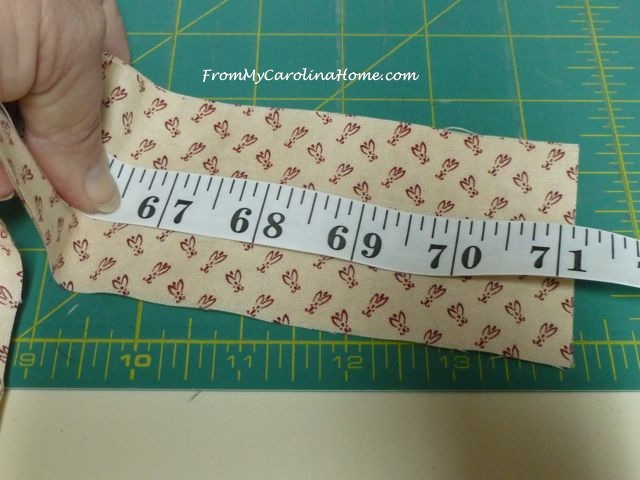
OK, now I am going to pick up the quilt, and measure on the edge by sliding the quilt edge and the measuring tape in my hands and working down the quilt edge. You know, pulling both through my fingers at the same time, this should put the tape along at the same rate as the fabric right?
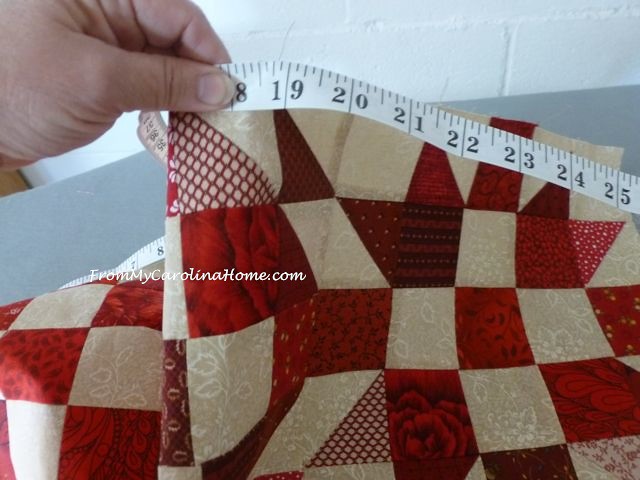
Wrong! Sliding both the edge and the tape through my fingers gave me a different answer. And it was enough to be a problem, 31-5/8 inches! I promise, I didn’t make this up, try it yourself to see.
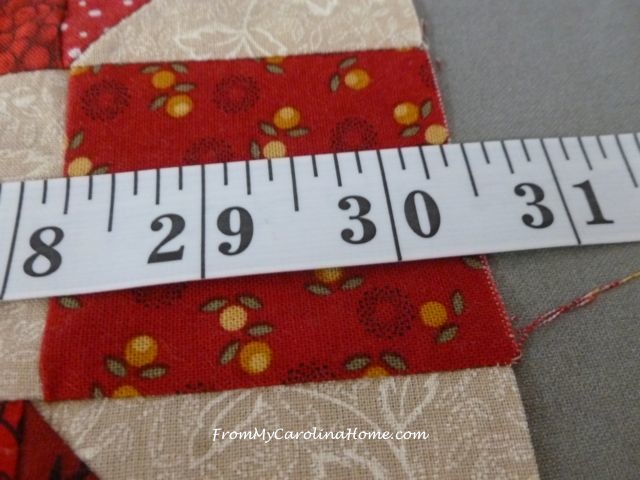
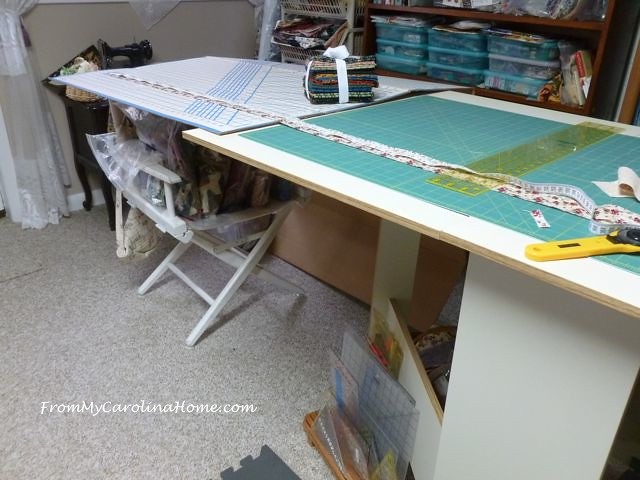
More than one inch of excess fabric would be added in that border using that measurement, and it is only three blocks. Take that up to five or six or nine blocks and the numbers just get bigger. So, how you measure the quilt flimsy is important. How you measure the border itself is also important. Using the proper method, I measured the first border for the Waltz quilt. I needed 70-1/8 inches. I set up an extension of my cutting board with a chair and a cardboard sewing mat.
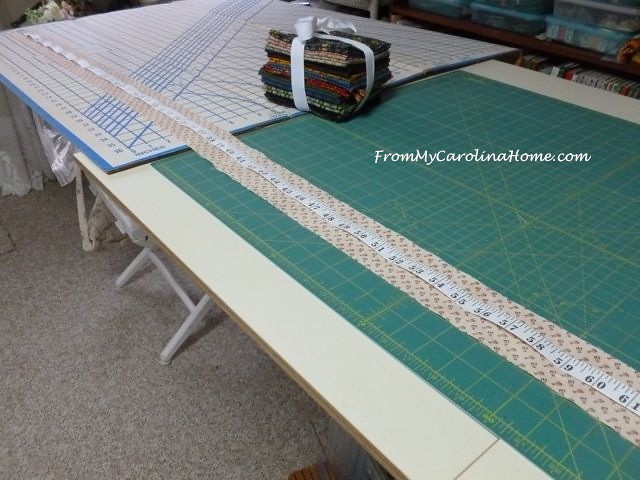
Measure the border by laying the measuring tape on top and carefully smoothing it. Slip the cutting ruler under the tape and be sure it is in the right place.
Then cut it to length.
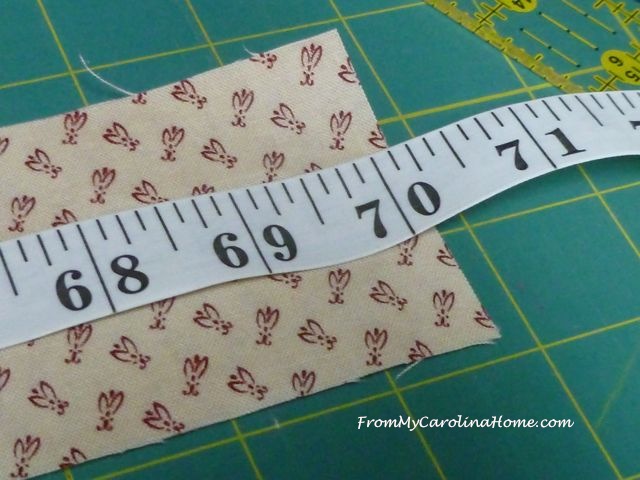
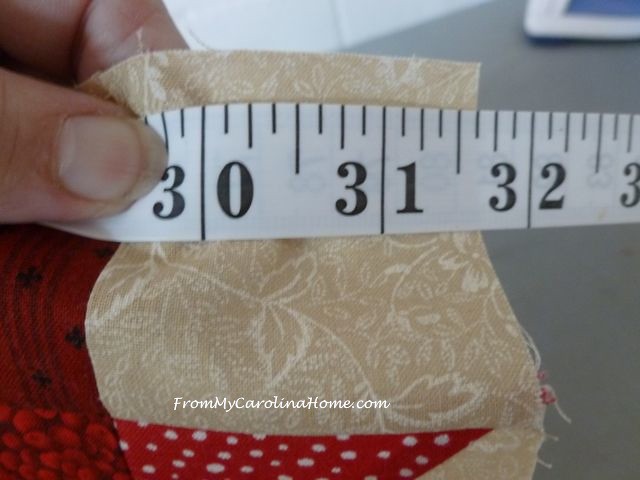
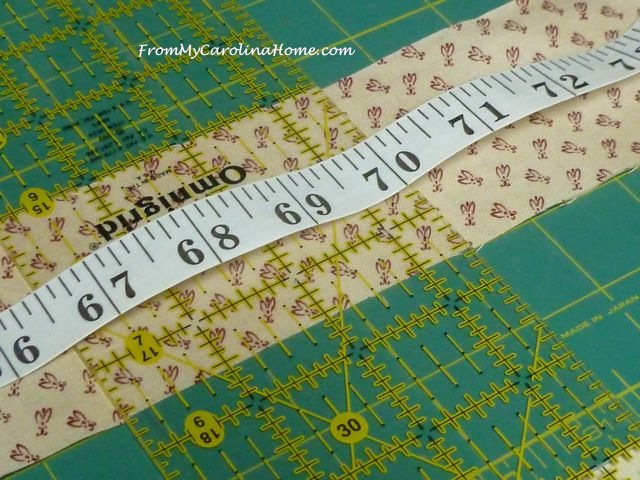
Then just for fun, I ran the cut border through my fingers to measure it again just to see what would happen. Oh my, again the measurement comes out too long! Measuring the border this way will make it too short, and will result in excess fabric migrating to the middle of the quilt, in this case a full inch.
Here is a better look at the setup I use, with a director chair under the cardboard extender. I have the rose print border on the cutting table, which is the center one on the Waltz quilt. If you don’t have the space or a way to extend your cutting surface, then use the floor. You can also do a bit more math and fold the border in half to get it onto a table, just be careful where you cut.
Ideally, take three measurements on your quilt top, one in the center, and two more between the center and each edge. This picture is from a while ago, today I would use the center of each row as the measuring point on a nine block quilt. On larger ones, I’d measure the center first, then halfway between the center and the edge on each side of the center.
So, why take three? Why not just do one in the middle? Well, because while the center measurement is often the smallest, it might not be. It is much better to do three and take the average, and round that as needed. I hear fellow quilters whine a lot about the math, then whine that their quilts aren’t flat. Get a calculator, it isn’t that hard. Sometimes you don’t have to, all the measurements come out the same, that is golden! But often there isn’t more than a 1/2 inch difference between all three. Use the measurement that is between the longer and shorter measurements to cut your borders. It isn’t difficult to work in an extra 1/2 inch in a border, what is hard is working in two or three inches because it wasn’t measured right or it was done by the slap and sew method. (See my tutorial Quilt Borders Understanding the Why) But, know your target.
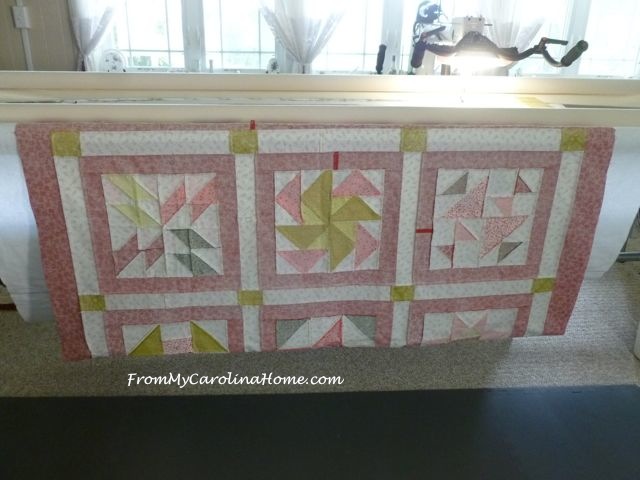
So, lets say that you all are doing the Scrap Dance Waltz quilt – this one. The blocks are 10 inches finished. What size should the first cream color border be across the top and bottom?
Answer – 5 blocks x 10 inches + 1/2 inch = 50-1/2 inches. Your measurement should be close, allowing for some variation in piecing.
OK, now do the vertical border, assuming the cream border is 2 inches finished width.
Answer – 7 blocks x 10 inches + 2 inches cream border on top + 2 inches for the bottom + 1/2 inch seam allowance = 74-1/2 inches. If you measure and get 76+ inches, they are definitely going to be too big. Go back and measure again, making sure you are not distorting the quilt while you measure it. If you get 75 inches or 73-3/4 inches, it is probably correct for your quilt, assuming that is the average of three measurements. You have a target to shoot for, so you will know if it isn’t right.
Once again, once you are completely done with your properly done borders, do this trick to be sure they are good. Lay the quilt on a straight flat surface with the inner border seam at the edge. A bed or a long table will work, or if you just don’t have that kind of space, use the floor. Bring up the bottom of the quilt up to meet the top, placing the border seams on top of each other, step back and look at the bottom of the fold. If it bows up in the middle like this one, you need to remove the borders, remeasure and try again.
It should look like this, straight across the bottom, indicating the middle and the sides are the same length, which will mean the borders are flat without excess fabric.
How about a New Year’s resolution to do your borders better in 2017? Whaddya say?
Update – This post has gone viral, LOL!! And I couldn’t be more delighted to get the word out. If you are visiting my blog for the first time, welcome! I hope you’ll look at my other quilting tutorials that are popular as well, just click on the Quilting Tutorials page at the top of the blog. I also have lots of projects too, on another page.
Thanks for reading and happy quilting!
Carole
My blog is about a variety of topics, quilting and sewing, crafting and cooking, reading and travel, mountain living and gardening, and more. You can follow my blog in several ways, see the sidebar for email sign up or blog-reader links. I have lots of free patterns for quilters, mystery quilt alongs, holiday quilt alongs, and seasonal events with giveaways. Please follow me for all the fun! New projects coming up!!
Fat Quarter Shop has 20% Off the Basic of the Month, and the Notion of the Month, books and patterns too, plus check out the Daily Flash Sale – something new at clearance pricing every day!


Thank you for the reminder!
I’m currently at war with a twin sized quilt and was SO tempted to just apply the border & trim. (Horrors!) I have to figure out a large workspace, will use your suggestions.
Love your blog, BTW!
Horrors, indeed, LOL!! For those who haven’t seen it, I have a full tutorial on applying borders correctly and understanding why it needs to be done a certain way. See the post Quilt Borders Tutorial Understanding the Why. I do two identical quilts two different ways and show readers the ‘why’ as well as the ‘how’.
Excellent post! I didn’t realize there was such a discrepancy between measuring flat and withe the fabric and tape through the fingers. This explains several things….!
Thank you for the very clear instructions. Well done.
thank you. this was a hard learn for me. now that I use this method of measuring my quilts don’t have wavy borders anymore.
Thanks for the reminder….I usually do this but on my last quilt I didn’t bother…..now the borders are like a ruffle!
Crystal in Cedar City
Interesting. When I am using pieced borders, I piece them to be the size of what they’re being attached to, and if they don’t come out close enough (usually 1/4″ or less) I adjust seam allowances to make them fit. If I have unpieced borders, I measure the fabric directly to the center when possible, and then they fit for sure. I’ve quilted enough donation projects (pieced by others) to know not everyone knows how to do this. But in truth, it NEVER would have occurred to me to slide the tape and fabric through my fingers at the same time. No way would that be right! Thanks for the explanation.
THANK YOU! You have a great way of explaining. I am a self taught quilter and never knew this. I have been doing this wrong for 15 yrs and now the finished projects will look better and not be a headache.
Thanks for writing this post – every quilter should read and heed! I have been teaching quilting classes for 25 years now, and this is definitely an area that many struggle with. I teach my students to take five measurements and average them – the edges, the middle, and roughly halfway between middle and edges. Edges can be stretched, and if the blocks are on point, the middle can be stretched too, especially if the top has been handled a lot. Averaging five measurements works well.
Laying the top on a smooth hard surface is equally important. Thanks for bringing this valuable info to your readers.
Thanks for a great post! I measured the middle for the quilt I’m working on now and I think it’s better than when I would just sew the border on and then trim. For cutting, I folded the border in half and then cut at half the length of the border, but didn’t think about laying on the floor. Hopefully I’ll see the benefit when I quilt the borders!
Excellent post with so much good information. Thank you….
Excellent post. Definitely a keeper. Thank you.
Great tute! I can’t tell you how resistant some of my quilty friends are to taking simple, accurate, flat measurements in multiple places – how hard, after all, is it to “do the math” with three numbers that usually just differ by small fractions, at the most.
For the non-floor folk, using a conference table at the library, church or community center is well worth the extra effort for large quilts.
Thanks for a great lesson, I have been careful with my measurements, but have never done the math, using the block sizes!
I take the actual border piece and lay it down the center right on top of the quilt, pinned at one edge and carefully smooth it down. Then I slip a small mat under the other end and make the cut. I have done mostly lap size and baby quilts so this works for me. But your directions are very clear and will hopefully cure quilters who just take the border and sew it to the quilt without measuring.
In CA, I frequented a LQS with a massive classroom space. They devoted several tables to just layout and measuring. We all took advantage of “free sew” days by bringing our tops and fitting them with borders. Heaven! I don’t have that luxury here in MT, so I use either my long-arm table or a queen-sized guest bed. The floor and I don’t get along :-). Have you ever tried folding a top in half (one direction at a time) to save space? Theoretically, if pressing and folding are precise, you’d only be missing the fold measurement, which can’t be more than a few threads. I may experiment on my next top. Thanks for the lesson behind the lesson. As always, very informative!
Thanks for sharing this tutorial with Oh Scrap! As a longarm quilter, I know borders are where a quilt usually gets wonky.
This is always a good lesson to re-read, and remind myself to do. I have an older UFO with wonky borders that I really should fix so that I can finally quilt it!
Thank you, Carole. I needed that tut. The lady who is teaching me at the center helped me with my Trip Around The World border telling me how to do it, but I really didn’t understand it until now. Thanks again!
Another great teach-able moment! Excellent information to keep and read and read and keep!
Thanks for the lesson on the borders. Always nice to learn how to make those quilts turn out better. I had started measuring in the middle, but only measuring once. I will try the 3 measures for the next one.
I never used to measure my borders. I would just add strips longer than the width & length and trim the excess. Since I’ve started measuring them I’ve noticed a big difference in the finished piece. Thanks for all the tips, Carole!
Hi Carole I have now joined up with my snowbird “Sewing Sister’s” friends in Yuma, Az. This is were I started quilting about 6 years ago and have enjoyed the sewing and the company. We have some wonderful quilters who have shared many great lessons, their experiences with sewing tips along with show and tell. I would like to post your web/blog page, your tutorial have been so helpful to me and we always have newbies. We have about 30 regular quilters that spend many hours in our craft room that we are so lucky to have allotted to us for sewing. Thanks again for all the time you spends helping us with the right way to do the job.
Great post! I know of more than a few quilters who avoid borders whenever possible.
I read this yesterday but never commented. This is a lesson everyone should learn and practice.
First, it is absolutely worth it
second, you put effort in to the piecing and connecting. Don’t stop – it’t not over yet 😀
A very useful reminder. I’ve also reread your earlier blog post. I had only started quilting when I first read your earlier post and its basic message about measuring and borders has stayed with me. It takes me too long to make a quilt top not to take the time to add borders correctly.
Great post Carole, I always measure all 3 measurements before cutting a border and recommend that in my patterns.
Great points. I’m loving your table. I’m always crawling around on the floor when I cut border lengths. It’s interesting I learned to measure once through the middle but I can see the value of measuring 3 times.
Very clear and great tutorial! Thank you for linking up. 🙂
Hello Carole! It is a tad past 10:30 pm, so just was not quite sure how to start my comment. LOL. I have read and reread each of your tutorial posts on borders and measuring. Yet, it just did not fully click in my brain. This tutorial post made perfect sense to me! I have to admit I have done the measuring of borders in both ways that you show and have encountered many problems. I will have to have Hubby help me create an extension for our kitchen table since I really can not get down on my floor due to the severe arthritis in both of my hips. Thank you so much for continually writing tutorials on this subject to make sure that every quilter does understand the process of doing this important step correctly! Your tutorials are fantastic Carole! Never stop writing them!!! Have a spectacular day tommorow!
Thanks for taking the time to write this up. A curve, no matter how subtle will measure differently than the straight. The Bonneville Salt Flats aren’t really flat now are they?
Thank you for a great lesson, I do usually measure across the middle of the quilt for my border lengths, but measuring three times and taking the average is a great idea!
Great tutorial, love the pictures as I am a visual person. Keep up the great work teaching the proper way to piece quilts. Kudos!
Loved these tutorials as I am newer to this process. One question, do you recommend doing sides or top/bottom first for borders. Are you using the WOF and joining pieces to desired length? Thanks for your help.
Please tell me you have a video explaining all this. I am a visual person and understand so much better. I read your post (very good by the way) but it’s just not soaking in. Thank you
Great post. Would appreciate your thoughts on pros/cons of the type of ruler to use when measuring. I use a metal type ruler for any thing longer than 12″ to avoid potential stretch of cloth/vinyl tape measures. Also having to do repeated placement of a ruler to short to reach the span of the quilt challenges the accuracy of the measurement.
I have a flexible tape measure that is 120 inches long, my go-to choice for measuring. I don’t find that the tape stretches if it is measured without stress, laying it on top of the fabric as it is laying on a flat surface. Thanks for asking!