
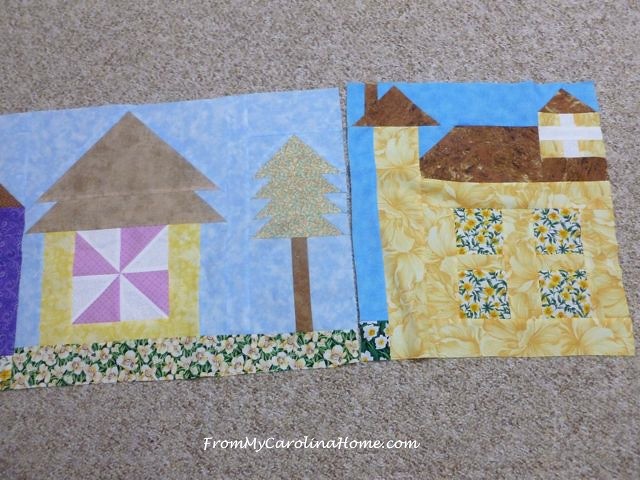
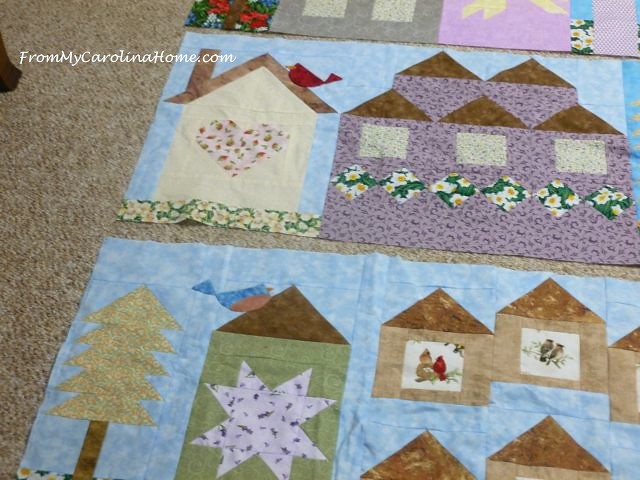
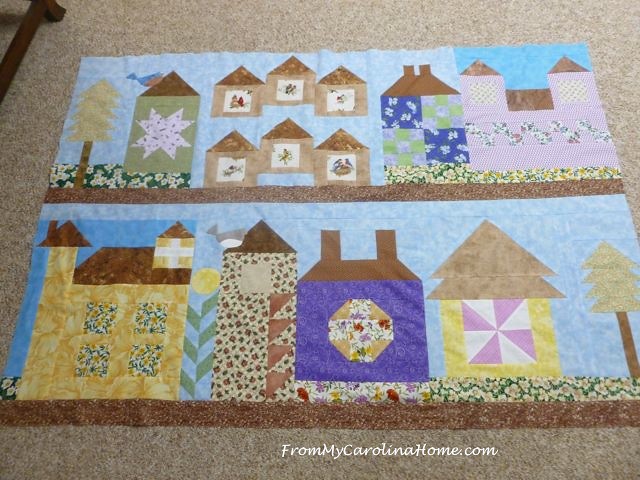
When I left this at the beginning of the week, I had realized too late that I made two yellow houses to go next to each other. One of those ‘oh, no!’ moments. What is the good of having a plan if I don’t stick to it? Well, perhaps it is to let you all know that mistakes happen, and there isn’t anything that cannot be fixed in some way. I make plenty of mistakes normally, but this quilt has certainly tried my patience. So now, time to punt yet again.
The first thought I had was to just move this block to the opposite end. But, I have made one block in each row with the darker color blue, and this would put two right next to each other in the first position on two adjacent rows. So I thought, I’ll swap the two, but as you can see, they are not the same width.
OK, leave the house in the fourth position, then I realized that the house in the same position on the first row was also yellow. Good grief.
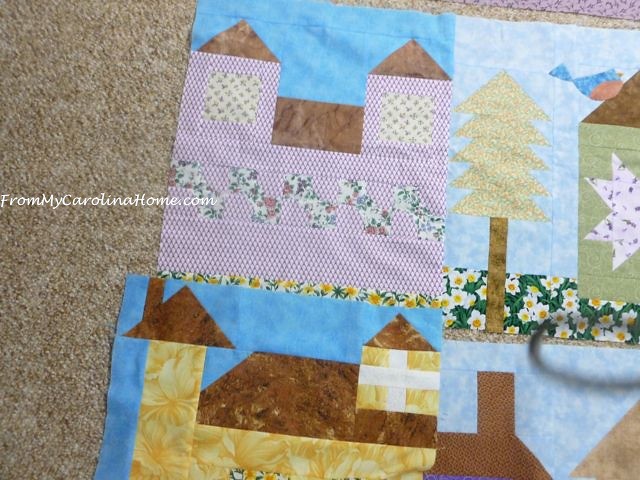
So, maybe I move the last house to position one, but again, I end up with the two dark backgrounds in the same position on two rows, plus it doesn’t separate the yellow very well.

OK, so this row goes back to the bottom. The only thing that makes sense now is to rip the first block from row 3 and put it on the right end, so the dark blues are again distributed evenly.
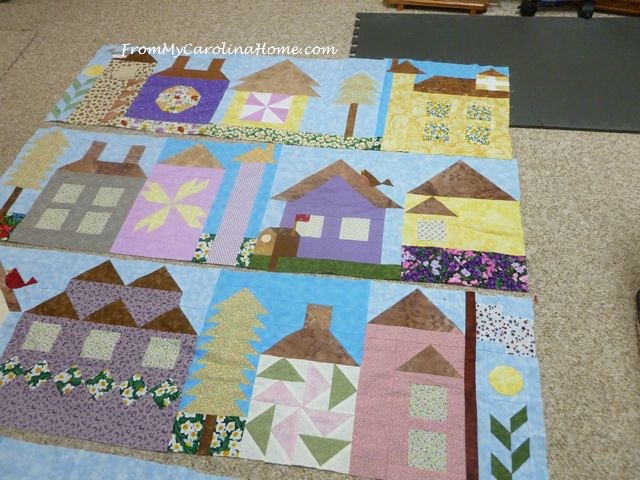
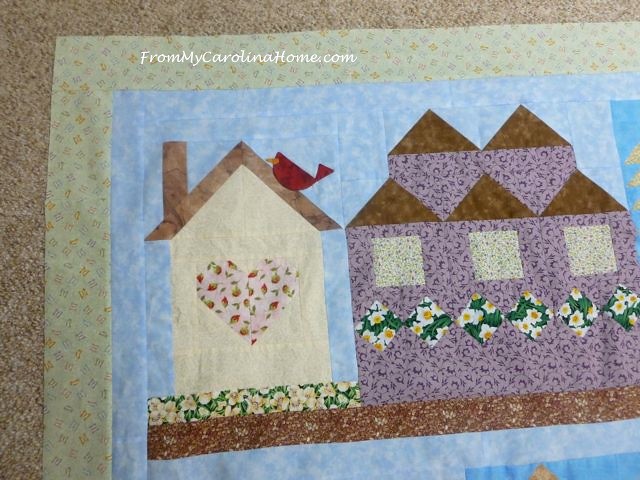
That is looking better, but now I have birds on two blocks in the first position on adjacent rows, when they were spread out better before.
But I am not ripping up an applique, LOL, I draw the line there! So, the only thing to do at this point is to swap row one and row two. OK, maybe I have a good layout now with the colors and the birds well distributed from a design standpoint. I’m good with it, so this is ready to finish up.

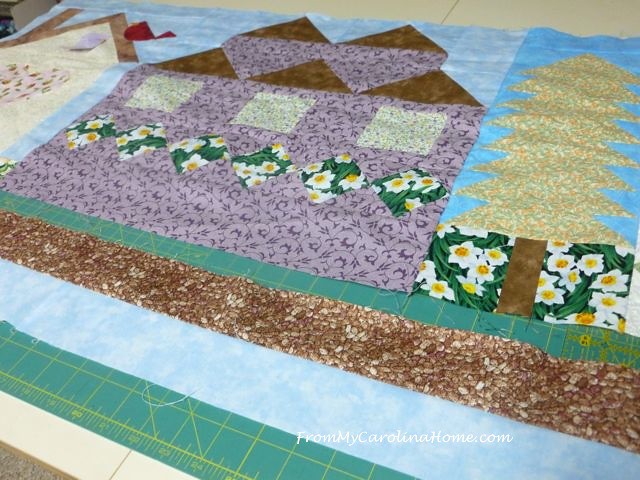
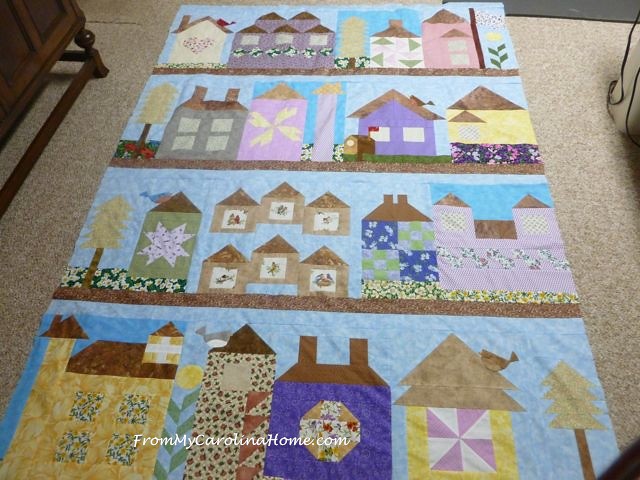
I sewed the end blocks to the rows on the third and fourth rows. Then, I begin cutting the sashing strips. I use one strip of sky and one of pebble fabric for road between the rows and across the bottom.
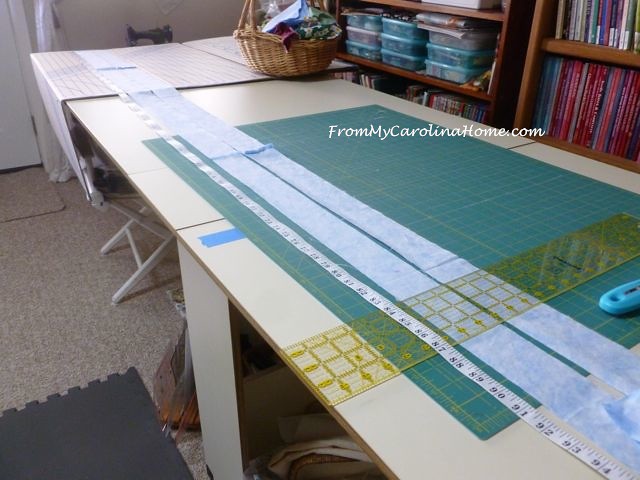
Cutting the strips to measure 60-inches, and pinning takes the longer set up of cutting board and pin board.
But, in short order the upper two rows are together.
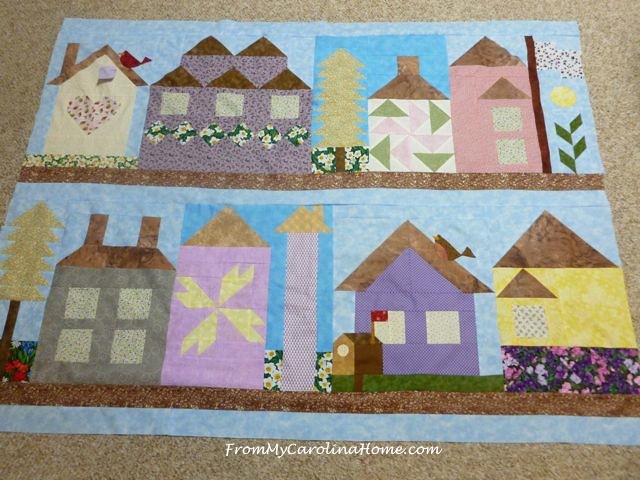
Then the bottom two rows are sewn. I only put pebble fabric on the bottom for now.
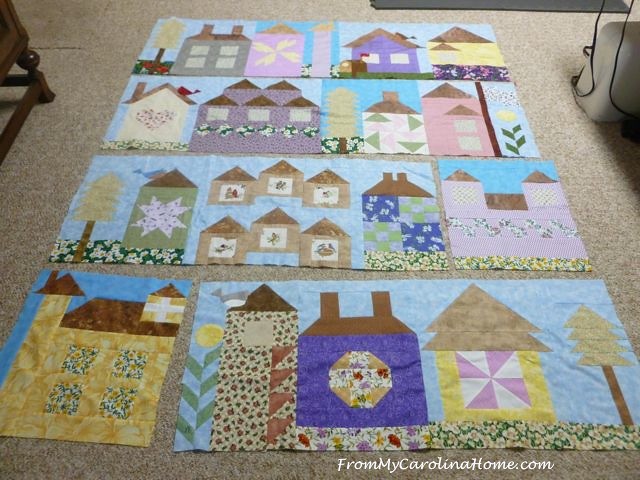
Now as I am looking at the two sections together, I see a big open space on the bottom right.

If I put a bird on that house, it would balance the distribution of the birds. So, more applique! Now is the time to do that, before the upper and lower sections are joined. Out comes the freezer paper, sections are cut and ironed.
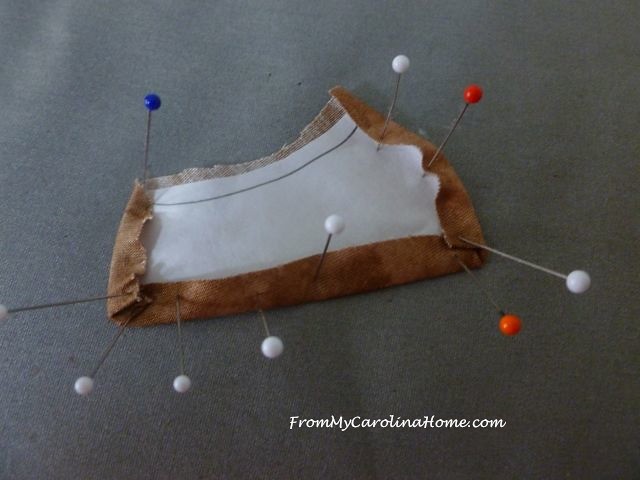
I still should to buy some applique pins, but I am resisting that urge as I don’t really want to do a lot more applique. I see this little guy as a Carolina Wren. It took less than an hour to stitch him down.

Joining the top and bottom sections and finally, the blocks are together with the sashing!
I start auditioning border fabrics now too. The light green with the butterflies looked the best. I also decided to add side and bottom borders of sky blue to frame out the neighborhood.
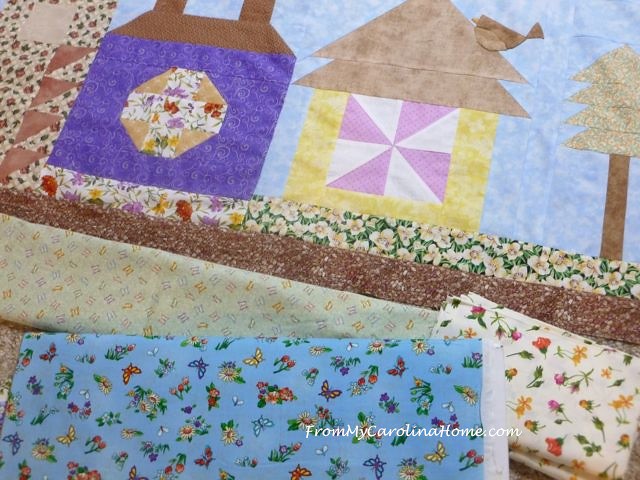
Two borders done, a narrow light blue sky fabric and then the light green with butterflies.

Here’s the bottom corner, with the same strips as between the rows.
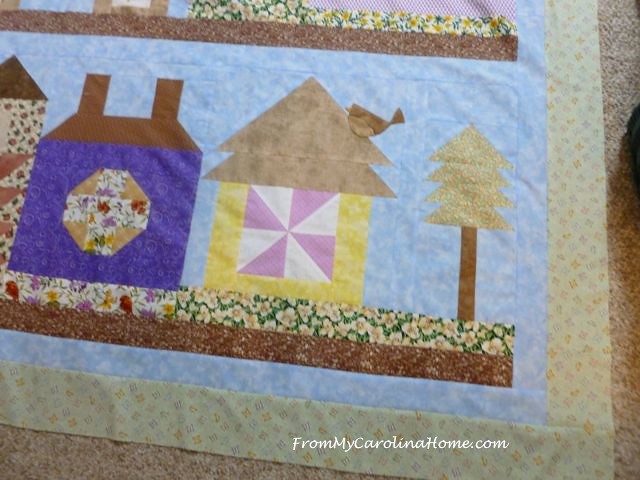
One sky strip on the top with no pebble fabric. The sides have just the sky fabric. The green is 3-1/2 inches wide.
And, there it is, finally all assembled!!
On to quilting it, LOL!! Then I’ll need to do binding and all the extra details, then a label and hanging sleeve. I think I can make it by the deadline now.
What are you sewing now?
Sharing

Carole, your quilt turned out so adorable. Pat Sloan is doing a block of the week with that same pattern. I was telling my Mom about your idea to put it in the County Fair and she thought that was a great idea. Beautiful quilt.
Congratulations! Your quilt looks just perfect. I was holding my breath the whole time I read your post.
Gorgeous, lots of work and thought! I have two baby quilts back from the long arm quilter to bind and label, the king size wedding quilt went to her on Tuesday when I picked up the others. I have two more in progress. Then I need to start this weekend on curtains and roman shade for dining room space we are creating. Been put off too long and they are almost ready to move into their new living room!
Thanks for the inspiration and encouragement dear lady. And yes, I saved the patterns for this neighbor quilt. I hope to work on one soon!
Yay!!!!! Also, woohoo – finally!!!! Just like “all good things come to an end,” thankfully difficult things also get done at some point (or maybe not in the case of UFOs?). Anyway, this was certainly a challenge to all your skills figuring things out and you have conquered it! As for me, I finally put the last slip stitch in the front band of the robe I’ve been making and wondered why the pattern instructions didn’t just call for it to be sewn in place by machine…well, next time…if I can stand to sew it again, since right now I don’t even want to think about that!
Well done! That was a lot of brain power to sort out all those finishing details!
My mind was spinning just reading how you worked all that out, but it looks perfect now.
Way to work it, girl! When the going gets tough, yada yada. You get what I’m saying. Great job.
Your quilt looks awesome. I know that I should not try this pattern even though I love it. I’m too inexperienced for all the challenges but I do love it!
Looks like a prizewinner to me!! Great job, figuring out the placement that works the best — and it’s amazing how much that last little bird just filled out that block perfectly!
Congrats on a wonderful neighborhood finish! Love the little birds!
Hi Carole,
I had to laugh with your thought process! In real life, there are sometimes houses the same color . . . but I do see your point with all three yellow ones together. And the birds! Don’t they kind of stick together?! But I love your final layout – it really turned out nice. I wonder if this was a QAL? I love all your fabric choices, and look forward to seeing how you quilt it. ~smile~ Roseanne
As I was reading about your dilemma with the two yellow houses, I thought make another and put the original house on the back. But you kept at it and found a solution. Bravo to you for keeping with it until it worked AND for remembering to photograph your thinking. It takes a lot of commitment to keep snapping away in the middle of a project, even when it helps with the decision-making, I think.
It turned out great!! Love your decision making and the thought processes. It was interesting to see the last little bird and how you made it. It’s perfect..I’d probably would have stuck a bush in there! Congrats on the finish!
Darling quilt top! ‘Love it so much. Maybe some day I will get mine started, lol 🙂
You are a wonder! Such careful planning is paying off in a beautiful quilt. Well done!
Wow, you got there. It took some time to sort out some blocks but well done…
Well done with all the changing around, it looks sensational!!
Looks really nice all together. Thank you for sharing your behind the scenes thinking!
Your quilt top looks great, aren’t you glad it is finished. Thank you for sharing all the steps you went through. I have most of the patterns, but haven’t pieced any yet. Still thinking! Have a great weekend.
Perseverance pays off again! The added borders are exactly the finishing touch. Well done, now on to the finish!
Absolutely beautiful! I love the addition of the Wren too!
Well done on persevering until you were happy with the design. A beautiful quilt top, Carole. I really like the brown sashing between the rows – makes a big difference to the look. I haven’t sewn anything for at least a week – been out in the garden. I’m half way through several pairs of harem pants for charity, and have two lined jackets to take up for my daughter.
We make ourselves crazy with all the decision making, don’t we? It turned out perfect!
This quilt may have caused you some angst, but it’s absolutely adorable! I loved reading about the thought process behind the decisions you made. It really came together well and I’m looking forward to seeing it quilted!
Love your neighborhood block quilt!