
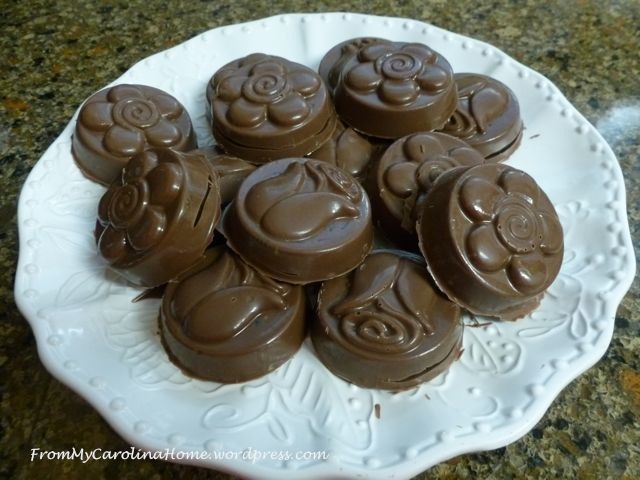
Recently I had a pot luck lunch to attend, and I wanted to make something special. I learned how to make chocolate covered Oreo cookies last year through some trial and error. I think I have it down now, and can share it with you. So here is how to make Chocolate Covered Oreo cookies!
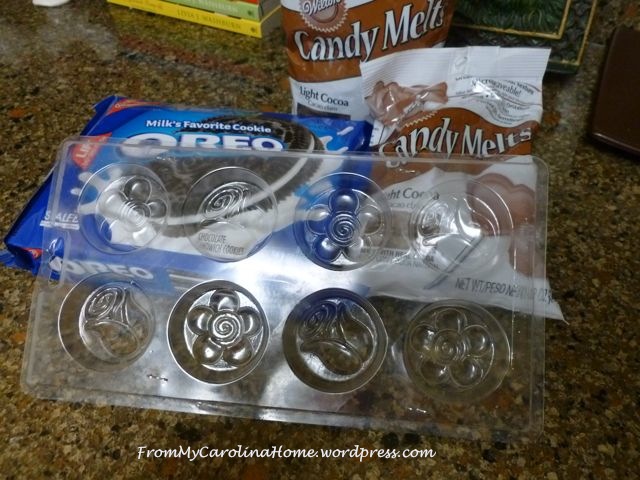
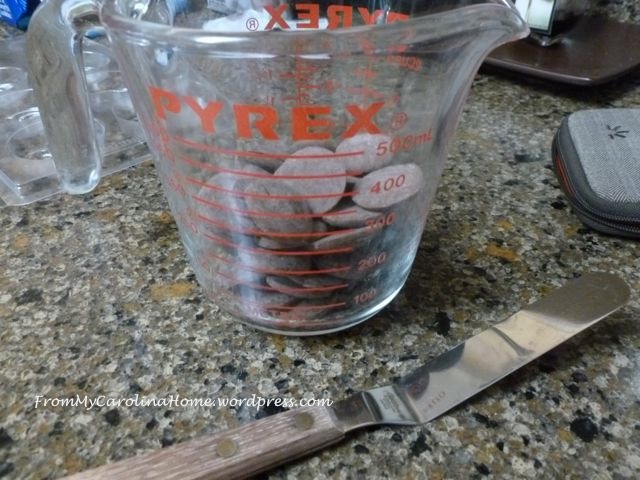
You’ll need one package of regular Oreos (not double stuff, they are too thick), two bags of Wilton Chocolate Candy Melts, one or more molds, an offset spatula and a glass cup for microwaving the chocolate.
Start by pouring half of a bag of candy melts into the glass cup. Microwave on 50% power for two minutes.
When done, stir the chocolate until all the lumps are gone.


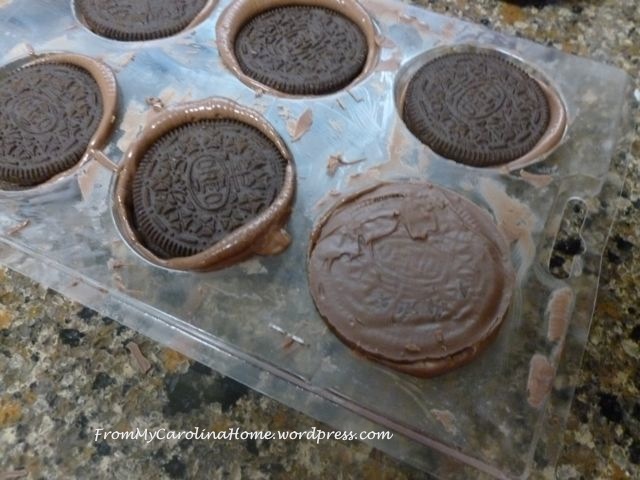
Put a generous dollop of chocolate into each mold.
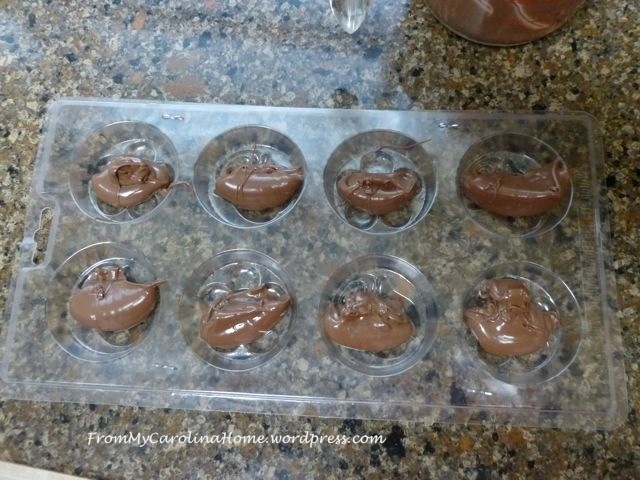
Press an Oreo cookie into each mold until the chocolate squishes up the sides of the mold.

Put a small dollop of chocolate on the top, and spread evenly with the spatula.
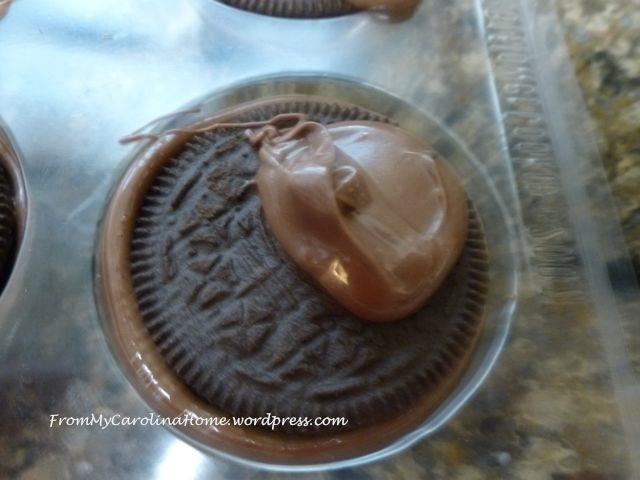
Don’t worry if there is some on the mold, it will harden and can be reused.
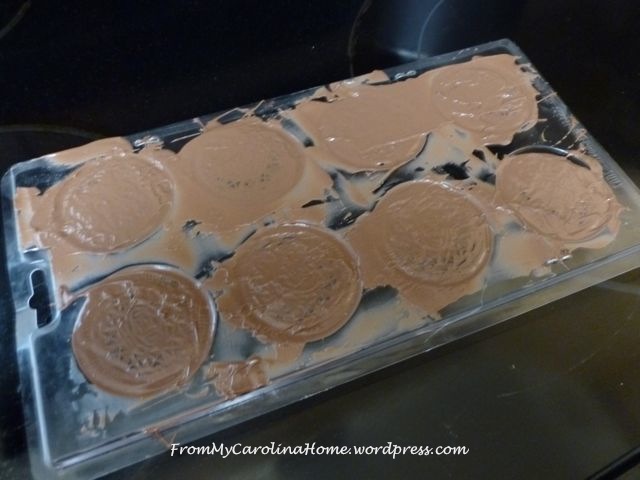
Place in your refrigerator. Set a timer for 25 minutes. The cookies should easily pop out with just a bit of tension on the mold.

If the first one doesn’t come out cleanly, or it pops out with half the chocolate left in the mold, put them back in the refrigerator for another five minutes. Scrape off what is left on the mold…
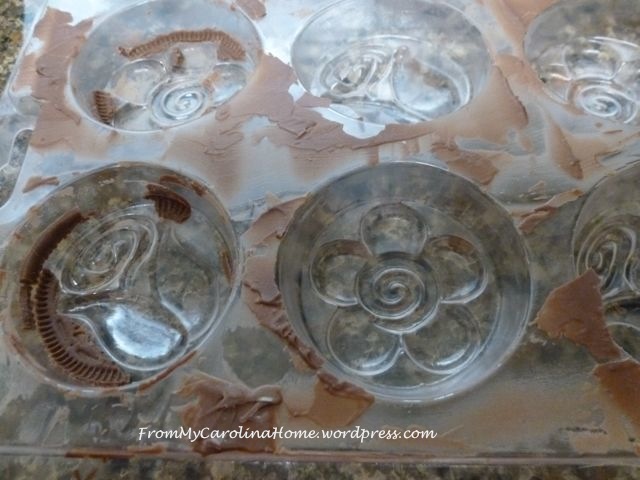
and put it back in your cup for the next round of melting.

If one doesn’t pop out right, you can take the messed up one and lift off the chocolate.


Put it back in the glass for the next round of melts.
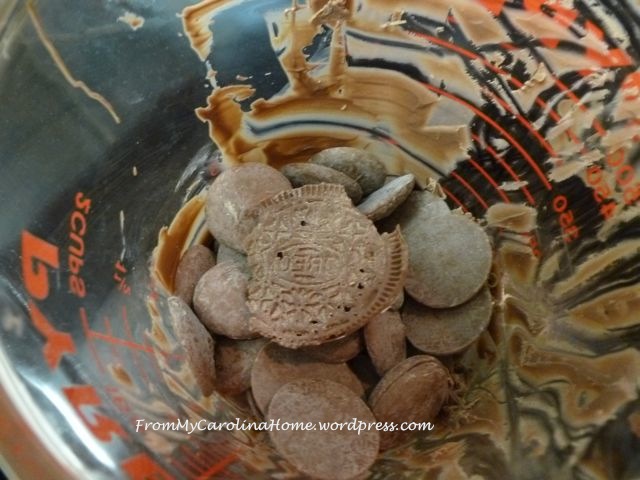
Take the messed up cookie and put it in the next batch. It’ll be fine. Just remember what Julia Child said, no one will know!!
Next time I am at the craft store, I am going to buy more molds. Using only one mold took me a couple of hours to make 32 cookies, just 8 at a time. You’ll have half a bag of candy melts left to use in the next batch. My local chocolate shop charges $1.25 each for these, but I made mine for about 15 cents each. Using coupons for the candy melts and finding the Oreos on sale helps. The molds are not expensive at the local craft store, about $2 regular price. I bought my supplies with a 50% coupon for the most expensive item, and 40% off everything else.
These were a hit at the potluck. Enjoy!! Sharing with some of the fun parties on my link page again in 2016!
And in 2017!

My Grandkids willlove these! No sugar though for GrandMa! Lol
I’m always looking for something new, these look delis and simple to make, thanks for sharing.
just what I need!!!!! More sweets!!!. I will probably eat the ones that are not perfect.
Thanks for sharing & showing all of the steps.
oh my word…..talk about a sweeeeeeet treat…well done….
How ingenious! I always send sweets to my elderly relatives for the holidays, these would be beautiful decorated for any holiday. I just signed up for your blog.
Thank you, Meg!!
Thank you, Meg!! I didn’t originate the idea but I sure do like doing them. JoAnns has a marvelous selection of molds too (not affiliated, just like to shop there) and some have holiday themes. You can put red or green (or any color) melts in the decorative part before using the chocolate if you wanted them fancier.
Can I eat these for breakfast LOL!!! PERFECT YUMMY recipe to rejuinate at Tuesday Archives this week Carole! Thank you.
I will definitely will try the popovers for us and chocolate covered oreo cookies for my grandson!
I love this simple idea and I’m sure they would be a hit! Thanks so much for sharing! Pinned 🙂