
With all the fabrics cut to size for the pattern pieces, I loaded the longarm with the backing, added Dream Orient batting, and arranged the fabric pieces on top. I’ll quilt these in black thread, and the right front fabric will be done in blue thread as it is lighter. I’m using Sulky Rayon Thread for the shine it will add to the project.

Quilting on your domestic machine can be done with straight lines or freehand designs, doing one piece at a time. I would recommend quilting your fabric first, rather than cutting out the pattern pieces first. Quilting will take up a bit of yardage in length and width, and this will ensure your pattern still fits. If you do strips, you could use a Quilt-As-You-Go method to assemble the strips and quilt at the same time. That method would work for covering a sweatshirt with patchwork as well. I am quilting mine with a leaf pantograph to complement the floral print.

As I get to the next piece, I just quilted over both edges in the same pass.

Then I got to the strip piecing, and just continued quilting. The leaf design looks nice across all the prints.

When I finished all the black, I added the blue fabric piece that will be the right front of the jacket. Then I loaded the longarm with blue, Sulky rayon thread.

Using the same leaf design, I quilted this piece.

On the back, I used black in the bobbin for both colors on top. The black thread embedded well in the lining print. I checked the quilting and removed it from the longarm.

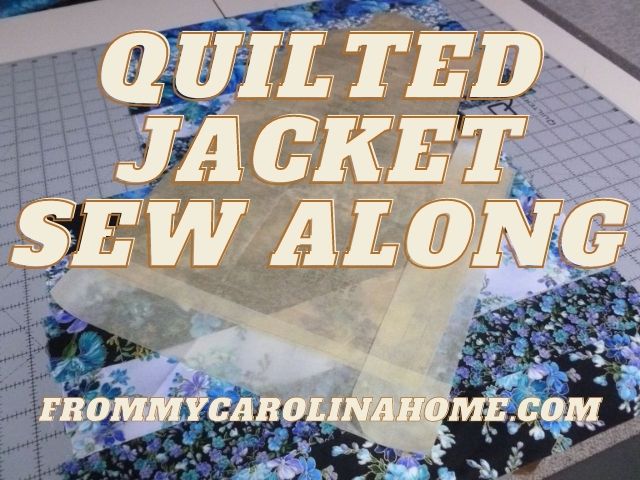
Cutting the pieces apart, I lay out the pattern to be sure things were still good.

I put the pattern for a sleeve on the quilted fabric, and moved it around a bit to get the best placement of the print on the piece. Then, I cut it out.

Next was the other sleeve. Be sure to flip the pattern wrong side up to get a right and left sleeve. I moved this one around as well to get the best placement I could.

For the back, I decided to take out the center back seam. I want to be sure you know that usually center back seams are not straight. They are straight from the neck edge to about the mid-back, then they taper inward slightly, to give a bit more shape through the waist. But my shape can use that little bit of extra, so I remarked the pattern to remind myself to place it on the fold. This will also put the seam allowances into the jacket, so I may need to add a dart for fullness later. We’ll see. It may fit OK as it is.

Next, I want to be sure that the seam joining the two prints on the right front will be straight. Using the long ruler, I pinned the pattern piece making sure the seam was parallel to the bottom.

Then, the last piece to cut was the left front strip pieced section. I placed the pattern piece on the piecing, making sure the pattern was wrong side up. I barely had enough through the middle, but it made it.

Next week, we’ll assemble the jacket and adjust the fit. Share your jacket progress in our Friends of From My Carolina Home facebook group.
How are you doing with your jacket? Are you using a sweatshirt for a base, or maybe finishing a jacket started some time ago? Or did you start from scratch like I did?
Shop my affiliate links for great deals this week.
Fat Quarter Shop – Sales on Notions, Books, Patterns, and Fabric. This month get 20% off the Basic of the Month, Bee Basics from Lori Holt. Sale 30% Off the Books of the month Perfect 10s from Its Sew Emma. See the Precuts of the week, and don’t forget the daily Flash Sale.
Sulky Thread is having some fun webcast projects. Plus free shipping on orders of $60.
Find new ideas with Books on Sale at C&T Publishing!
Remember, your purchases help to cover the costs of writing this blog. Use your existing accounts on all my affiliate links, it won’t cost you any more, but I receive a small commission. Have fun shopping, get yourself something fun!

Love, love, love seeing this come together and how you do the pieces on your longarm.
Your jacket is so pretty. I will be following along on all the jackets. Will not be able to start until September.
Those are such pretty fabrics for your jacket! I especially like the butterfly print. I’m enjoying seeing how this project comes together!
Blue,Black and White is just beautiful. Carry on so we can enjoy the finished work.
My original thought was to use blocks for the entire jacket. I didn’t write down the measurement I used for my first day making string blocks. I made a bunch a couple of days later. Now I have 7 inch blocks and 7,5 inch blocks. I think I will use the larger blocks down the center of the back with fabric on each side of them and use the smaller blocks for the sleeves and collar. Haven’t decided what to do about the front.
Gorgeous fabrics, and quilting all those pieces as you did is a great way to start. Then fronts on the diagonal, this will be a stunner.
What beautiful fabric! This jacket will be OVER-THE-TOP. Looking forward to the finished product.
Where can I find the pattern for the jacket? Thank You!
Robyn, your email address came back as undeliverable. I hope you see this reply. See my post Quilted Jacket Sew Along – Selecting A Pattern to get guidelines for choosing a pattern for your project. The one I am using is vintage and discontinued.
Your jacket is looking great. I started mine from scratch. Working on getting the quilting finished and all pieces cut out.
It’s looking good, Carole!
What fun. I love your fabric and I’m amazed to see how you do this on a longarm. I’ve made quilted jackets before, even one my husband placed a special order for. Time for me to make more. But I’m traveling this summer so I can’t join your QAL, but you’re definitely inspiring me to do so this coming winter.
I’m enjoying watching your progress! I want to make a quilted jacket but don’t have the time at the moment, and I’m not sure I have the clothing sewing skills, either. I plan to start with a sweatshirt and see how I do with that before I think about tackling something harder. Can’t wait to see yours!
It is starting to emerge. Loving the colours.