
This unusual shaped ironing board has been in my sewing room for many years. It isn’t made anymore, but was great when I was sewing most of my clothing. That hasn’t been the case for the past 15 years, as I have been doing much more quilting. I’ve recovered it twice and did a tutorial on that process (Recovering an Ironing Board), showing the process of getting around all those curves.

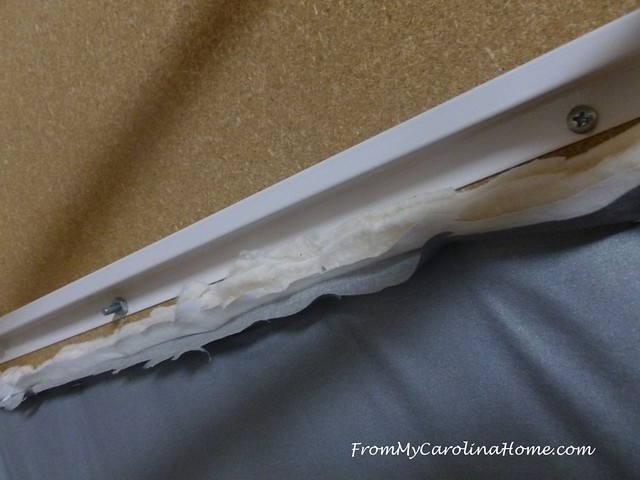
The previous cover lasted 3 years, but with pressing piecework, I tend to use the same section over and over. Naturally, it gets very brittle and eventually begins to tear.

The base of the board is metal, and the surface looked to be particle board. Simple screws held it in place. My Sweet Babboo was willing to remake it for me to better suit my needs now.
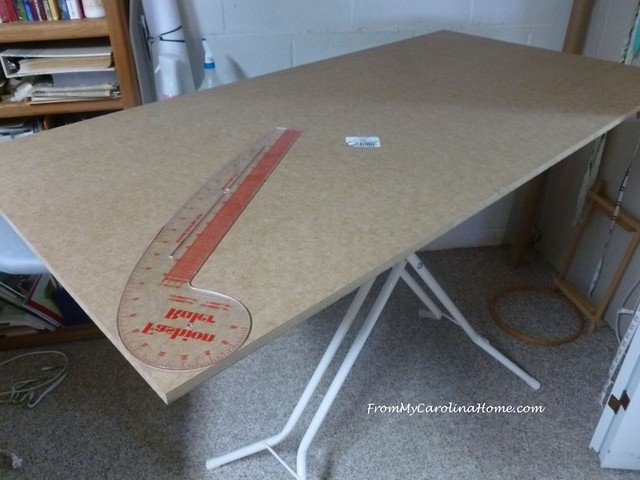
He removed the old board, and set the frame up to measure the size top board it would support.

I was able to have a 2-foot x 4-foot surface as a replacement. He used MDF (medium density fiberboard) as it is very flat and provides a stable surface. I marked the edges to round them off with a dressmaker’s ruler.
He cut off the corners and smoothed out the edge.

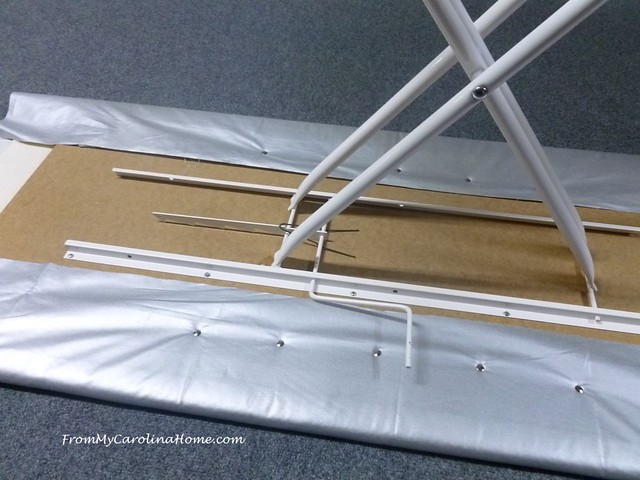
Then he remounted the frame on the top. If you have the old metal mesh style of ironing board, you could attach a larger board to it using screws and large washers through the mesh.

This time, I used two layers of cotton/wool batting with a layer of Insul-Brite between them, and heat resistant fabric on top.

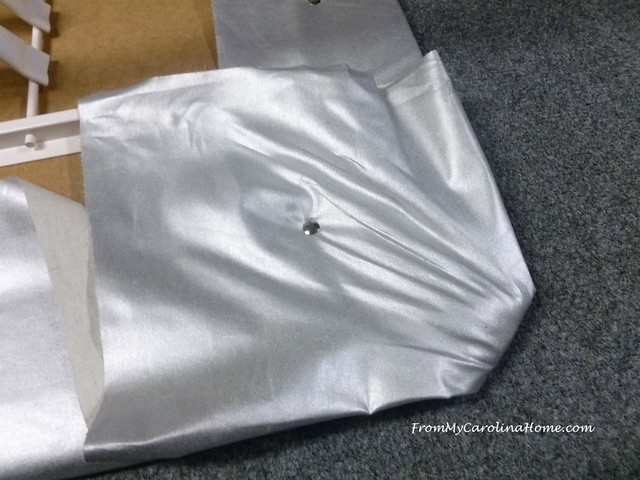
Instead of using the staple gun (which is really difficult to get right) he used tacks, hammering them down while I held the fabric and batting layers in place.

We did the long sides first, pulling the layers taut but not overly so.
Then we did the ends in the same manner.
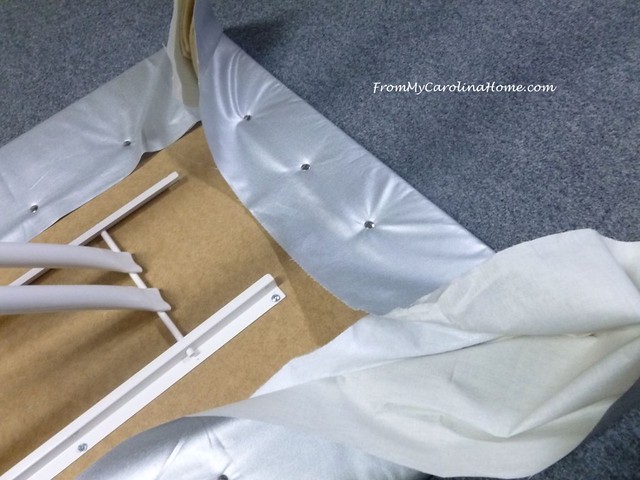
For the corners, I cut some of the batting away to reduce the bulk.

Then the corner is pulled taut and tacked.
Folding the corner over, a tack was placed to hold it.
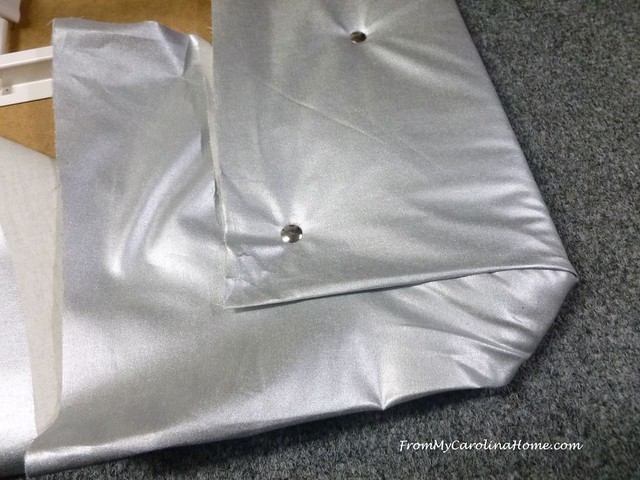
Then the second corner is folded over the top and tacked down.

All four corners are done in the same manner.
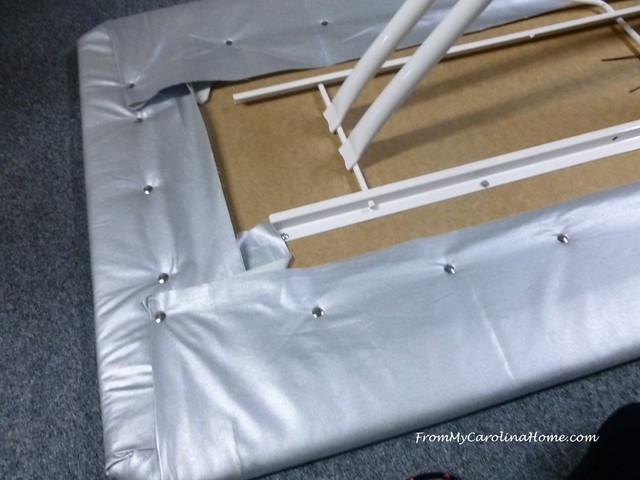
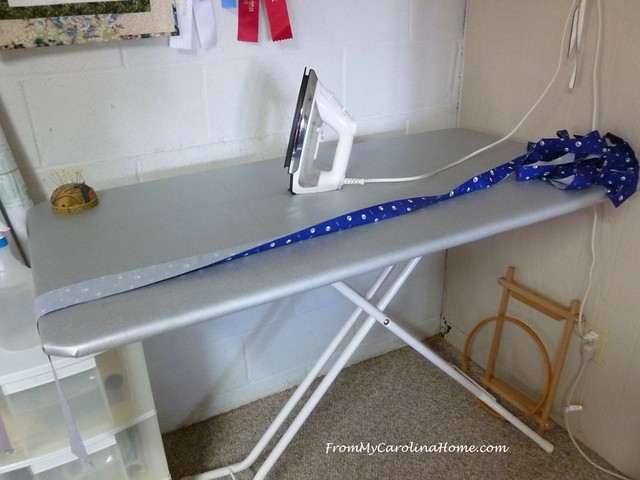
All done and ready to move into place.

Wow, now I have the perfect ironing surface for quilting! There is a lot of space to use so I won’t always hit the same spot when pressing piecework.

Pressing a binding is now so easy with this large surface and it doesn’t fall off the edges.
Do you have a large ironing space for your projects?
Sharing at Tips and Tutorials, Thanks to Jen at Patterns By Jen for the mention in her newsletter.

Wow! That’s a brilliant idea! i love it because it gives you a lot of space.
What a wonderful ironing board for a wonderful quilter! Merry Christmas and Happy all Holidays.
NO, sadly I don’t have a large ironing space in my workroom. I’ll bet you will really enjoy this new and improved verison of your ironing board!
Do you know the expression “a day late and a dollar short”? I’m not sure it applies here but it kind of feels like it does! I recently bought the large rectangular ironing board “top” and thin pad/cotton cover from MassDrop….that attaches to the top of a standard ironing board. The size is nice, probably close to the size of yours…but the pad was too thin so ended up cutting batting to make it thicker for better pressing. The corners are sharp…I like your rounded ones better….here’s the rub—-mine was not cheap and while yours probably wasn’t either with the insulbright and heat-resistant fabric — my guess is you’ve got the better, sturdier, less-expensive ironing board. SIGH! But I am happy for you. Merry early Christmas!
my ironing board is a little larger than regular but still the same shape – I like the shape of yours much better! it looks like with a little work you have a great board
Love this! I see a new project for my hubby!
It’s the perfect size! Love it! My husband is going to make one for me when i decide the size i want, and i think this one your husband just made is PERFECT!! Thanks for the demo, i am going to save it and put it on the to do list as we have a few projects to finish first! Thanks so much for sharing!
Carmen
Love it! It seems it would work wonderful for pressing a completed quilt top, also.
What a great project! That looks like a great pressing surface
You will LOVE that for your quilting. It is such a nice size and a much better shape for what you need it for. I’ll bet it’s a delight to have all that pristine area for pressing too. 😊
A larger ironing board is every quilter’s dream! I like the potability of yours. In my sewing studio, I have a 5 foot long buffet placed along the back of a couch. My husband cut a board to match the shape of the top of the buffet which is now lined with batting, insulbrite and a layer of quilting cotton with a sweet sewing studio print. It’s so handy to have a place to drape the quilt as it’s pressed. There’s also a coffee table at the front of the couch that, when moved, it can also support the quilt as it comes off the board without having it touch the floor. The buffet has drawers for storage, so the iron, Best Press and many other quilting supplies are stored there.
Thank you so much for the many ideas you share on your blog–it’s become part of my daily morning welcome to the new day!
excellent idea with the tables available
Now that the kids are gone, the whole house belongs to us! Yeah!!
Great! I’ve been wanting to do this to my ironing board for quite a while. I believe I’ll show this to my husband and ask him to give it a try!! Your hubby did a great job!!
My sweet husband made me a wide board to fit over my old ironing board. I loved it, because it gave me more space to iron piecework and binding. But I was using the board at chair level so I could just swing around from my machine and not have to get up each time I need to press a seam, my husband irons his own pants and hated the height. I was given an old machine in a drop down desk. The machine was unrepairable so I adjusted the big board to fit and now have a keyhole to fit my legs in when I need to swing around and press. My husband has the old ironing board and we are both happy.
Thanks for sharing all those detailed instructions. I am sure they will be useful to a lot of your readers. I just finished recovering my ironing quilting surface in about the same manner only I put mine on top of a table.
Thanks for the idea.Hubby can help and I will love it.
Fantastic!
I gave both of my ironing boards to charity (why did I have two??)
I made an ironing table across two book cases from Target. but mine is only 48 inches….
now I want a longer one.
Maybe after Christmas bc it will be a big project.
I will keep the old one because two ironing boards are better than one.
Happy Monday. It is very dreary here. Gonna go to daddy and do his laundry and maybe bust out to the mall or something.
I love your new board. Fits right in the corner and what a good job you both did. Happy holidays to you.
Hello Carole, What a marvelous job you and your husband did with redoing and recovering your ironing board! You have done an excellent tutorial on the steps that were used to create your new ironing board. I wish that I had that type of space for my ironing board to be rebuilt to that size! Hubby and I did find a table that is large enough for my cutting mat to be laid on. He had to buy a bigger piece of board to lay down on the table because the table is round. LOL. It is so nice to have! Thank you for sharing this great tutorial and a wonderful new part of quilting area! Have a fantastic day!
Great direction
I have my in laws old wooden ironing board, it’s a little longer than the ones sold today. About every 2 years I have to flip the wooden base over as it warps but the wooden legs are nice and sturdy. I also have the tiny 20 x 15 ironing flip over cutting mat but the sewing machine and when i get a new cover for the old wooden one, the little one gets the scraps. I should throw both of them to the wind but they are like family.
Any recommendations on irons? We use an Oliso at sewing club and I have a Rowenta at home but neither is as hot which is neither a good nor bad thing as the old ones that used to scorch fabric. I can’t tell from this picture which one you are using. Any suggestions?
I’ve always wanted a “Big Board” & your DIY is perfect, so I’m saving this one for sure! Thanks for sharing your process with us! Off to iron some fabric on my dinky ol’ “regular” board (I also wish I had a mangle, don’t you?)… LOL!
I made myself a big board ironing board when I was in Florida. I got a piece of 3/4″ plywood, covered the top with 2 layers of batting and canvas, stapled down. I made it to fit over my ironing board. I put a piece of wood at the wide end of the ironing board, one piece of wood on either side of the wide part of the ironing board and one piece of wood on either side of the narrow end of the ironing board. Those 5 pieces of wood were screwed into the bottom on my big board. In Florida, I was using my daughter’s ironing board and when I got home, I found that my ironing board had different dimensions. I just unscrewed the pieces of wood from the bottom of my big board and re-positioned them to fit my ironing board at home. I love having a 5′ by 2′ space to iron!! I now I a large (24″x18″ ish) wool mat that will reside on my big board when I get home. I wish I could afford a wool mat the size of my big board!! Hubby did a great job on your new ironing board!!!
Brilliant idea!
Brilliant!
Great instructions, and I didn’t consider adding Insul-brite when I made my big board. My board is covered with canvas ticking so I can have a straight line for pressing strips, bindings, etc. It’s also removable, with the wood blocks like farmquilter’s above, in case I have the rare notion to iron a garment.
I had made a big ironing surface on a piece of 1/2 ” plywood and laid it on my ironing board, then I got the idea to mount it on the wall and using a large hinge and a fold out leg my grandson had it mounted for me in no time….i love my 24″X 60″ surface..!! When i am done using it i fold it up to the wall and clip into place…
I love your “new” ironing board. Isn’t it great to have a large surface? I have a similar set up using an old table. I use a lot of steam and have noticed that I can feel some bubbling in the board beneath. I’ve been using it for years so it may just need to be re-done. I can’t even remember what kind of board is under there! Will your board take steam. I use my wool mat on top to press blocks. I also use a fitted crib sheet as a cover. I have a few and throw in the wash as they get dirty or full of starch.
I’ve been thinking about how I could redesign my room to fit this kind of ironing table in it. But I am going to remember that you posted how you changed your ironing board when I start looking for inspiration for actually doing it. Thanks for sharing.
Merry Christmas
xx, Carol
Thanks for posting this. With no carpenter in the house I purchased a “Big Board” with the metallic cover several years ago and I love it! The metallic surface is now in really bad shape, and I’ve been wanting to upgrade and recover it. I’ll try the same combination of materials you did.
Wow! An awesome ironing board, and an awesome husband!
Oh my goodness! That is brilliant! This would be so fantastic for table linens! I want to do this! You have inspired me!
Wow, that looks amazing!!! Perhaps I can talk Husband into helping me create one as well.
I use my ironing board for storage too which limits the space I have. Hmm, maybe it would be big enough if I didn’t have stuff sitting on it…. The last time I recovered it I added some cotton batting in the spot I use most.
I don’t have a really large space, just the side of a small room, with things at one end. I like your corner, though. That would be amazing. I’ve thought about making a big board to go over my ironing board, but never completely replacing it. Part of that is that I don’t like the base of mine. It doesn’t feel stable. I think I need to get a new or used ironing board I like better and then do something. How handy Mr. Babboo is!
I love this! Thanks for sharing on #TTot22!