
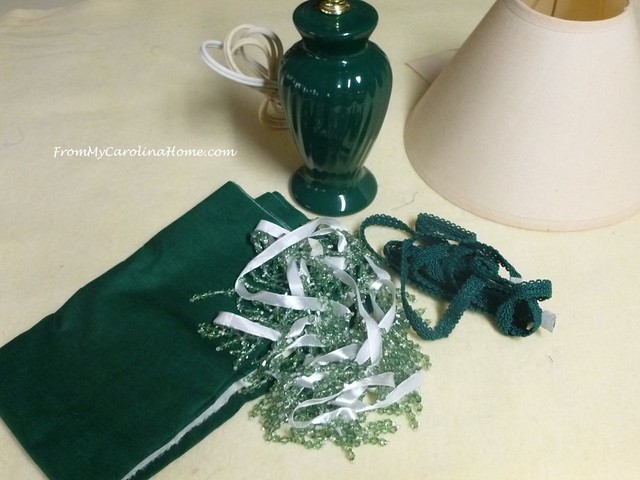
Autumn Jubilee has to include some crafting time, and this one will use fabric. I found this little lamp at a thrift store (naturally, LOL!!), and it was the size I wanted for the den. I needed a small lamp to provide some low light for the room when we are watching movies. My Sweet Babboo likes to turn off the lights and have a home theater effect, but having all the lights off is actually too dark and creates a bit of eye strain looking at the TV. So, a small light is nice. I had a really small lamp before, but I wanted to move it as it was dark red. This one has a green base.

But, in spite of putting a very low wattage bulb in it, it was too bright. Add to that the shade is funky in the way it attaches to the base, so not easy to just replace.

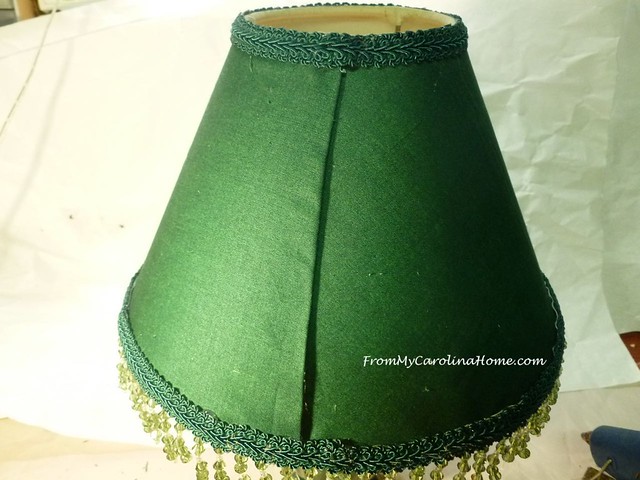
The answer was to cover the shade with fabric and trim. I took the base to the fabric store, and matched the green, then picked up some beads and braid.
Begin by making a pattern for the shade. Place the seam on the paper and draw a straight line.
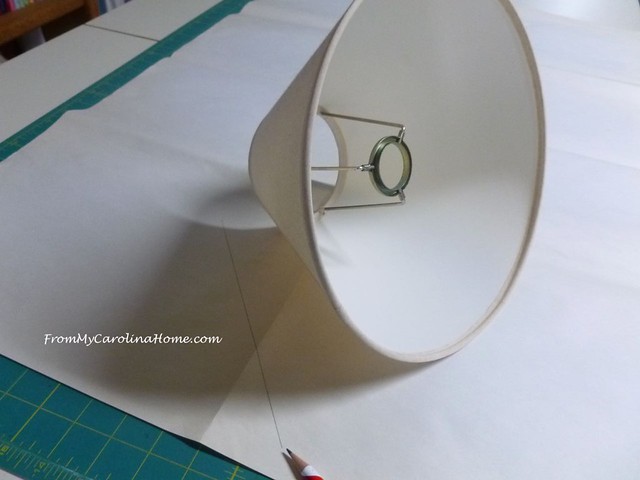
Then, roll the shade, marking the edge lines as you go, until the seam is again on the paper.

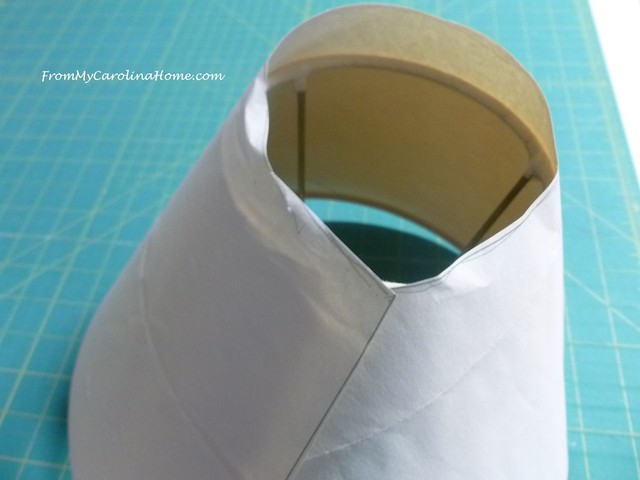
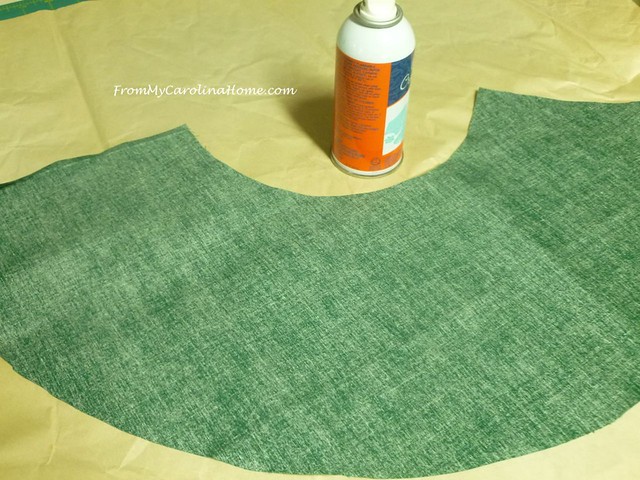
Cut out the shape, extending one edge about an inch to be sure you have overlap, and cutting generously so you have a bit of overage on the top and bottom.

Do a test fit to be sure you have it right. There should be some overage on the top and bottom.
Place the pattern on the fabric, and cut out the cover.

Test fit again.

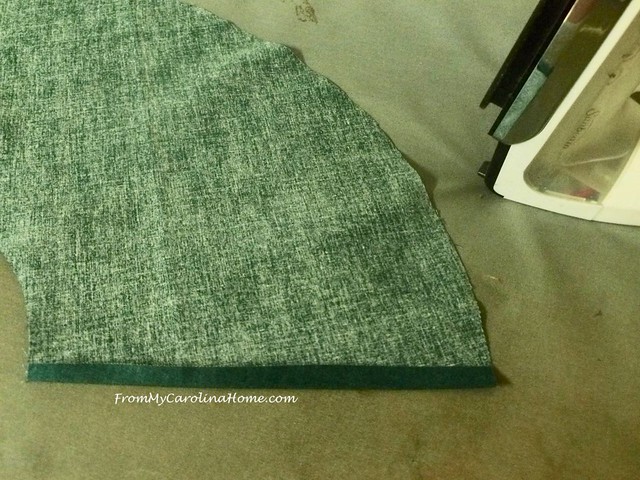
Press under one end to create a finished edge.
Using a spray glue, lightly spray the fabric on the wrong side.
Starting with the raw edge, press the fabric to the shade.
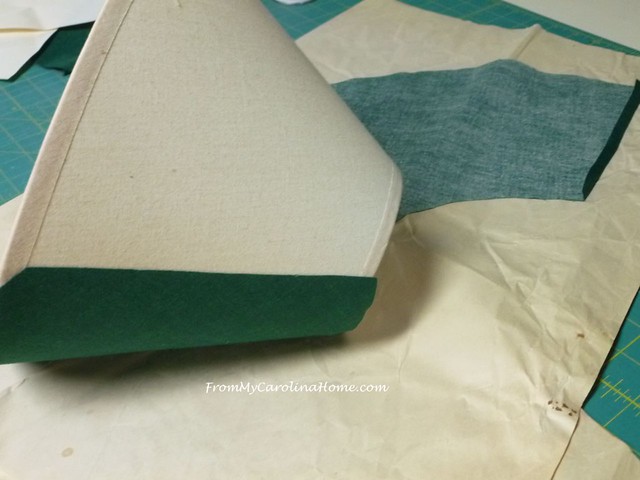
Continue around until the cover is in place.

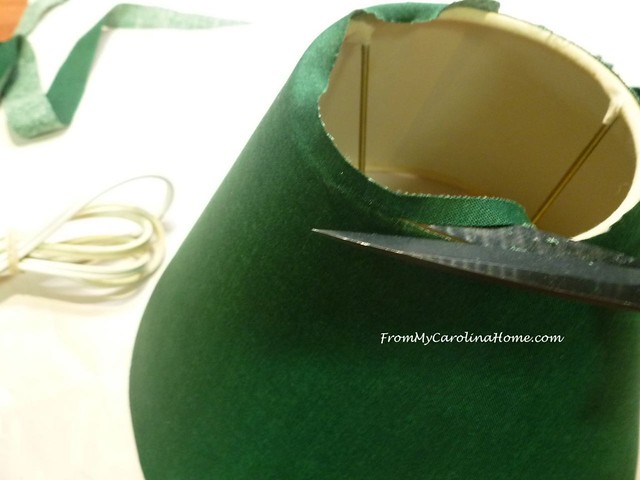
Trim the bottom even with the edge of the shade.

Then do the same on the top.
Heat up the glue gun and get the trims ready.
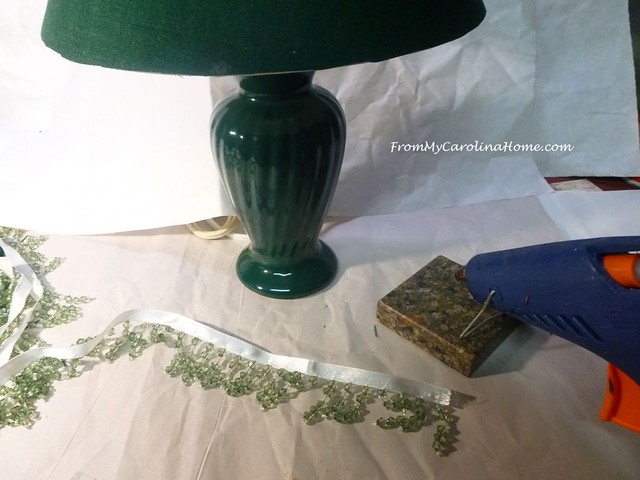
Run a thin line of glue down the inside of the seam and press it down firmly.

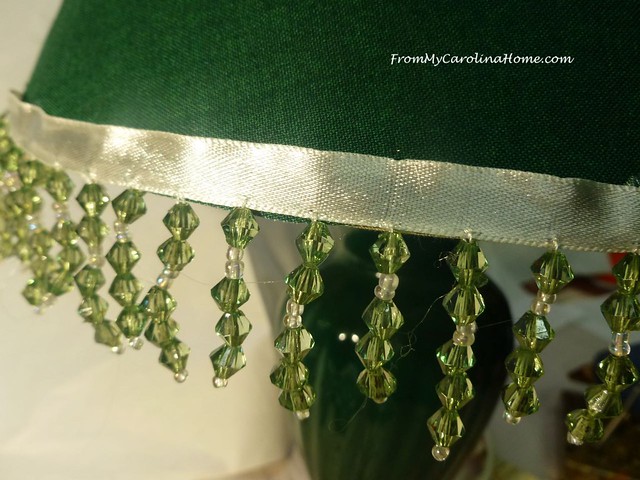
Working with just a couple of inches at a time, run a thin line of glue on the bottom edge and press the beading ribbon in place.
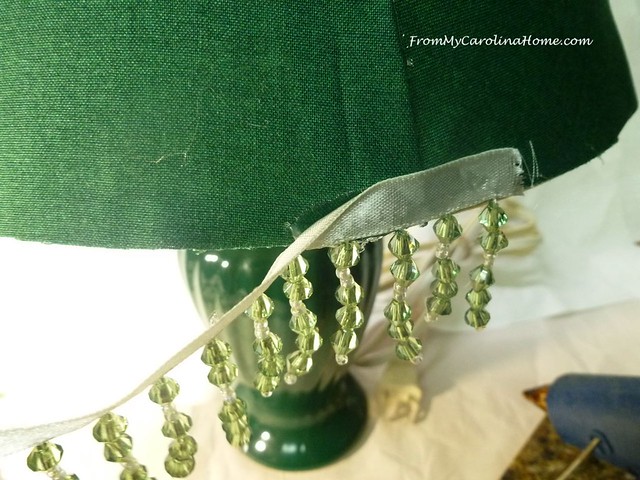
Work all the way around the bottom. Don’t worry about the ribbon color, we’ll cover it up.
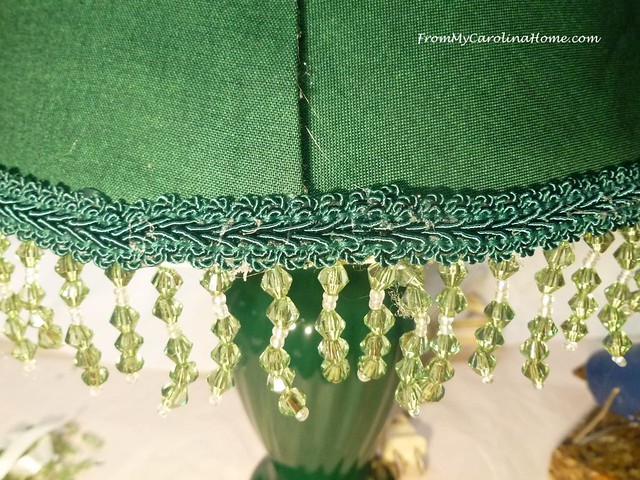
Now, using the same technique, glue the braid trim over the ribbon.

At the joining point, cut the braid to length, and mesh together at the seam line.
Glue braid to the top, covering the raw edge of the fabric.
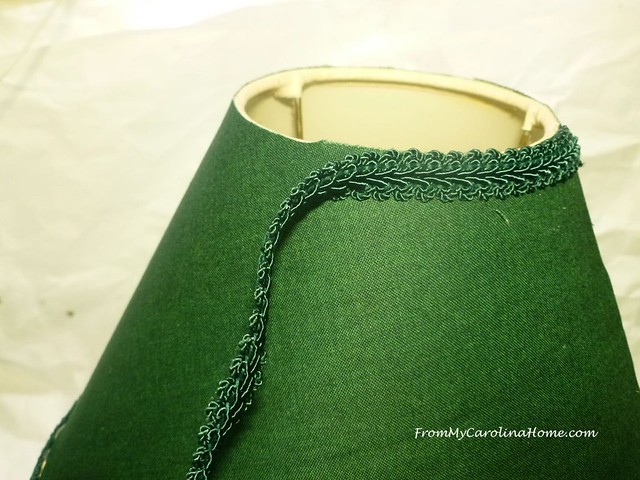
All done.
Now there is a dark cover which will lower significantly the amount of light coming from the lamp.

With the lamp on, you can see how it lowers the light emitted through the shade. If you wanted to keep the light level high but dress up the shade, use a light color fabric.
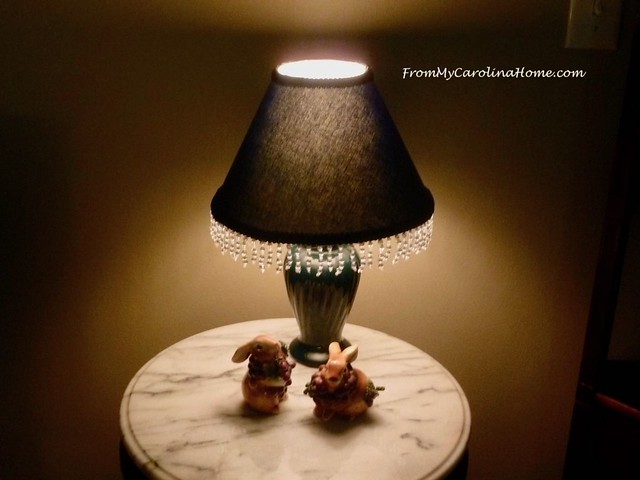
So, there it is, with the Autumn Jubilee wool work penny rug from last year’s event, and a leaf candle. I added a black tassel to the neck of the lamp, something my mother used to do with her lamps.

Today’s project was designed to lower light levels, but most of the time we need more light. This was the perfect time to do the Inspired LED giveaway!
 Returning sponsor Inspired LED is giving away THREE lighting kits for your sewing machine, along with the extension kits!! Who couldn’t use more lighting? This one is limited to USA due to electrical differences, but if an international winner is chosen, I’ll send you something else and draw again. Just leave a comment on this post, then click on the Rafflecopter below to enter the drawing. Hurry, this one is only open for entries until midnight Tuesday night.
Could you use more lighting in your sewing room or elsewhere?

Shop Amazon’s Gold Box – new deals everyday!

Sharing – Vintage Charm

Who couldn’t use more lighting, especially at the sewing machine! I currently use a little portable light that sits flat in front and shines on the needle area. It is battery operated and uses a lot of batteries but is very bright. I love how you covered your lampshade!
Wow! Your lamp turned out great! What neat and tidy work. Yes, these older eyes can always use more and more light these days! Thanks for the chance to win.
Very nice “Re-do”!
I could indeed use more lightings at my sewing machine. I might also recover the shade of one of my favorite lamps!
I would love new lighting for my sewing machine!
Nice upcycle!
With slow growing cataracts, I can always use MORE light!!
OF COURSE, MORE LIGHT WOULD BE WONDERFUL!
My hubby likes the room dark for tv watching, but not me. Great project and nice way to repurpose an older lamp shade. Tip for hot glue gun users – get out your long tweezers to hold your ribbon/embellishments so you don’t burn your fingers. (I have a great set from Harbor Freight I use!)
Caro!e, you did a great job! Love the trim, too. Thanks for sharing at Vintage Charm!
I always need more lighting. What a neat gift a way.
very cute — you are so creatively clever! Thanks for sharing the process you used!
omgosh, what an awesome upgrade for your lamp!! Ha, so true about needing more lighting when sewing!!
I find that I am needing more light for close up tasks.
Wow…you are ambitious!!! It looks great.
I had looked to do that to one of my lamp shades lately, but the old shade had cracks in it (plastic underside), and I figured the cracks would show through the fabric as well. 😦 Because this looks like a fun project!
Nice job on improving your lamp.
That’s a great idea. I have the perfect shade in need of recovering.
I have an old Kenmore with no light on it and have been looking at that special lighting to use on it. The older I’ve gotten, the more crucial good lighting is.
Great solution for you lamp shade. Lighting is so important.
Your lamp covering tutorial is great Carole, thank you. Yes, can’t we all use a bit more light by the sewing machine!
The more lighting the better! These old eyes could use all the help they can get.
I agree watching TV in the dark causes eyestrain. I like the way the lamp turned out after your makeover.
what an adorable lamp! You have given me a great idea for fixing up my grandmothers lamp.
I really like your lamp shade. Thank you for the instructions. I always need more light in my sewing room.
I could definitely use more light for my sewing machine.
Very nice job on the lamp shade. I could really use more light around my sewing area. These old eyes aren’t as good as they used to be.
I’ve wanted to try recovering a shade and your step-by-step is great. I’ll probably give it a try now!
Have not thought of redoing a lamp shade but this lamp by my chair just might get a face lift! Thanks
And more light is always welcome!
Great tutorial! I agree about the lighting needed with watching a TV. This little lamp is perfect for your space. Great idea!
The light in my Bernina 1230 never works, so this is just what I need.
Ooops! Didn’t notice the question! I was lucky and won an Inspired LED last year that went on my two Berninas and purchased yet another set to use on my longarm! 🙂 so my sewing machine is lit up well. I could use better whole room lighting though I think.
What a lovely finish and a super tutorial I have an old lamp that could use a facelift for sure (like me hahaha) I love the beaded edging…hugs, Julierose
More light always seems welcome.
Thanks for this tutorial! I’ve often wondered how to do this, and you make it look so simple!
Great tutorial and creative project. I actually have an old lampshade I now want to do this to. Thanks. Perfect timing. And, what a “bright” giveaway too!
I could definitely use more lighting for my sewing these days. Fun lampshade idea.
Old eyes definitely need more light, everywhere!!! Awesome giveaway, thank you!! Love your lamp – it looks great!!!
I’m not good at crafts, so I wouldn’t recover a shade, but I loved reading how you did it. You are really clever.
Thank you so much for the ‘brightness’ giveaway! Boy do I need that!
-Jean ❤
What a fabulous and useful tutorial. Thank you. I have been playing with lighting in the sewing room. I always seem to need more. 🙂
wow this is really neat-I am pinning it to save for later-thanks for the tutorial-You are so good at these things-hugs
I had never thought about recovering a lamp shade. Thank you for the wonderful tutorial. We all know that good light is essential.
just toooooo great! Love the detailed instructions!!!
I could definitely use more lighting in my sewing room, especially on my sewing machine. Thanks for sharing the lampshade tutorial and for the great giveaway!
I could use more light for sewing–especially when working with black!
I don’t know of anyone with a sewing room that DOESN’T need more light!
I have good daytime light, but in the evening I could always use more!
As I age I need more and more light, I now understand why my elders always had every light on. Wish I’d had your tutorial when I crocheted a shade cover, your finishing instructions would have been useful.
I have a little lamp that I love but the shade has faded-just the trick to make new again! I need all the light I can cluster around my sewing machine-those LED lights would be just the thing!
Your lamp shade turned out beautifully. Thank you for sharing how you did it. I am going to give it a try.
I’ve done this to a lampshade, too. When the lamp part died, I had to go out and buy a replacement since I just couldn’t part with the shade! IKEA for the win, in my case.
My husband is an electrician. So, we have plenty of outlets and an abundance of lighting in the house. We do need lighting in our RV. He has been working on changing out bulbs which is tricky with the type and sizes of the ceiling lights. And, of course, I can always use lighting right at the sewing machine.
This was an interesting project. Thanks for sharing.
Connie
Your lampshade is great. I have one I need to redo, and now I know how to do it! I’ve been wanting more light at my sewing machine. Hope I win!
I of course need more lighting in my sewing room.
Yes I do! Doesn’t everyone?? I don’t try to sew at night because the lighting is shadowing.
That was fun to see how you did it. My aunt used to make her own lampshades, but I never worked with her on that. This looks easier. =)
I’ve done a couple of these. Yours is very cute!
Fun, aren’t they?
Wow, your shade cover looks fabulous! Great way to get less light. I do have a led light on my machine, but would love to win and give one to my sister. Can never have too much light while sewing.
Carla from Utah
I love your lampshade transformation. It turned out so lovely! Yes, can definitely use more light as we were among the unlucky folks in No. Calif that had our electricity cut….after two days still waiting for it to be restored…..
A beautiful lampshade, and a neat way to change it to suit your home theatre room.And lighting for my sewing, at the moment I use a bedroom lamp that I move when needed.
Thank you for that great tutorial!! I have been thinking of changing the shade on one of my lamps and new is so expensive. I’ll give your tutorial a try.
xx, Carol
Absolutely! My “mature” eyes seem to need more light while sewing.
Great tutorial for the lamp shade transformation. And my sewing room could use better lighting!
My sewing machine needs focused light in the evenings so I rarely sew at that time. Just too much strain on tired eyes. These lights look fantastic! Would love to give them a try. Thanks for all you do with Autumn Jubilee.
I could definitely use more lighting in my sewing room. I don’t have an overhead light and I just had to move the second lamp into our sitting room because a different lamp broke.
Super project, does not look too difficult!
Your lamp looks great! Always can use more lighting for these tired old eyes!
Your lamp shade turned out really nice. My attempt was not so successful. Yes, I could always use more light in my sewing area.
Cute! I’ve done covering with paper, esp when you find a nice little accent lamp with an ugly shade (I have a couple that are tiny pitcher and bowls…) I am in a basement apartment, so light can be a problem, and I have daylight bulbs in the can lights in the ceiling, much prefer real daylight! I have my mother’s prescut crystal/glass lamp from the 40’s (the other was lost before I inherited this one! and it had one of those bell shades which I found a plain one at Hobby Lobby years ago) and a desk lamp that I put an oval shade on, perhaps it’s time for a recover…
Great idea and a great tutorial as well, Carole! Your details always save time and money. 😊
Definitely need more light while hand and machine sewing as well as craft/garden table. Awesome lamp shade idea even in white! Many shades are yellowing due to age but don’t want to incur cost of replacement!
Always! You did a great job with the lampshade. Thanks for the chance to win.
Thanks. Great information and well explained.
Yes, my wife and I share the sewing room, and as we are getting older, it’s harder and harder to see. We definitely need a better lighting solution!