
Sometimes, despite our best efforts, our furry friends can make a mess of a treasured quilt. This one had been in a closet, but the dog found the door open one day, and began a chewing spree resulting in a lot of damage. Add to that the wear and tear of a quilt over 60 years old, and it was next to ruin. But, the quilt was precious, made by a grandmother in the 1950s. The granddaughter was very upset to find it in this shape, and contacted me to see if it could be saved. As I haven’t met a quilt yet that couldn’t be repaired in some way, I made arrangements for her to bring it to me.
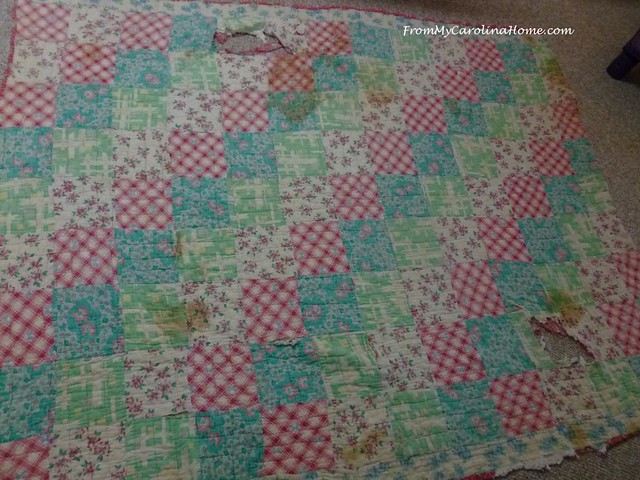
When she brought it, I could understand why she was upset. Two large holes had been chewed into it, and one edge was completely frayed. After discussing options, she decided to go with the plan of cutting off the bottom row and border, and using that fabric to repair the rest. New binding fabric would be purchased, and new binding made for the entire edge.

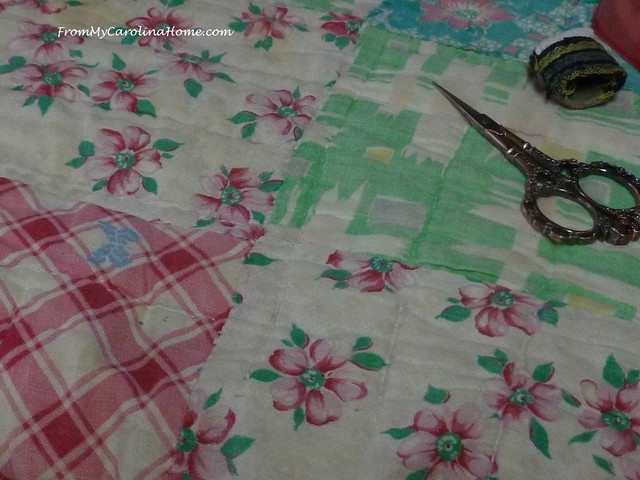
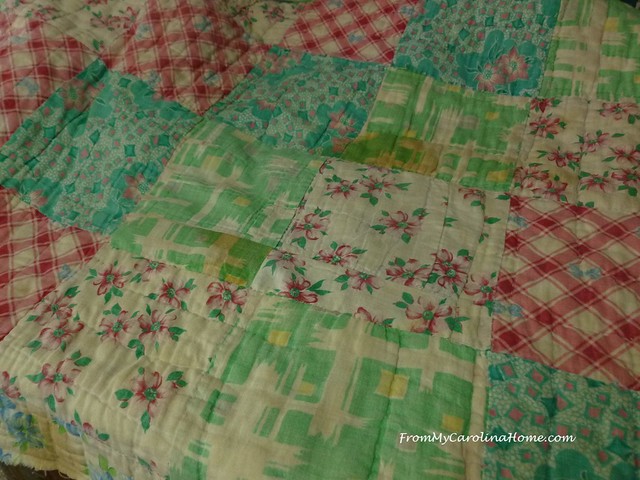
To begin the repair, I put the quilt on the table, and systematically went over every seam to find all the popped seams and areas needing repair.

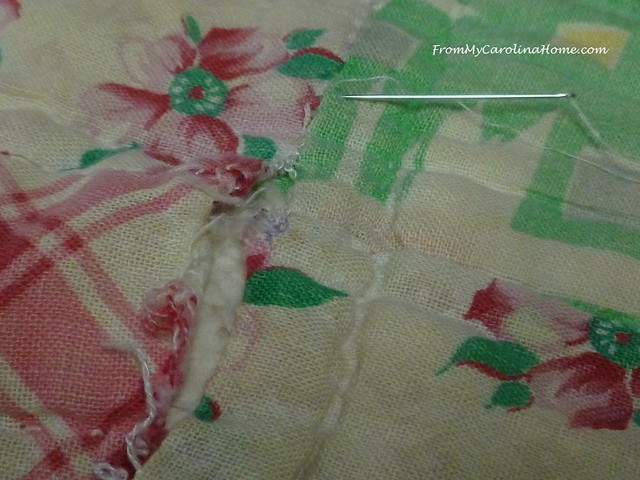
Each one carefully re-sewn by hand.

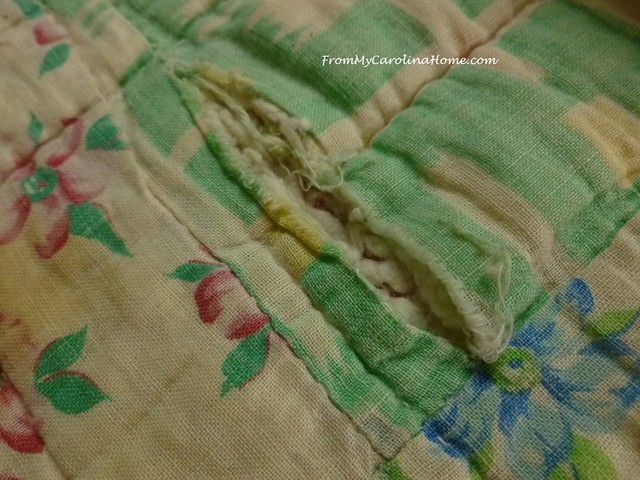
Some had rips associated with them, so I hand stitched the edges together as best I could, just for stabilizing.

Then I put a pin in to mark the spot where an appliqued patch would be needed.
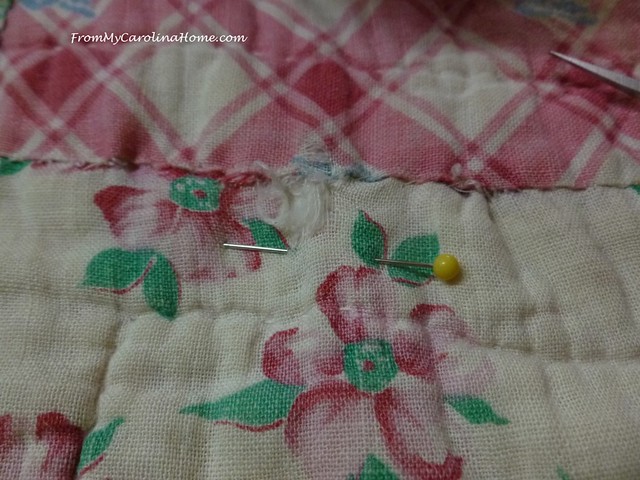
This rip wasn’t on a seam so it would need the same treatment.
The edges are stabilized with whip stitches, then a pin placed so I can find it again.
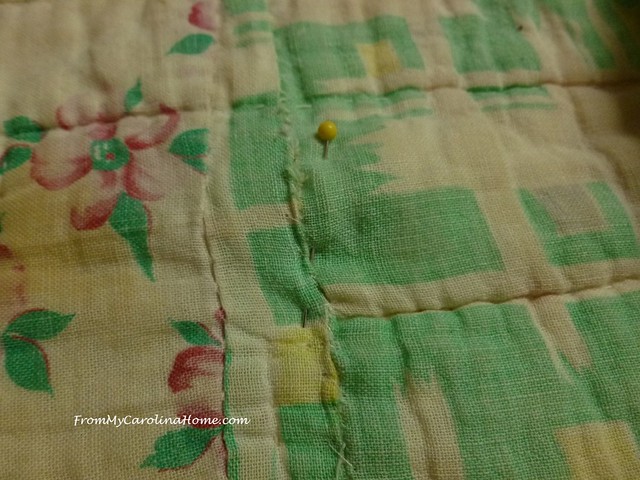
Working carefully, I examined each row individually, repairing what I could and stabilizing the rest for later.

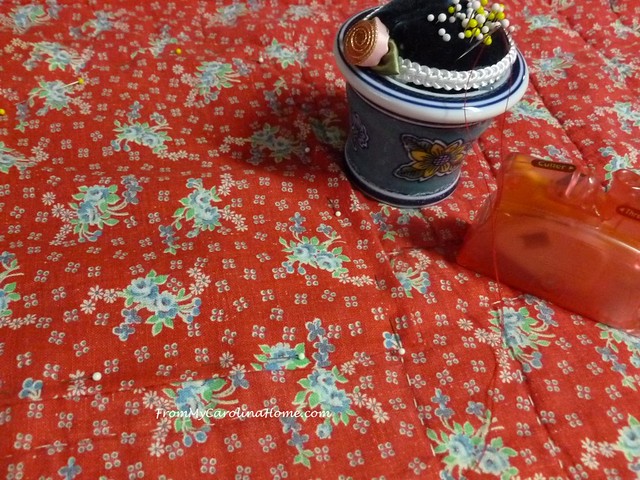
Aurifil thread in 50 wt is the best for this job as it is next to invisible on the repairs.

Some of the repairs were really quite simple and easy. There was plenty of fabric on this one to fold over the seam again on all four sides of this corner.
After stitching, the repair isn’t noticeable.
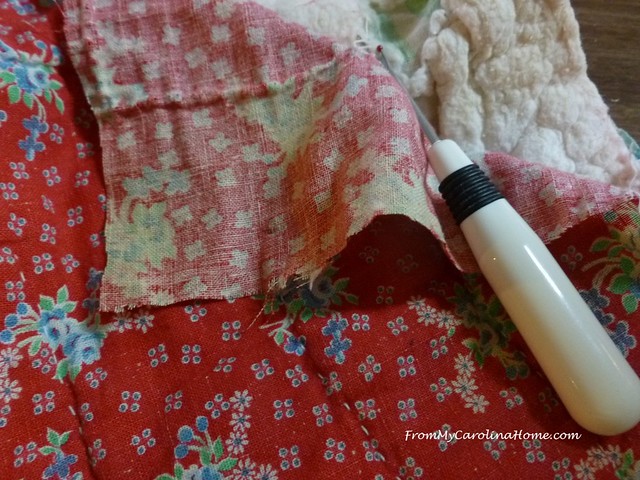
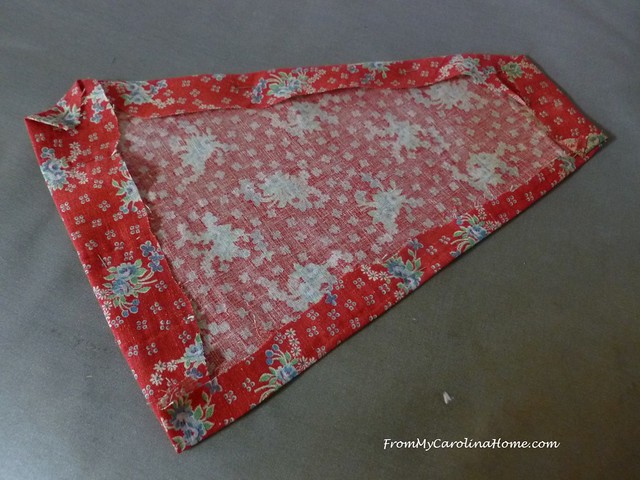
Next, I ran a line of machine stitching down the quilt next to where I planned to cut off the row most damaged.

Around the gaping hole, you can see why this is helpful. It keeps the layers together for the removal of part of the quilt.

After cutting the row off, I used my seam ripper to separate the layers so I could use the fabric for patches.
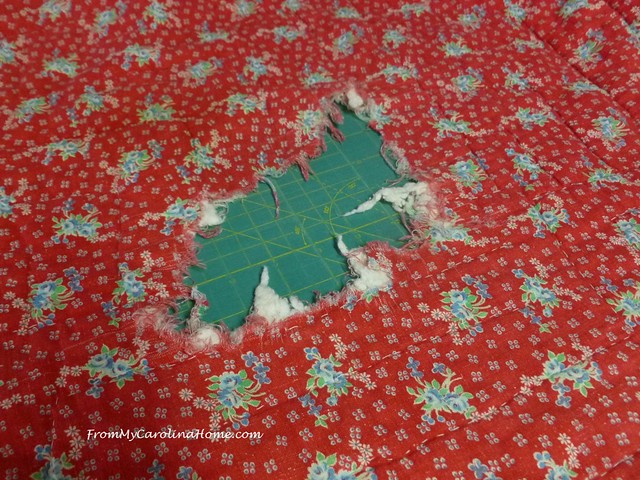
The remaining hole was large and triangular in shape. I spread it out on the cutting table and smoothed it so I got an accurate layout of the space needing repair.
I made a patch for the backside first, in roughly the shape needed.
The patch is put in place and pinned, then hand stitched into place.
Turning the quilt over, the hole now has a base.

Using batting from the piece I cut off ensures that the texture and loft matches the rest of the vintage quilt.

Next, I needed to sew a patch for the top, matching the prints as the damage crossed over two patches.

Patch made, it is pinned into place. There is another hole in the blue fabric above the patch. It needs to be repaired before the larger patch is sewn into place as it goes under the new patch.
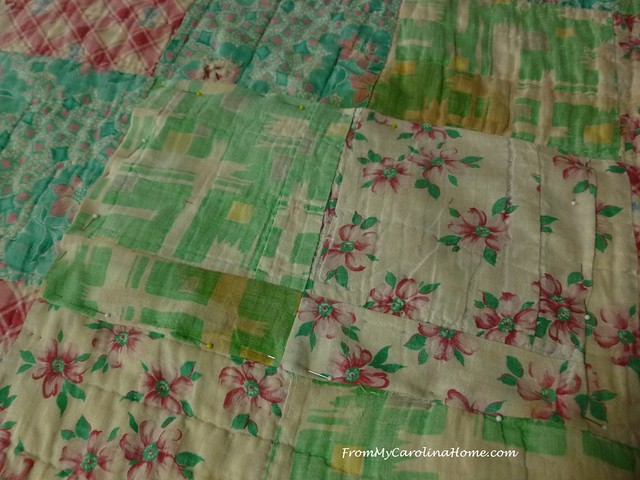
I made another small patch with matching fabric, and pinned it down.
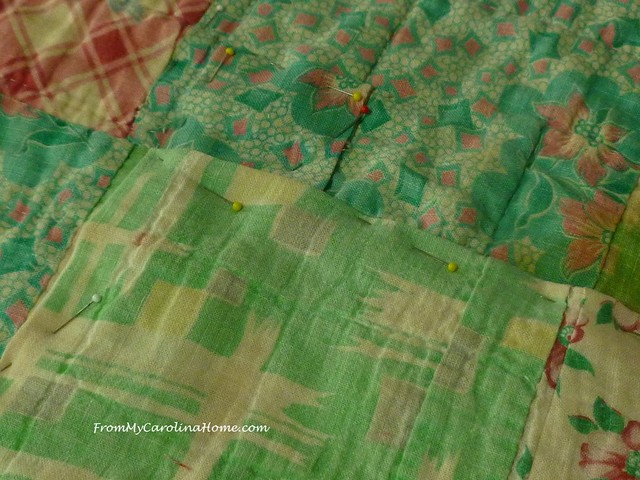
I appliqued the blue patch first, then the larger green and floral patch. Afterward, I put in some hand quilting stitches across the area to match the quilting on the rest of the quilt.
There was yet one more large patch with several holes, and I thought this would do best with one large patch covering all of them rather than three little ones.

The new patch is pinned into place, and I tried to line up the pattern in the plaid. I didn’t have a lot to play with, but this is pretty close. It is on the edge, so I only needed to applique three sides.

New binding was made and attached, and it covered the edge of the patch.

The new binding was put all the way around the edge for consistency. The color looks pretty good with the vintage fabrics.

So, there it is, all done. The customer picked it up on Saturday, and she seemed very pleased with the results. She still wants to use it to cuddle with, and display on a bed, and she should get years more use from it if she is careful with it.

I gave her instructions on washing it too, as that is safer to do now that it is repaired.

Are you working on any quilting projects?
If you have a quilt needing repair, see my page Well Loved Quilt Repair at the top of the blog.
Sharing with Slow Sunday Stitching

I saw in the paper that you would be doing a program for the Misty Mountain quilters. If I can get away from work I’d love to come hear it and meet you. Fantastic job on repairing this quilt!
Wow…you did an amazing job repairing this quilt! I wish I lived closer I would love to come hear you speak and meet you!
Yikes!! What an ambitious undertaking…..but such a worthy one! Kuddos to you for saving this precious quilt.
You truly are a magician when it comes to quilt repair. I could not find the patches in the finished quilt! What a labor of love.
Another fabulous restoration job and tutorial. You really gave new life to that quilt and I don’t think anyone will know unless they are told! Do you mind sharing a bit on how much you charge to do something like that?
By the way, I really enjoy the variety of content on your blog.
I love how you repaired the quilt. I love the pincushion you have.
I enjoy your sharing of the repair work and processes, Tips are very useful. I won’t work on a dog damaged quilt unless some one had a guest who’s dog did the damage. I get a little irked that a quilt owner would allow a dog on such a treasure – I don’t even let my cats on a finished quilt.
Beautiful repairs. You make it look so easy. I like the step by step illustrations. Natural question, how long did it take you to complete the repairs? Diane
Way to go, Carole! Great repair job. You are so resourceful.
Wow! What an amazing repair job. I hope the customer sends the dog to training school in order to save more quilts, furniture, clothes.
Excellent repair job! Lots of time and patience needed. Another heirloom saved😀
Beautiful! so glad it was simpler than it appeared at first… We love the old sentimental ones and while we can’t save them all, we wish we could…
I’m not working on anything other than some planning right now. Still have some binding to do on those vintage tops I had quilted, and second grandbaby is coming in Sept, so we have some in planning for that. Want to use the nautical fabric I stashed away and hope it’s a baby boy Schipper!
As always thanks for the inspiration.
Thank you so much for the informative step by step repair you did on this quilt. It looks amazing and I’m so glad that they will continue to love on this quilt.
wonderful step by step directions to break it down in manageable repairs.
Looks wonderful
What a great repair! Thank you for explaining the steps, I have one I want to repair myself.
Oh, Carole, I cannot imagine the relief and gratitude this woman felt! You truly are a magician without a rabbit! Thank you for sharing this step by step…..
I am so impressed! I am almost inspired to bring out the quilt that my Great-Grandmother made for me and do the repairs on it. I might get around to it at some point!
I would love to hear you speak. Do you ever get to San Diego?
Carole, you are truly a “Quilt Whisperer”. I appreciate your sharing the steps you have taken to preserve this quilt as best you can, allowing the family to maintain the connection with the maker for that much longer.
Thank you for all that you do for others !
Congratulations on another quilt saved and another miracle performed! You did a wonderful job! I am always amazed at your repair work!
What great repair work. I would be thrilled. It could never be like new, but by using its own parts it’s a wonderful redo. You are inspirational.
Carole, you are amazing. Your skill and patience are stellar. Great job! And thanks for documenting it for us to follow along.
Thanks for sharing the quilt repair and the numerous pictures. I’ve repaired a few quilts and you made it look like magic. Beautiful job.
What a meticulous job! Thank you for sharing your process. I usually turn down any repair work like this.
You are magically amazing.
I agree with Anne. Seeing your quilt restorations is like watching magic.
Great restoration. The step by step instruction will come in handy one day. Thanks.
Wow! What patience you have, and a real knack for knowing how to keep a quilt as consistent as possible. Details like reusing the same batting are great. I’m so glad your customer will get to cuddle with grandma’s quilt for years to come!
A lot of work, but it looks amazing! I’m so tempted to come next Tuesday, but it is a long drive from and to Knoxville. Have a wonderful time. I know the guild is in for a real treat.
I love to see these quilts all fixed up. You did a wonderful job.
Great job! thanks for the pics of your work
Brilliant! So many great ideas on quilt repairs! I have a few to repair from granddog Max episodes, and just need to tackle it. I’m thinking it will be a good takealong project for camping this summer. Thanks for sharing the step by step photos to see how the techniques!
I bet the original maker is looking down at you and smiling. What a great idea to remove a row to use to repair the rest. You did a awesome job matching the prints to hid the patches.
Thanks for the step by step process of repair on this quilt. You did an amazing job.