
Last year, I repaired a Severely Damaged Quilt, showing the steps of that repair on the blog. I thought that would be the most damaged quilt I would ever see, but I was wrong. Get ready for a very picture heavy post!! This one was my biggest challenge yet!
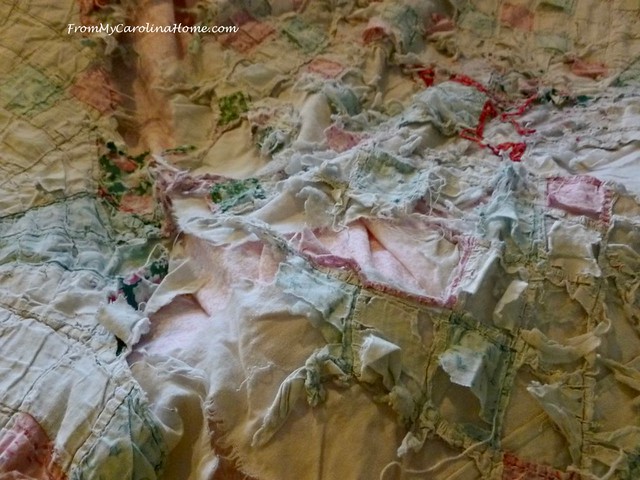
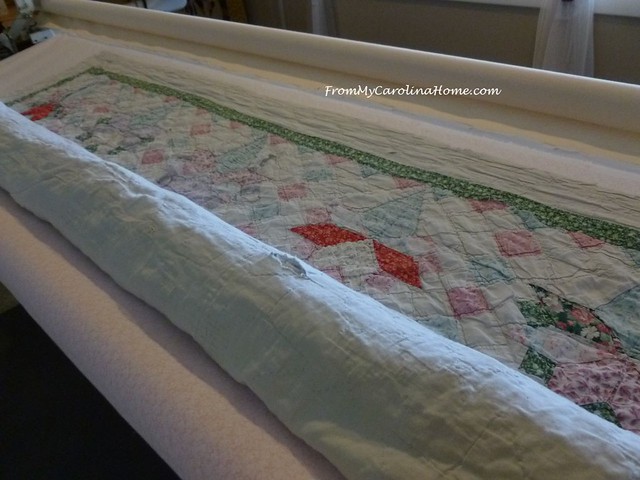
Large holes were in several places that went all the way through the quilt. The pink you see underneath the white fabric is actually the new fabric that will become a new backing.

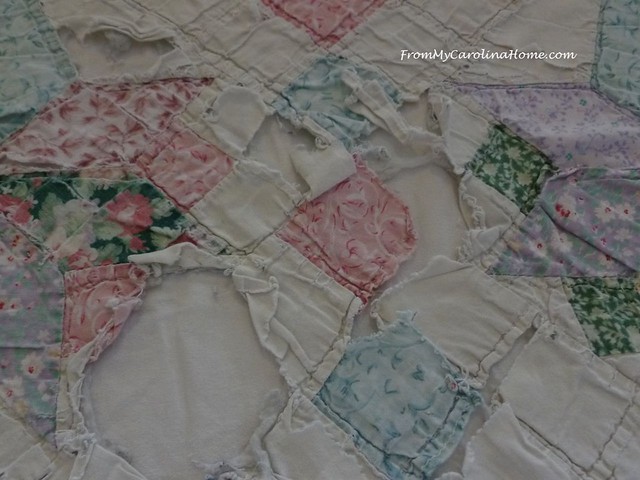
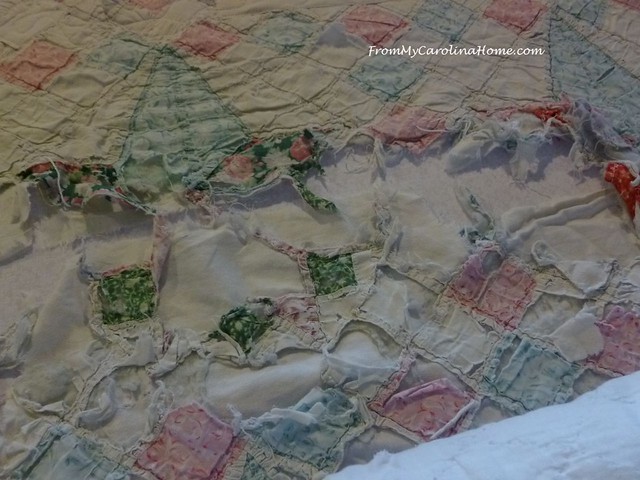
In places the backing was intact, but the top was just shredded and the batting was gone.
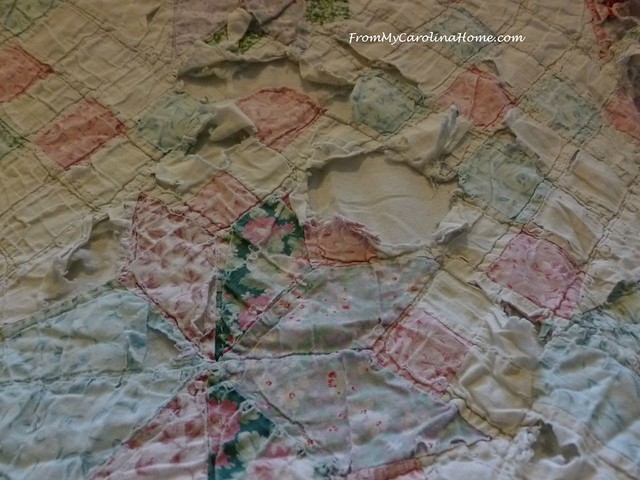
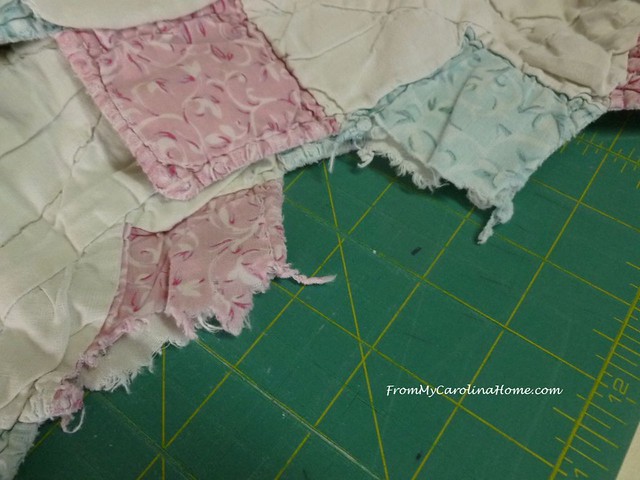
Along the edge, rips and tears were separating the pointed edge from the body of the quilt.

The largest hole was three feet in width, and 18 inches along the ripped left edge. The top below the rip is shredded too.

With the permission of the owner, the plan was to remove the edge all the way around and use that fabric to create patches for the center, then bind with new fabric.
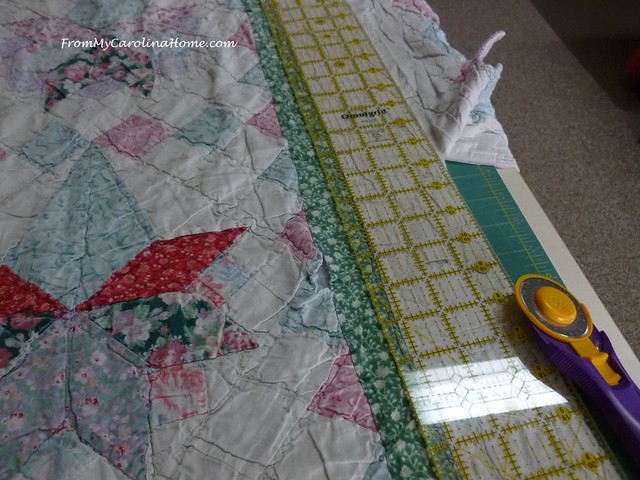
Some of the border was just not useable, but I took the intact points for the center section. I separated the top from the backing in the cut-off sections so I would have double the amount of fabric for patches, and I needed every bit I could get.
I loaded the new pink backing onto the longarm, and lay the quilt on top, using the upper bar to roll the quilt. I rarely use that bar, but in this case it was needed to keep the quilt from hanging and having that weight pull on the section I was working on. The customer decided not to add batting as she wanted it to stay thin and soft.
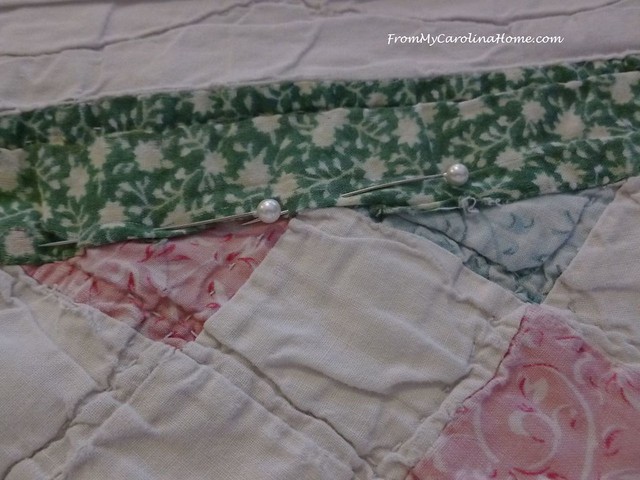
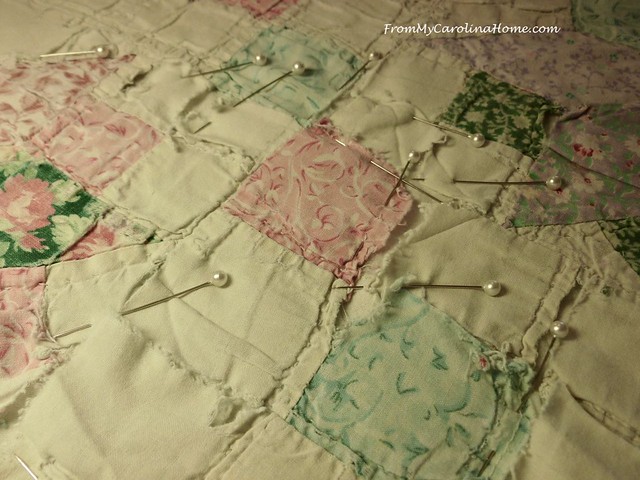
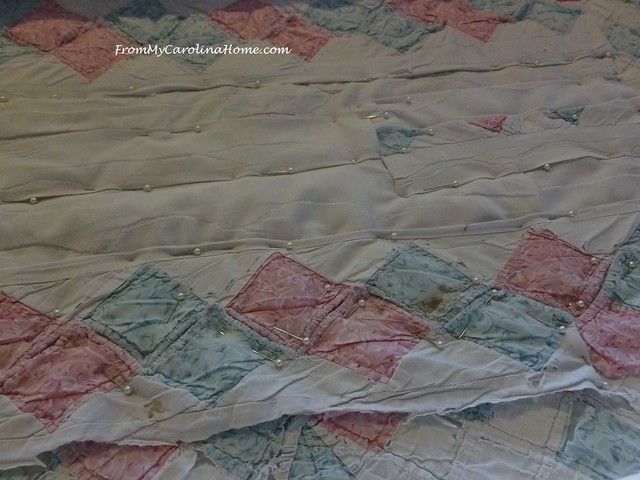
Pinning the sections that had enough fabric to fold over, I then sewed these areas closed by topstitching with the longarm.
Dozens of these little patches were placed over holes in the top.
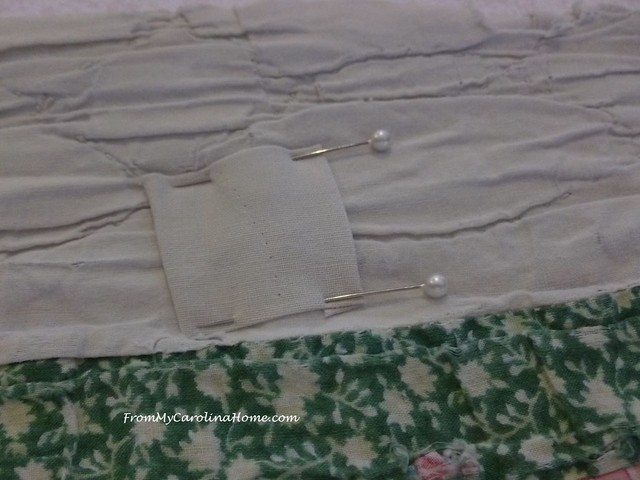
In some areas where the fabric was too damaged to fold over, I stitched the edges down before putting a patch on top.

As I worked my way down the quilt, the damage was worse.
Using the iron, I pressed out the rolled up edges, pinning as I went in order to topstitch.
Then those areas were covered with patches. Using the color squares from the edge made the patch look not so much like a big white area.
But the size was limited by the small amount cut off of the edge, so I added more patches, butting them together to cover holes.

And then I got to the top edge of the largest hole in the center. Once again, I ironed the rolled edges as flat as I could. In the empty spaces, I used some of the batting from the edge to fill in.
Using several edge pieces together, I made a very large patch, again butting the pieces up to each other to cover the space. Pins hold them in place.

I quilted over the patches after topstitching the edges.
Then I rolled the quilt up to get to the next section, and repeated the process again.

Lots of patches and lots of pins were used.
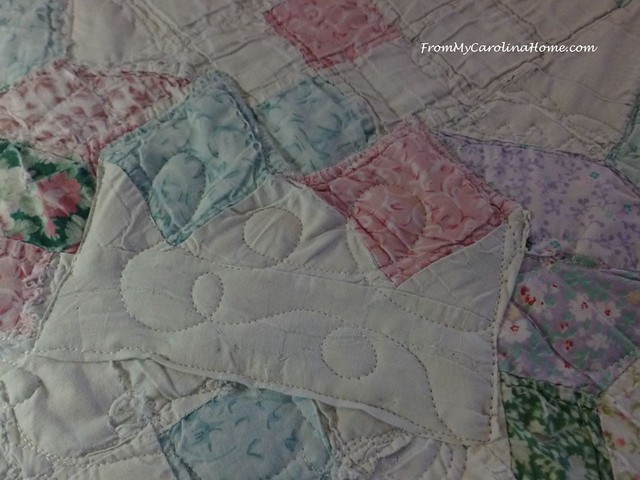
Then the patches were quilted over with loops.
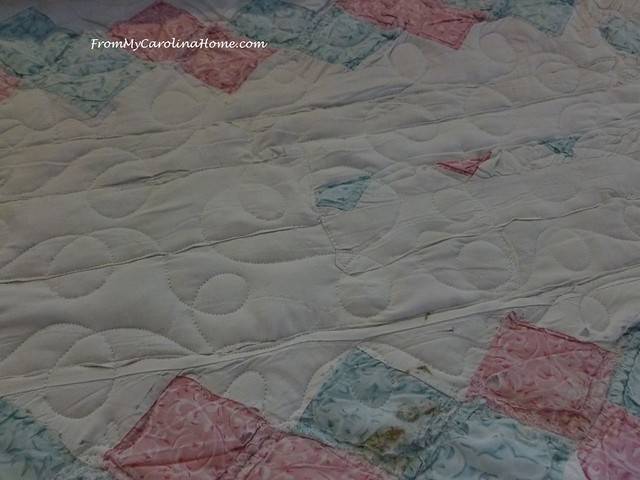
Roll, press, patch, pin, quilt, repeat.

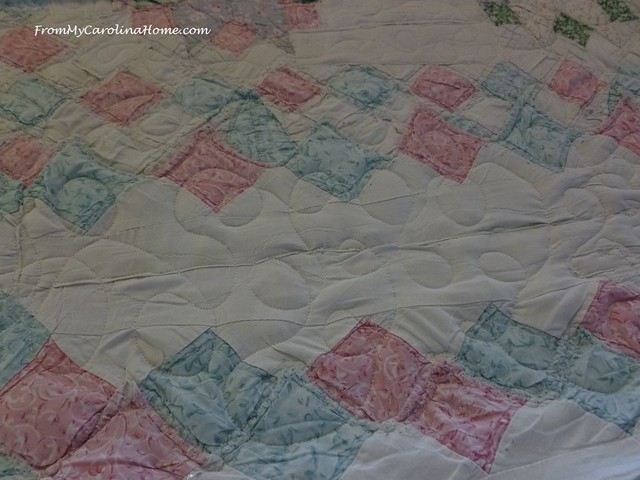
The largest section now done, there were just a few more bits to add.

The pink and blue points from the edge kept the repair from being a big blank spot.
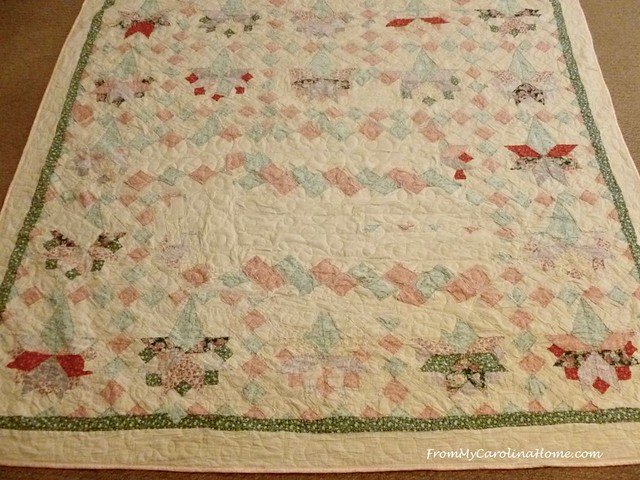
The owner and her 13-year-old son were really happy with the result. A beloved heirloom can be used and loved by the next generation. All the stitching, new backing and new binding adds stability to the quilt.

In case you are wondering, this project took 13 hours total time spread out over several days of intense cutting, pressing and pinning of patches, the quilting between the patches, along with making and applying new binding. If you have an heirloom or vintage quilt, here are the instructions on how to safely wash it – HowToWashYourVintageQuilt
What do you think of the final result?

What patience…….great post that can help educate others to tackle ‘saving’ a vintage quilt!
I think you did a fantastic job, but I really thought it was beyond repair! I am guessing that it holds a whole lot of sentimental value for them.
Amazing work, Carole. I’m sure it requires a bit of patience and certainly resourcefulness. It has been and certainly will continue to be a well-loved quilt!
Wonderful work in saving that quilt!
Great strategy to use some of the edge for filling in. I am amazed you were able to save it!
Once again you worked a miracle! That quilt was beyond repair! You have amazing patience and can fix something from nothing! Great job!
Just amazing Carole. It literally looked like a rag before you started. You saved it!
Wow! Again you worked your magic –you’re amazing !
Good morning Carole….I am amazed by your patience, knowledge and willingness to tackle, what looked to be an insurmountable undertaking. This quilt looked as though a couple of dogs played tug-o-war with it. Thanks to you, this family has their beloved quilt back. I doubt there would have been many people willing or able to tackle this project.
You did a fantastic job making all those repairs.
Where did you get the patience to work on such a project? You are amazing.
Yes, truly an amazing repair. I must give up too easy. It didn’t look salvageable to me. Good job
I am amazed by you dedication to the cause. My grandmother quilted and I have vague memories of her repairing hers. (She had 4 bedrooms in the farmhouse all covered in beautiful quilts). They were necessities as there was no money for other bedding. Although I don’t have any of hers I do have 2 incredible Santas who are adorned with the remnants of quilts. If you are interested I will send you a picture. Again, congratulations on your abilities to rescue family treasures.
Carolyn K.
What a beautiful quilt after all your wonderful labor of love. Inspires me to repair an old quilt that I have had for along time Thank You so much
Wow, just wow. Such meticulous work. I think I would have turned it into a table topper or something!
I bought a very old baby quilt on eBay that was in worse condition than I expected when received and have put it away, it has so many places needing work, about 3×4 feet originally. I shall try again, perhaps your method of sacrificing one part to repair another, and I may end up with a dolly quilt for my vintage baby doll! Want a long arm machine, sigh.
Could one use an old flannel sheet where new batting was inappropriate, and use that either between or for the backing? Mom used to call flannel sheets summer blankets and used them with a regular cotton sheet on our beds. I thought it might serve like batting as a further stabilizer and insulation? Anyway, very impressive!
To Sharon Shipper — using a flannel sheet as backing is a great idea. It would add stability without changing the look/feel of the quilt.
Gosh what a labor of love working on this damaged beauty–it is amazing what you accomplished…hugs, Julierose
Your patience is beyond description! I am a little surprised the owner wanted it repaired; there really wasn’t much to save! It must be a very special quilt!
I cannot believe you were able to save that quilt! I would have called it DOA for sure! You have way more patience than I ever dreamed of!!!! Great job!!!! Thanks for sharing the pics….we can really see how you made magic happen in front of our eyes!!!!!
Truly an amazing job! The owner is very lucky you would take on such a challenge!
You and your work are amazing! ‘Nuff said. 🤗. ❤️. 🌺
Amazing. You did a wonderful job saving the quilt. I wouldn’t even know where to start. Thanks for sharing.
Simply amazing work! The final result is so special.
a labor of love-hugs
I’m surprised that a quilt that meant so much to get it repaired would have gotten in that sad of shape in the first place. What a daunting task. I’m impressed you tackled it at all. Amazing work.
Nice job. Boy you have more patience than me! Great idea to cut off the edge and use the pieces in the body of the quilt.
How wonderful that you were able to return that quilt to such a beauty. I have several of my mother’s hand-made quilts and they are treasures. One she made for my ‘baby’ has some parts that have come unstitched and that makes me sad. Your work makes me consider possibility of reworking. My ‘baby’ is now 41 years old, so the quilt has been well-loved and used.
Wow, you are sew good. I repaired one where fingernail polish had been spilled and that was just one intense spot. Great save of an heirloom. Keep up the great recovery process.
A great effort, wonderful result. No challenge is too great for you, friend. ☺
Wow! What a great job you’re doing to repair this beautiful quilt. 🙂
I decided to look over the previous comments, since I was basically speechless….and I can only say….WHAT THEY SAID.
Amazing…..kudos!!!!
Utterly amazing. I repaired a favorite blouse for a friend–she’d actually worn the fabric away at the elbows (long sleeve blouse). I found fabric that would compliment the colors of the existing fabric (it was a plaid) and used lightweight fusible interfacing to adhere the fabric to the top then added a simple zigzag stitch around the edges to strengthen the patch. As in your quilt, the fabric was fragile and extremely difficult to work with. Admiration and kudos to you for your skill in restoring a family’s treasured quilt.
Hello Carole, You, my dear friend, are an amazing quilter! I am so thrilled that you share these miracle quilt saves with us. I know that my Mother asked awhile ago about a few seams in the first quilt I made and I just kind of brushed it off. I will get that quilt and fix it ASAP. Thank You for fixing and sharing how to repair these precious quilts for us! Have a spectacular day!
You have done an amazing job. I would have thought this one was beyond repair!
What caused the damage? I know age is a factor, but the quilt is all the same age, why was it so deteriorated only in certain spots? And your quilt makeover is hollywood style adding some pins and tucks here and there with a bit of botox injection to make that old gal look newer again! Nice!
This is nothing short of a quilt miracle!!!
Good morning,
You’re a braver soul than I, don’t know if I would have ever tried to repair that one. I would have probably just made something else out of it, maybe tree ornaments. Good luck with it .Phyllis
You must have a very big heart! Beautiful job!
Could you please tell us more of the quilt’s history?
Carole, “Impressive” is not a strong enough adjective to describe your repair process. You are like a quilt heart and brain surgeon. Taking the quilt from the brink of death (or the trash bin) and saving it for the family to keep loving. Remarkable and so inspiring 🙂
In this day and age of everyone just throwing things away and getting new. It is delightful to see you proving that no matter how things look, a bit of effort can go a long way!
Thank you so much for helping the family and for sharing your process with us.
Peg in Alaska
Wow that is incredible! You were able to bring back a quilt! That had so much damage I am amazed that you were able to do so much!
Wow, this is an amazing repair job!!! I’m impressed with your patience and your skill! It’s so great that this heirloom will live for another generation!
I recently returned from visiting my dad and he brought out a quilt of my grandmother’s that he uses. (He alternates it with one I made him from your Square Dance Two Step pattern!) There were two areas that needed repair, nothing nearly as serious as this, and I was able to fix them. But while he had it out I noticed the binding was really frayed in some places. I’m going to make new binding and fix it. My plan was to stitch the new binding on top of the original binding so I didn’t risk cutting the quilt. Would you remove the original binding instead? I’d love your advice.
Amazing! When I saw the before photos, I could not imagine how it could be repaired. And now it is so sweet. Truly –the Damaged Quilt Whisperer at work!
Oh darn you! Now I might have to repair a quilt for my brother that was made by our Great Grandmother!
That is an amazing transformation. I did not think that could be saved.
What an amazing repair job!