
A friend called recently to ask me if I would do a charity quilt she volunteered to do. Someone else had made the top, but wasn’t able to quilt it due to health reasons. So, my friend volunteers after no one else in the club she attends would do it. She wasn’t feeling well either and didn’t want to delay it getting done, so she asked me to help, and of course I said sure. She brought it over without taking it out of the bag, and boy did I get a surprise.
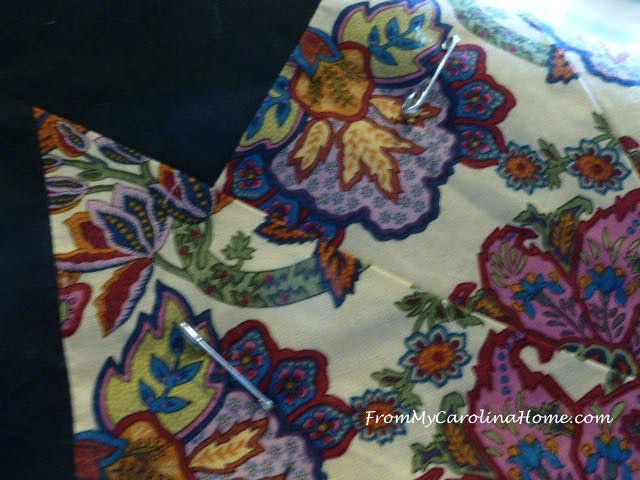
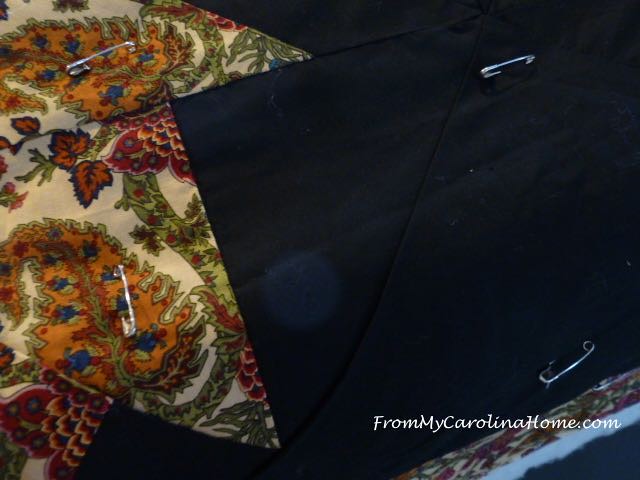
It was pinned with an abundance of safety pins. Presumably, the maker intended to quilt it herself. So, I got to work removing all those pins.
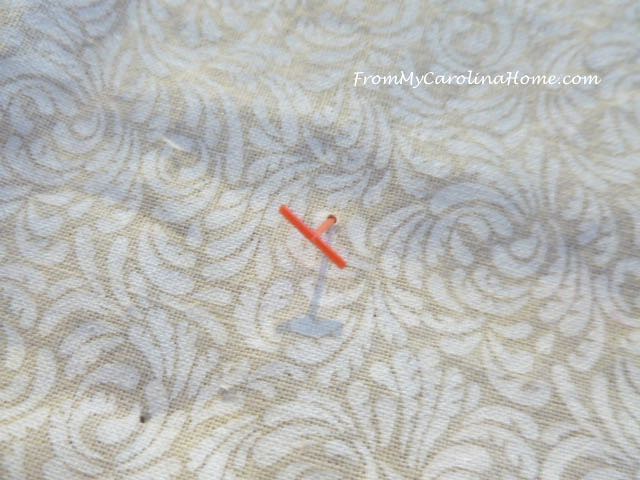
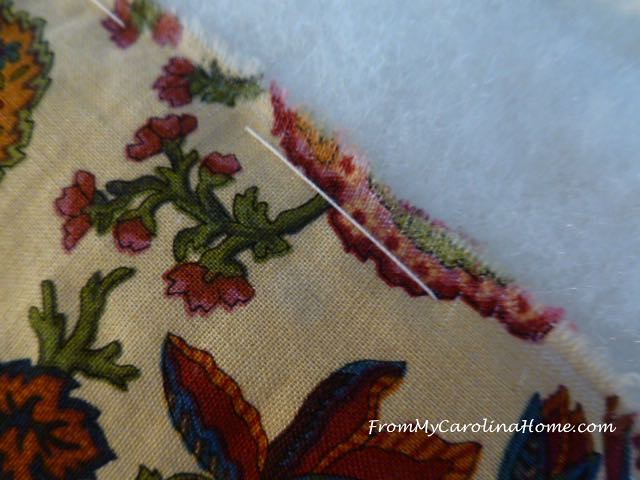
I thought I was done, but when I tried to separate the top from the backing, it wouldn’t come apart. Closer examination revealed a few of these plastic tab things.

And then another one, and still more!
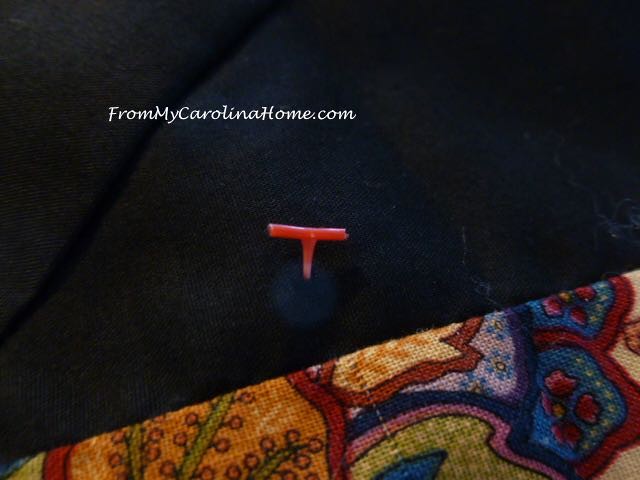
Finally, I got a bit smarter, and flipped the quilt over where the orange beasties stood out against the white backing.
Then I had to remove the basting along the edge. This would catch a longarm foot in a hurry and mess up the edge.
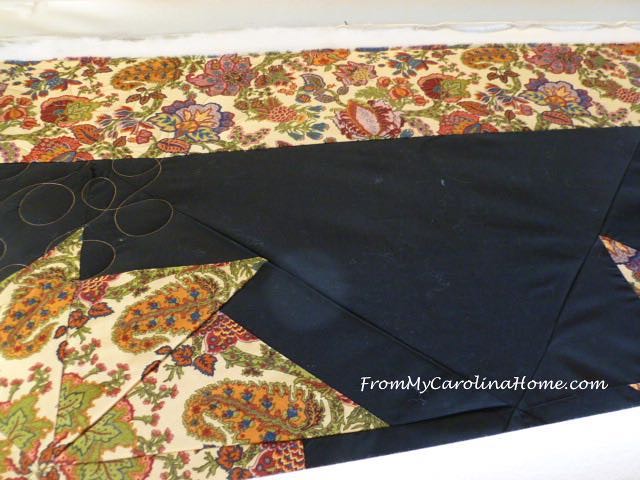
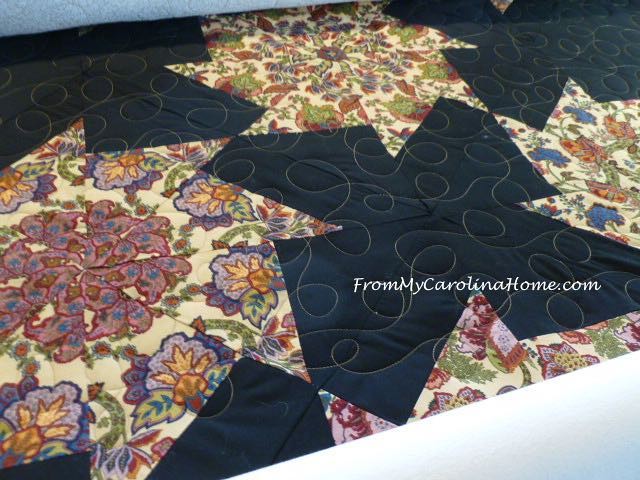
Laying it out on the floor, it was apparent this one was going to have little mountains at the center of all the stack and whack wheels.
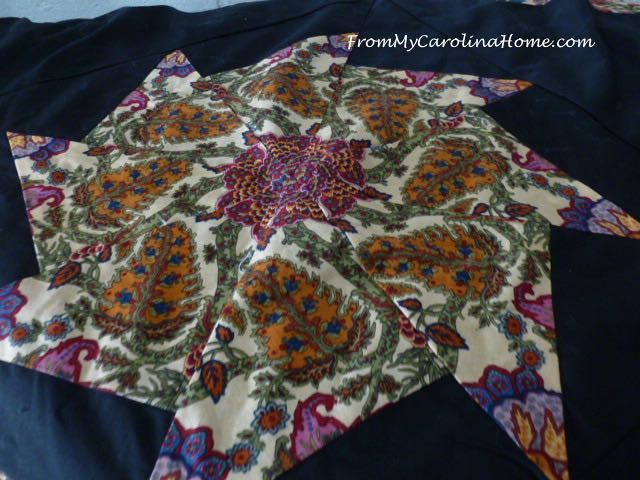
Thankfully, as you can see with my fold-up trick, the borders were put on correctly.
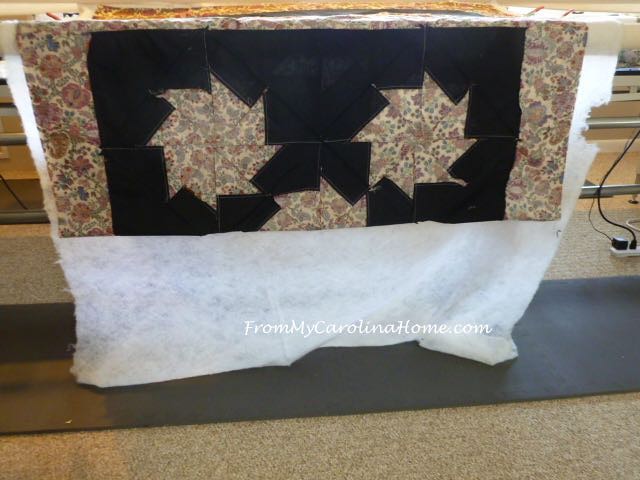
I ran a line of stay stitching across the top, then did the Best Press and steam trick to flatten out the piecing as much as possible.

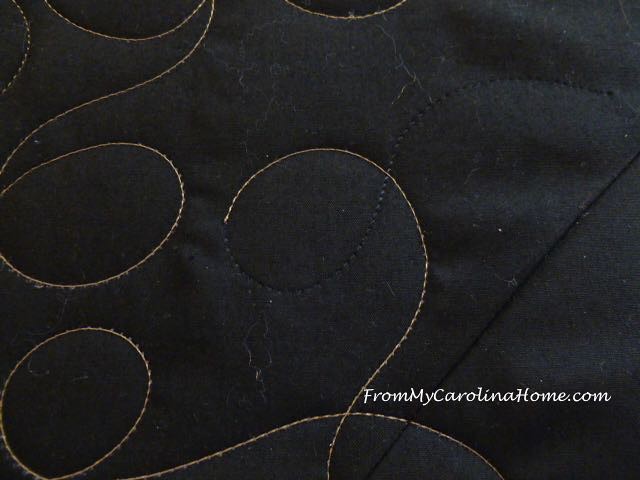
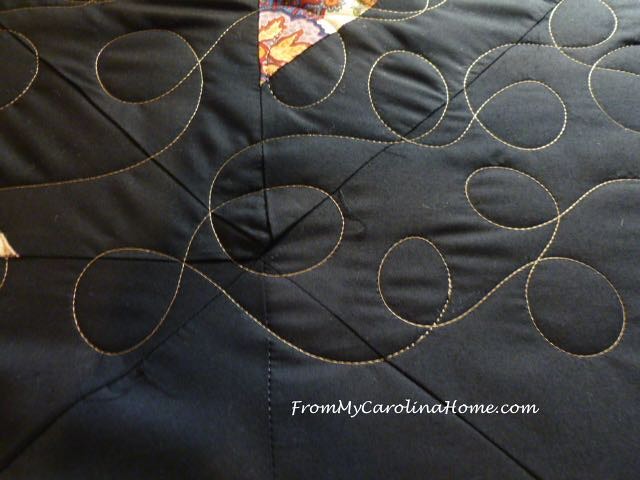
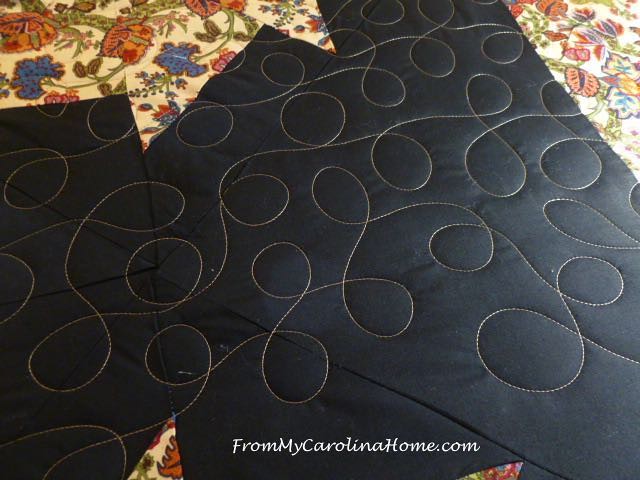
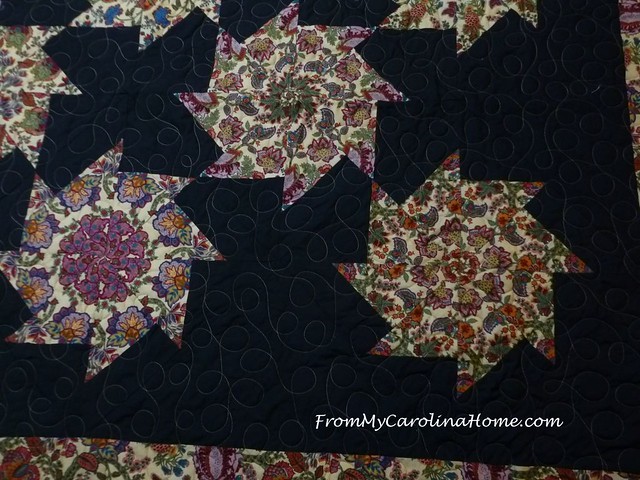
I decided to do a free hand loop quilting treatment on this one. A pantograph would be too hard to manage with all the fullness.

Plus, doing the quilting from the front where I could watch where the stitches were going meant I could avoid the really full center seam convergence areas. You can see here how I made a loop go around the points.
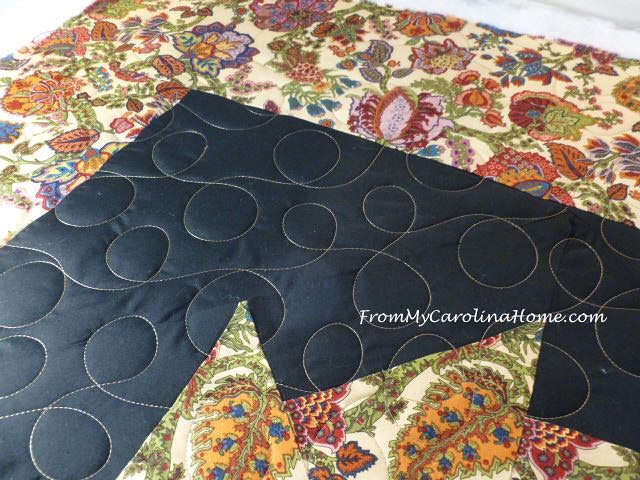
I don’t do this type of pattern in rows, rather I work on an angle, trying to leave areas for the next pass to come up between the previous pass in some parts so that it seems more random.
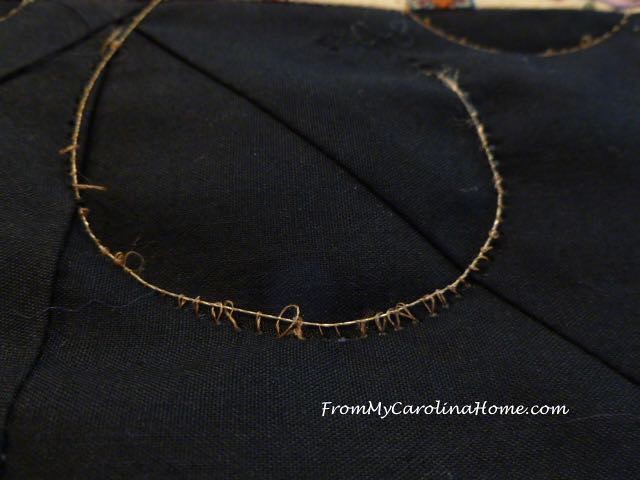
The bad news is when you have a thread break with light thread on black, it takes special care to tie off and bury threads so this isn’t obvious.
The good news is when you quilt with light thread on black, you see right away if the bobbin thread jumps out of the tension spring. This was fast and easy to take out, but would have been much longer if it had happened with a pantograph, because I likely wouldn’t have noticed until the end of the row.
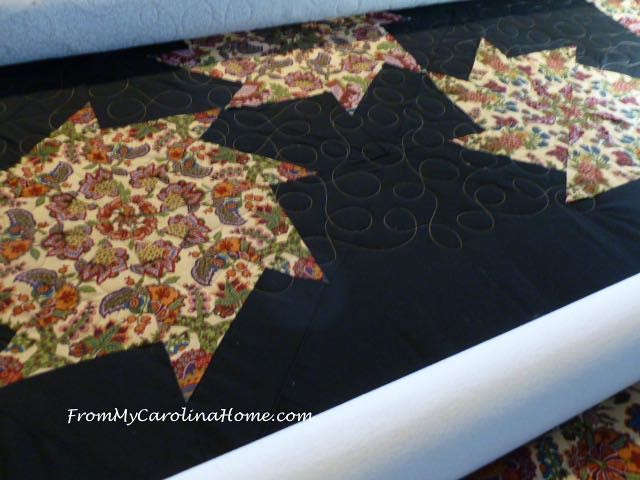
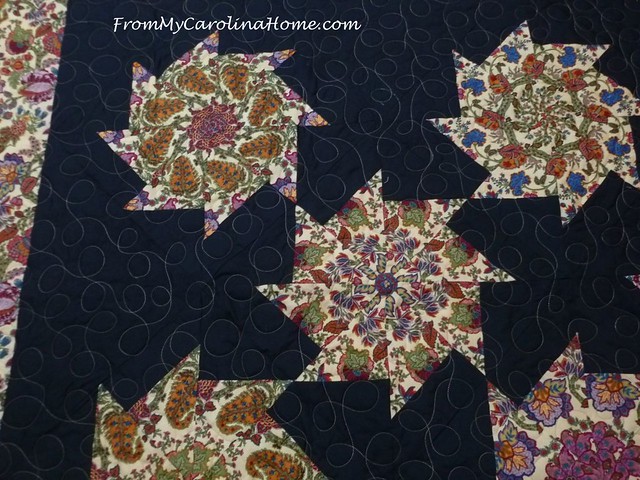
Anyway, all fixed and moving on. The rows go roughly from the bottom left to the top right. A big advantage to this is I can quilt a huge path across, as the machine doesn’t even realize when it is moving against its preferred direction because of the loops. So it continues to sew nicely, whereas moving against the natural path usually results in some thread breaks.
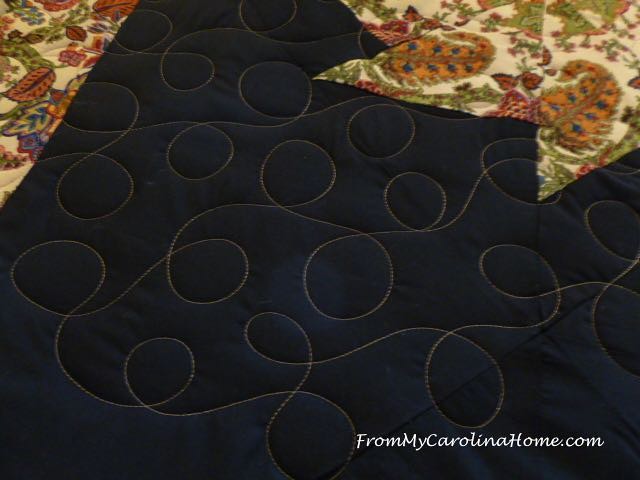
I could continue to circle around big heavy points where multiple pieces came together. Some of the puckering was unavoidable due to the excess amount of fabric in the middle, but this won’t be a problem once the quilt is washed.
I could quilt from the top all the way to the bottom of each pass in a 20-inch path. This is by far the fastest way I can turn out a quilt as I can use up every inch of quilting space available on each pass.
Just a little practice and the loops are more or less the same size. A bit bigger or smaller here and there really doesn’t make a difference.
Almost done, it took less than 2 hours on this throw size quilt. It actually took longer to get all the pins and tabs out and load it than it did to quilt it!
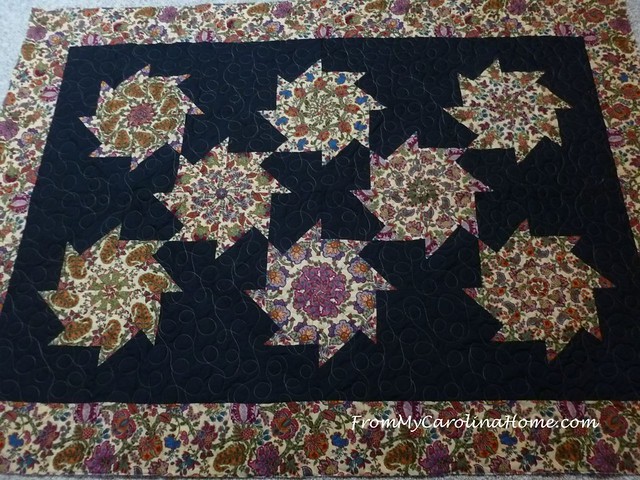
Quilting finished, it is a pretty quilt.
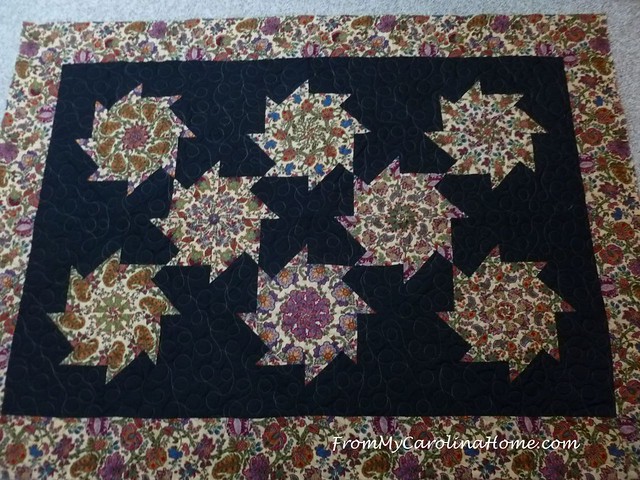
I am sure a charity will be happy to have it.
Most of the fullness did flatten out, with only a few puckers here and there.
What are you working on this week?
Fat Quarter Shop’s Basic of the Month is 20% off Pat Bravo Basics!
If you’ve ever wanted to do affiliate links on your blog, Check out ShareASale.
Did you know, Amazon has an Outlet Store with huge bargains.
Sharing
Freemotion on the River Linky Tuesday

You really do great work! The quilt is very pretty!
I plan to work on my patriotic UFO’s this week! 🙂
Hi Carole,
You are a good egg! How nice of you to help both the volunteers and charity. I love reading the details about how you quilt things as I don’t have a long arm. I sure think the quilting looks great and from the distance shot you can barely see the lighter thread. It’s a really nice finish. ~smile~ Roseanne
You do such nice work. Quilt looks great.
Great job on this! Those meandering loops are my go to pattern to eat up fullness too! Plus it is a pretty pattern and gives great texture when washed.
I’m finishing three Swing Bags…your pattern….for my daughters and granddaughter. They loved mine with the flamingos. Spring is slow coming this year. My tomato seeds (from you) are about 10 inches tall, but the night’s are chilly, so I’m hesitant to set them out. Heavy rain expected Thursday, so maybe they will get in the ground Friday or Saturday. Love your quilting experiences and how you solve “problems”.
Thank you for your patience…love what I call loop de jiggers quilting. Thanks for your loving spirit towards all.
Those loops look great on the black, love the thread color choice! This week I have this little project called Scrap Dance Square Dance to work on, I finished starching Saturday, so will cut this week, then there’s the never ending Hardanger and Butterflies and Roses quilt to work on a bit each day. I have two shirts to sew, one for me and one for Girl #2’s birthday, but they are not on deadline, so they may sit awhile.I hope to get some more done on my second mitten, the garden and iris bed need lots of attention this week, so maybe not!
Fab fix: how do you avoid the pucker in those radiant stars like that? Is it a poor piecing issue or just the nature of bringing together so many in the middle like that? I’ve done Dresden’s that don’t do that, but of course they are left open in the center with an appliqued circle to cover the space. I have some vintage blocks with the same issue, and have been hesitant to play with them… I was going to do a bedrunner or table runner with them but the issue of the little volcano in the middle is daunting!
It’s great that you were able to jump in and help finish that lovely donation quilt. The loop design worked out great on it.
It was wonderful of you to finish the quilt and you did it beautiful. It’s really a pretty quilt. Hugs,
Hello Carole; I enjoyed reading as you explained how you were quilting this quilt. Quite a long while ago, I had dreamed of owning a long arm. After reading your posts and the variety of difficulties and triumphs that you encounter, I now know for certain that my disability could never learn to do all that is required. So, thank you so much for always being totally honest with your posts about your long arm quilting experiences. So many bloggers only reveal the final project not the whole journey. This is a beautiful quilt. I know that I pin a lot, but not with two different methods (LOL) and I am sorry that you had to do all of the unpinning and so forth to get this quilt ready for your set up. I am looking forward to trying out my new set up on the quilt rack. Well, if I ever get the Leaders finished. LOL. I have just had so much going on, it is difficult at times to fit everything into the day. I continue to work on the quilt blocks I told you about yesterday or well sometime. Have a great day!
Congrats on getting your pattern published!! You transformed the quilt beautifully with your patient work.
It really is a pretty quilt, and a washing will eliminate the puffs, as you predicted. So nice of you to do it, and get it done quickly for your friend. I’m guessing a lot of people might have been intimidated by the puffy spots. Yay on getting the pattern out there pretty fast!
Well done getting it finished. That was a lot of extra work. Hope it doesn’t happen too often.
Your quilting design is ideal. I’m not surprised that it took longer to prepare the quilt than to quilt it with all those pins and ties.
I love all your tips for long arm quilting and how you get past what could cause you troubles! The loops are perfect! All those seams coming together is the nature of the stack & whack. I hope they were at least “pressed” open. Thanks for sharing your tips and techniques. 🙂
This turned out great. My sister recently brought me a quilt with A LOT of fullness. It was a learning experience.
You put a LOT into this venture, but you turned it into a good teaching experience, too. I always like seeing how you handle those less-than-perfect tops. Funny how the piecer made puffy blocks but good-fitting borders. The loops worked really well around the bulky spots and look great! I often intentionally vary the size of my loops so I don’t have to fret about consistent size. Sometimes I even throw in a random star ☺. This week I’m trying to finish hand-tying a queen-sized flannel quilt I made for DH’s camper. It’s been “aging” while I finished a few time-critical pieces. Thanks for sharing your tips!
Hi Carole,
This reminds me of folded ted bags, I bought a book on doing it but thought about using pretty gift wrapping paper instead of the tea bags.
Phyllis
Beautifully done!
Beautiful quilting design, I really like how the lighter thread stands out on the black fabric.