
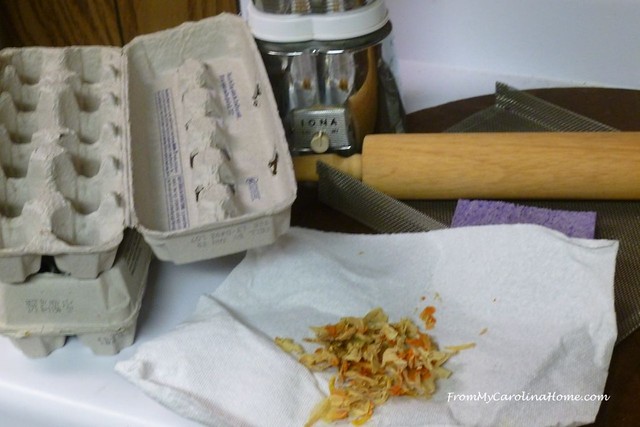
After buying a couple of books and reading about this process, assembling what I thought I needed, waiting for a nice day outside to try this and dilly dallying for a year, I finally got around to a day to attempt making paper. I’ve been Drying Flowers for months, so I have a lot of to use for color and texture. The funny thing is, I didn’t need to wait for a nice day outside as it was easier to do it in a sink. I did these on a rainy day, using the laundry room. I had some paper egg cartons, and had realized that they pretty well disintegrated when they got wet. So I saved them, found a rolling pin at the thrift store, got a free blender with a glass pitcher on Freecycle, and found a screen to use for the paper.
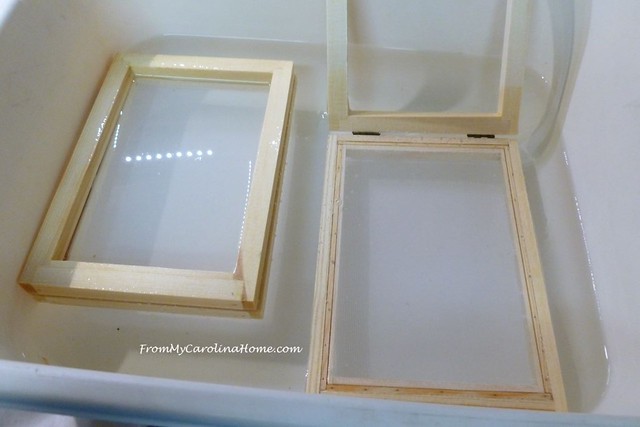
But, I realized by reading further that a frame would do a better job, as you need to have something with sides to corral the pulp into place. I ordered a set of two paper-making frames, and found a large plastic basin in DH’s garage stash. The frame has screening on one side of the frame, with hinges to lift the other side. Closed, it gives you a space to collect the paper bits, then you can lift the top up to expose the paper to press it.

Both frames fit nicely in the plastic basin.

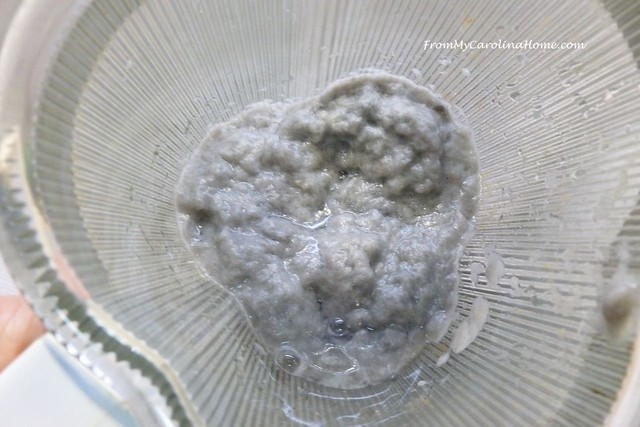
So next, fill the pitcher halfway with water, and break up the carton into little bits. I used about 1/3 of it.

I let it sit to soften for a few minutes.

Then, I blended it on high for just a moment, and it made pulp fast.
Next I added some dried flowers to give the final product more interest. These are dried hosta flowers. I thought the purple would work nicely with the grey pulp, and hopefully would push the color into more of a lavendar.
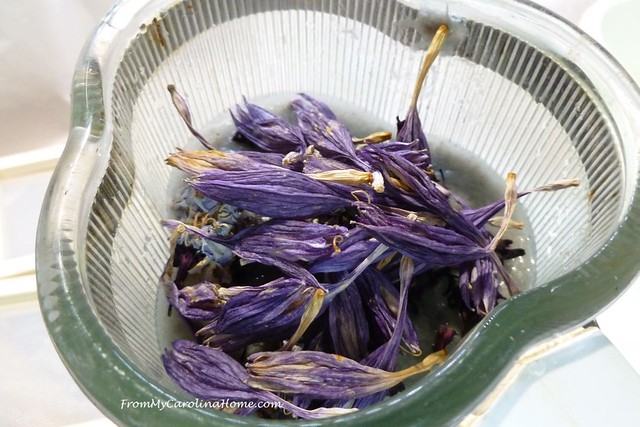
Adding a bit more water, I blended on a medium speed until I had a fairly homogeneous mix.

I filled the pan with water, just enough to make the frames float.
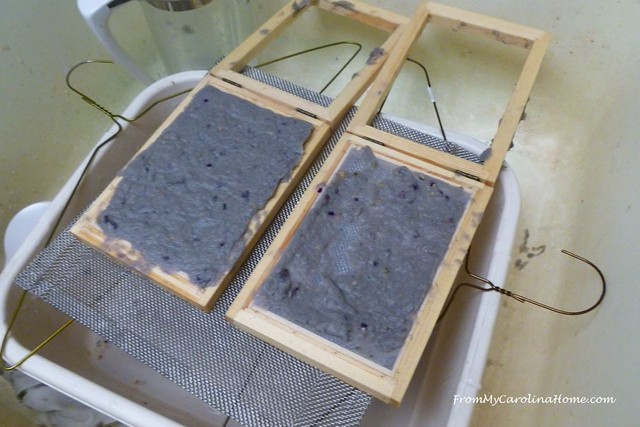
Next, pour the mix over them. Yes, it looks pretty disgusting right now, LOL!! You can see the bits of purple flowers, and the color came out darker than I thought it would, mainly I think due to the ink on the cartons.

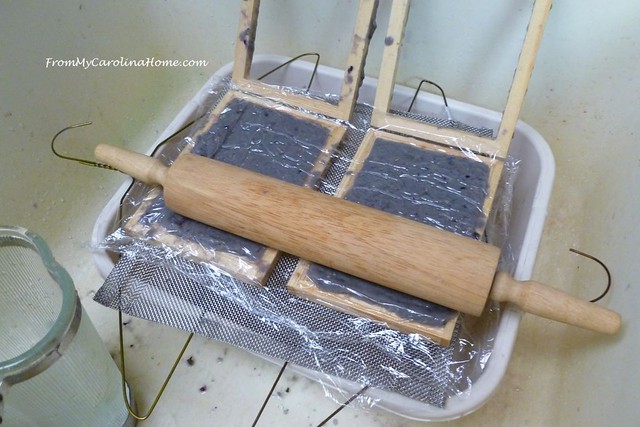
Jiggle the frames in the water, and swish it around with your fingers until the pulp distributes evenly inside the frames. Then lift them out and set on a screen or other type of frame to drain. Press out the water as best you can gently using a sponge, as shown on the frame on the left, then lift the top as shown on the right. Don’t use too much pressure or it will pull the screening out of the frame. (Ask me how I know, LOL.) If that happens, just use a putty knife to push the edge back into the frame.

I realized quickly that this was going to make a royal mess, so I moved the whole set up to the mud sink. I also made sure to collect all the pulp before it went down the drain so it wouldn’t clog it up. After this, I dumped the leftover water in the basin out in the flower bed.

I lay a bit of plastic over the paper so it wouldn’t stick to the rolling pin, and rolled the sheets to squeeze out more water.
Then I let them dry for a bit.
When I was able to lift the sheets off the frames, I set them onto paper towels to dry. They took two days to dry completely.

Not too bad for a first attempt, don’t you think? The third piece didn’t have enough pulp to do a whole sheet so it has a big hole in it. I’ll use these in strips and rectangles to add interest and texture to my cardmaking.

So, a few lessons learned, and I was having fun. I found a large piece of white newsprint, and I tore it into shreds to soak for an hour. This time I wanted more control over the color.

After blending for about 30 seconds, I had white pulp.

These are dried amaryllis flowers from my red blooms last February.

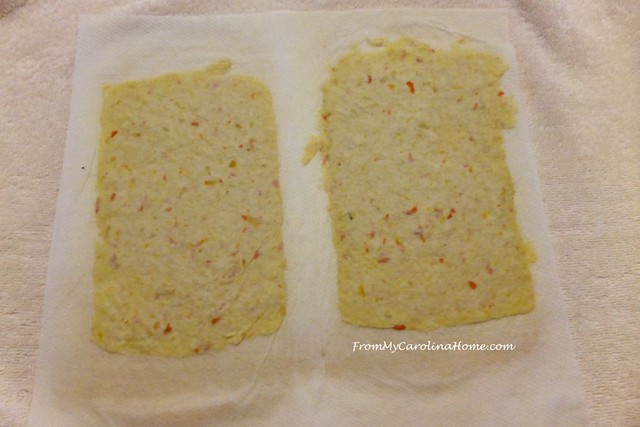
Oh, I like this! A lovely shade of pale pink resulted, with some dark bits.

This time I carefully poured the pulp into the frames instead of dumping it like I did the first time. When the frames were full, I saved the rest for a second run.

Pretty pink sheets were turned out onto white paper towels, and then rolled with another paper towel on the top. This worked better than the plastic, soaked up more of the water, and left a smooth appearance.

Four sheets of pink, and I am on a roll!

I soaked shredded newsprint paper in a natural color, along with the white paper towels shredded from yesterdays activities and let it soak for a bit.

This time I wanted yellow, so I used the dried daffodil flowers.

Once again, blending the pulp, and carefully pouring the sheets.

Rolling between paper towels, this time I set those on top of an old towel. Then I rolled several times, pressing harder this time.
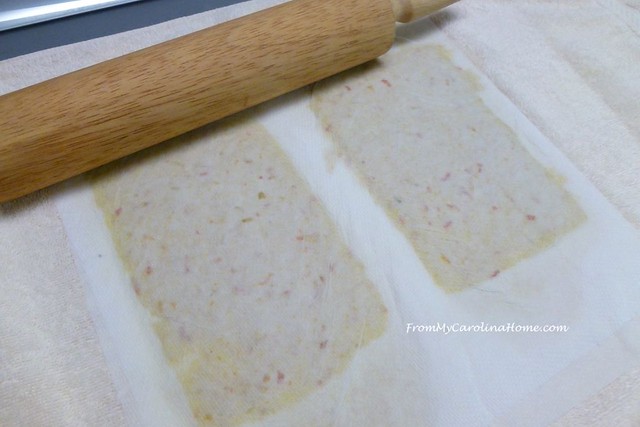
I got even better results as I was able to squeeze out more water and get an even flatter sheet. The yellow is nice, with the darker orange bits from the flowers.
One more time, this time with the browned rose petals I got from drying white roses.

Same procedure resulted in a lovely light brown which should do well with Autumn inspired cards.

There we are, the result of several rounds of making paper. Next time, I am going to soak several pitchers full at one time so I don’t have to wait. Not too shabby for my first go round, I think.

The quality of the paper got better with each set, as I was able to get them thinner as I went. The sheets were really stiff when thicker, but the thinner sheets were more flexible. Next I need to get another blender at the thrift store as the freebie I received leaks. I don’t think that having water inside the motor is a good idea, so it went to the electrics recycle at the recycling center in town.
Have you made paper like this?
Update – Thanks to Wendy, I have watched a ton of Arnold Grummer videos on youtube and will have more fun with this soon.
Affiliate links to supplies and information – Making Paper with Garden Plants, Papermaking Techniques, Easy Papermaking, Paper molds with screens
Sharing – Celebrate Your Story, Vintage Charm,

That looks like a lot of work. I am interested to see what you do with it.
This brings back memories of doing this with my second grade class for a lesson in recycling paper. We added a bit of glitter to our pulp and scraps of construction paper for color.
Oh, isn’t making paper just the funnest thing ever (next to quilting, of course)!?! Yours looks great!
Definitely will add some artistic texture and color to your cards! A pasta making machine came to mind to make them thinner? Are they extremely fragile? I suppose flour or glue would make them stronger? Makes one appreciate all the paper we take for granted!
I have not tried making paper but your results look pretty and will certainly lend a fun, unique twist to your handmade cards.
Just wondering if a few drops of food colouring would get some nice results, especially with white paper 🙂
Your cards made with those papers are going to be very pretty.
You had a great time experimenting with base papers and colors. The yellow and pink turned out exceptionally well, but overall, a marvelous first run!
Your results look great – especially that yellow.
The results with the white base are much prettier, but the egg carton did work great for practice. This isn’t a craft that is on my to do list, but it looks like you had lots of fun!
Sounds like you really getting into a fun, but messy hobby. Here are a couple of things I’ve tried that might be helpful. Try using cookie cutters or cut simple outlines (eg. rectangles in commonly used sizes) from plastic (yogurt lids, clear plastic from baked goods etc), then squirt pulp into your shapes using a turkey blaster or washed ketchup bottle. That way you can control the amount of pulp, even doing different colors in different areas and keep the lovely soft edges at the same time. Colored napkins add nice color to pulp. If you are in a hurry, use an old iron to dry the paper.
Years ago my daughter made paper for art classes. She found like you that old towels help soak up the water. She liked results with a thinner pulp so the paper was not so stiff. With very thin pulp she would put in a base layer in the frame, scatter her small petals and flower bits and add another layer of pulp to encase them. I loved her results.
Your papers are looking good…..practice makes this technique work better.
You achieved very good results for your first time at this time consuming but rewarding process. I don’t do enough with paper to make that effort again, but enjoyed the few times we did it as a group project.
Lovely experiments and great result. We have a paper mill locally – it was established way back in the 1700’s. For most of that time it has produced the cotton based paper used for bank notes. Fascinating process that starts with bleaching and pulping the cotton that arrives in huge bales.
Did this years ago in my classroom. Lots of fun! We made larger pieces which we used for journal covers.
Hello Carole, This is one of the reasons that I love to read your blog and have become one of the many followers who support you in every way we can! You love to surprise us with doing something new and unique. Well creating your own paper is unique to me, at least, I just do not remember reading about it before. In your post, as the reader, I could tell that you were enjoying this experiment and everything that you learned as you went along. I look forward to reading your posts when you are making card embellishments or entire cards with your new paper! Thank you for sharing your fun adventure with us, Carole! Have a fantastic day!
I just received a papermill kit from Arnold Grummer Paper Co. I can’t wait to start experimenting!
I love my Grummer kit-I have the simplest one they offer and I have used it allot so far
I binge watched the “how to” videos on the Arnold Grummer YouTube channel. Oh my gosh where has this been all my life!
You got great results with your dried flowers had not thought of doing it that way-dried first and then pulverized with the pulp I use a a big sponge to get the water out-the little simple kit I have has a piece of plastic, and a screen that fits in the mold.the screen on the bottom to dip in and get the pulp and then the plastic goes on top and I sponge out the water that way in an empty plastic tray like you have.
I also use a very big and heavy encyclopedia that is in plastic wal mart bags to flatten out the paper-I also bought and re use over and over-these special papers that soak up more of the water-I place them on top and bottom of each paper before setting the heavy book on top-and then lay out on a table to dry-takes about 12 hours. I am glad you had fun-this is a very fun project that I always enjoy
I shredded paper in the garden shredder, and Hugh made the frames, with bought fine mesh.I had old blankets cut to size to lay the papers on, but didn’t add flowers or leaves, This will be such fun to follow as you do more, and a new blender will be a lot safer!!
I forgot, Hugh also made me a press, that had a wooden plate at the bottom, and then another at the top with holes to fit over the tall rods, with BIG wing nuts to tighten it and squeeze the excess water out. This worked so well, as I could do a lot of layers of paper between the blanket squares.
I collected paper for a long time, shredded (w/o staples!) and junk mail in colors, because I was determined to do this! my friend does calligraphy on homemade sheets like this. I think she adds a little liquid starch to it to emulsify better, but I’m probably mis-remembering! I had loads of pink and yellow saved, sigh. Then we moved. She had a large screening frame she made herself with 1x1s and window screening. Oh well, as if I have time for another craft! but I do still have some Japanese washi bought while living there to do decoupage with! So glad fall is coming, we’ve had a very hot August.
sharon
When my kids were little, one Christmas we made ornaments using construction paper to make pulp and cookie cutters for the shapes. They are still used every year and bring back memories over 25 years old!!
I remember reading up on this some years ago, watched a demonstration, etc. They poured it onto a circle frame that went over a coffee can… can you still get those cans? I remember that adding a little bit of liquid starch to the mix helped it hold together. Sounds like you are having fun, and that is the important thing here, isn’t it? Keep at it and tell us what you’ve learned along the way.
Well this is the epitome of organic! Well done. The colors came out well with the dried blooms. Will look forward to seeing how you use these. I think the yellow is my favorite. And thanks for sharing lessons learned.
Wow, this is crazy cool Carole, but boy does it look like a lot of work! I have new respect for handmade paper now!
Jenna
My sister used to make handmade paper, and I loved receiving the beautiful cards she made with her paper. Very interesting to see the process – I know I’d never have the patience though.
Loved seeing your process. I did it once with egg cartons without the fancy screening; tried drying it in a warm oven–scorched the corners. I think I’d put in dried petals and bits of thread and maybe some glitter! I love making cards but the extra postage for thick ones hurts my feelings! If your blender is only suffering from a tired rubber ring, I got replacements from an old-type hardware store and have also cut them from art foam! Just got a new-to-me blender at a yard sale–like my old avocado one; this one is harvest gold. Felt so glad to blend my zucchini for a recipe!
I enjoyed seeing your paper-making process, Carole. Thanks for sharing at Vintage Charm!
What a great job you did! I made a lot a few years ago, & still have some – sent you some too, as I recall. I’ve learned from your experience, thank you, & next time I can talk my friends into needing some more, I’ll try your way! We didn’t soak anything overnight, just blended & blended & blended! Your colors are much nicer, & a nicer texture too. I ironed mine, but that didn’t work as much as I hoped. DID run it thru my Cuddle Bug to cut out balloon shapes, & that finally smoothed everything out. Anyway, kudos to you!