
Today we begin the Vintage Christmas Quilt Along, welcome!! This will be a six month quilt along, with two blocks each month. This will give you 12 blocks that you can then make into a quilt, placemats or table runner, or continue on your own making more blocks. We’ll have half of summer and all of autumn to quilt and finish so it can be enjoyed for the holidays this year. I will not be making any of the star filler blocks, only ones with Christmas images, like the two today. So if you will want to do a bigger quilt, you can go ahead and add any of the extra filler blocks you like as we go.

If you do not already have the book, click on Lori Holt’s Vintage Christmas Book, available at Fat Quarter Shop. It is also available on Amazon – Vintage Christmas Book at Amazon. All the patterns will come from the book and you will need the book to get them. I cannot reprint the patterns as they are copyrighted.

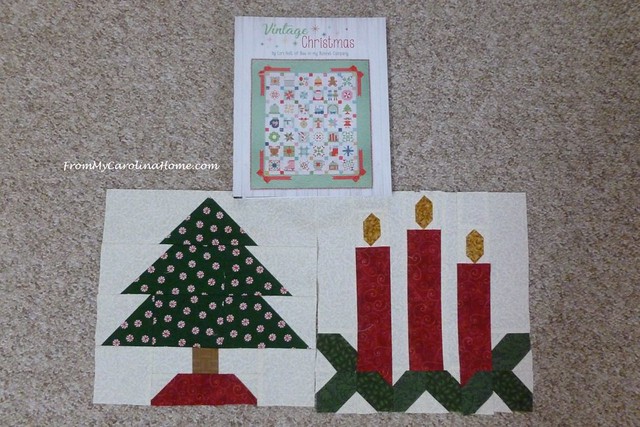
What I will do is give you tips on the blocks as we go, so you can avoid some pitfalls. I already have several just from making the first blocks! I am going to make the 12-inch blocks. I began with the candles and the tree blocks. First tip, read the entire block pattern before beginning sewing. If I had done that better, I would have avoided having to correct a mistake. In places, the instructions will start with marking a bunch of squares, then use just one. Be aware that when the instructions say ‘layer a fabric square’, it means just do one. I would have said ‘layer one fabric square’ for more clarity. At the end of each step, the instructions will tell you how many of an element to make. Be sure you know that before you begin that element.
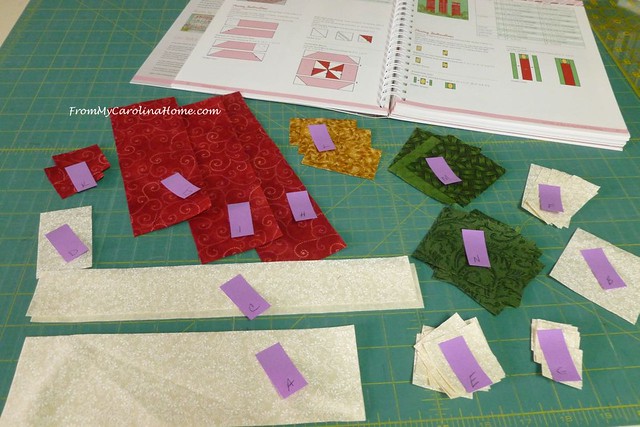
My next tip, as you cut your pieces out, label them with the letter associated. This will keep smaller bits from getting confused. Some of these sizes are very close, and it is easy to mix them up. Ask me how I know.
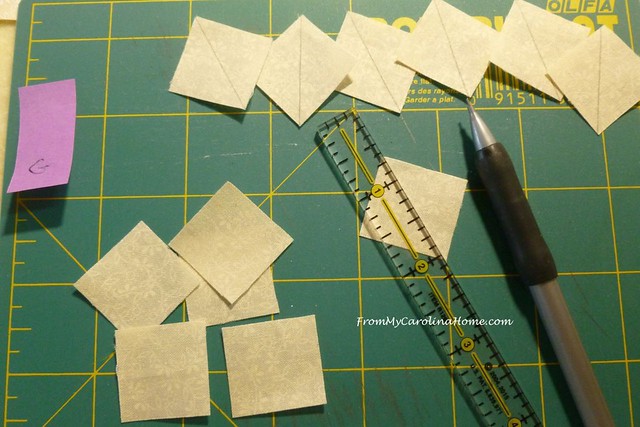
Use a fine line pencil to mark your lines on these tiny squares.
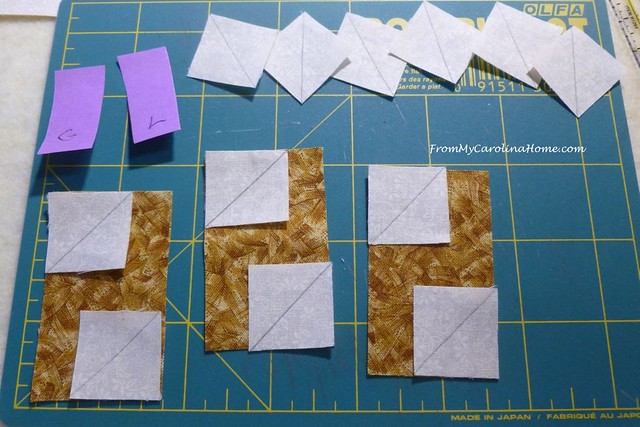
Lay out the pieces for each step so you can chain sew where possible.
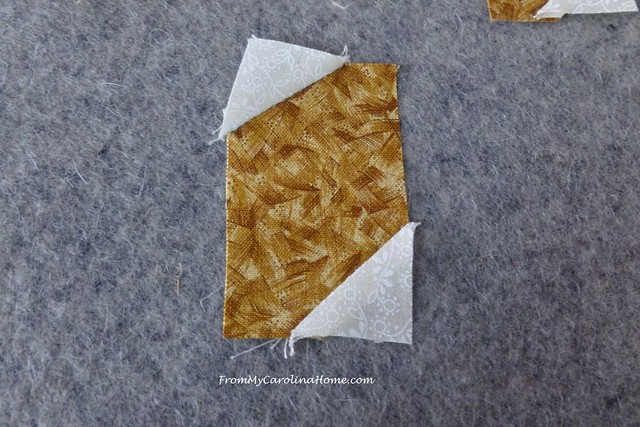
Sew slightly to the outside of your lines, in other words on the ‘point’ side to avoid getting this wonky result.
Be sure to square up your units as you go. The final unit size is given in the instructions.

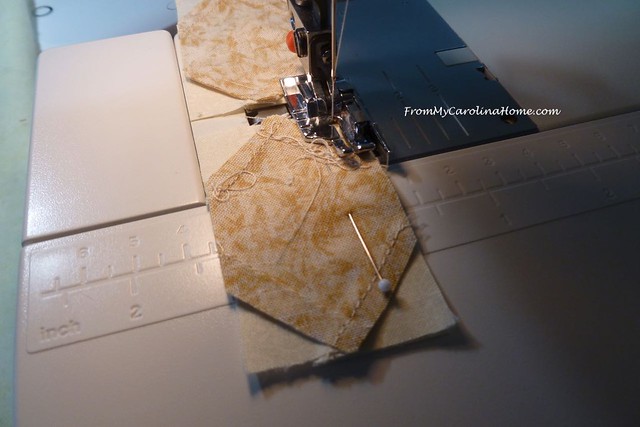
Chain piece where you can to get more done faster. Use your quarter-inch foot where you can to improve accuracy. Sew with the pieced unit on top where possible so you can see the intersections. Use pins to help keep tiny pieces from shifting, especially if you are doing the smaller 6-inch blocks.
As units are made, be sure you have them correct. On this step, I jumped ahead, and didn’t get the red bits in the right places. I had to go cut more and re-sew. The bottom of the left and right candles have red triangles in specific spots on particular green units. So be careful laying them out. Carefully reading each step would have helped, as the layout of the unit clearly says “make one”.

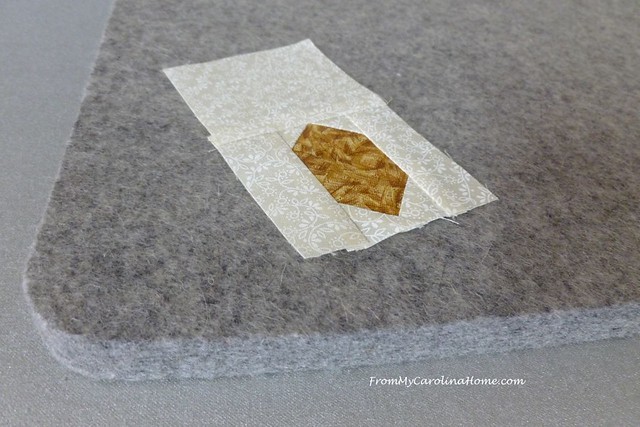
Press your units with a Wool Press Mat. It keeps the fabric from shifting so it doesn’t distort. Pressing the seams toward the outside made the most sense.
The first block is finished. I won’t add the button embellishments now, I’ll do that after it is assembled and quilted.

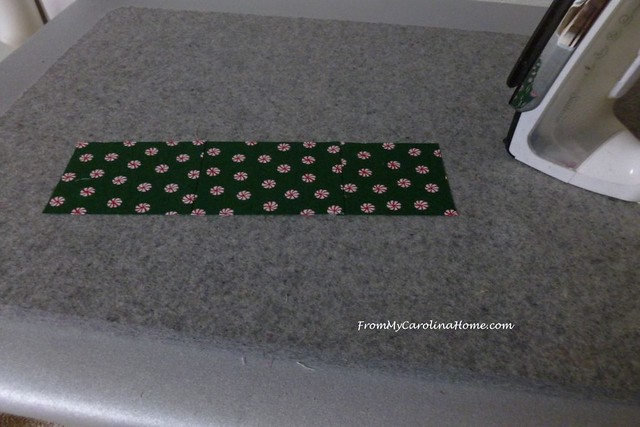
Next block, the Christmas tree. I had this really great green fabric with peppermint candy that I really wanted to use. Unfortunately, the bits weren’t long enough. But I really wanted them for the tree, so I sewed them together into strips I could use. There will be a few more seams than the pattern, but I love the look.
Again, label your bits with the letter of the pieces.
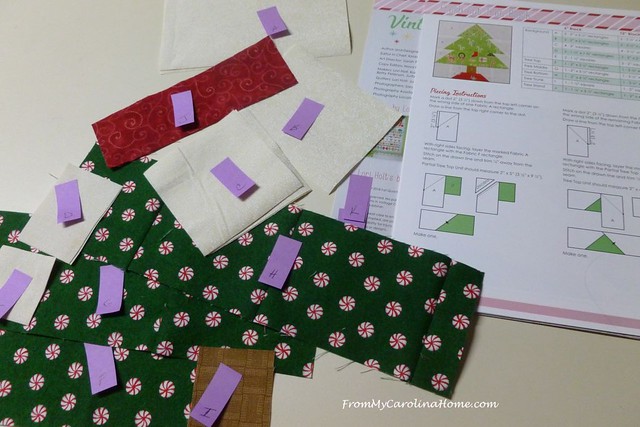
Here’s my tree fabric, the seams won’t be a big deal as they won’t really make a difference in the block. I can always add a few buttons to cover up the partial candies if it bugs me later.

I read the block pattern again, placing the units together as described in the instructions.

I made sure these pieces would flip correctly before sewing, pinned the pieces to keep them from shifting, and sewed slightly to the outside (toward the upper points) of the line drawn.

I could chain sew some of the pieces. I use a straight stitch foot for this step.

When I had most of the elements done, I placed them on the table in their places. Sew the base to the trunk, add the side bits, then the tree in sections.

Block #2 done.

I would love for those interested to join our Facebook group, Friends of From My Carolina Home, and share your progress but you must answer the questions or you will be declined by the moderators. The questions are simple, you agree to follow the rules of the group, and to be an active participant. It doesn’t matter if you’ve been a follower for years, or just now found the group. Spambots don’t answer questions, so this keeps the group free of spam, and only open to those real sewists and quilters. We want participants who will actively post and comment, creating a lively community. If you have recently been declined, try again and this time answer the questions so the moderators can approve you. For those inviting your friends to join our group, please do not use the ‘invite member’ links on the sidebar, they don’t get the questions and will be declined. Instead, send them this link – https://www.facebook.com/From-My-Carolina-Home-348482372259042/ – and then say click on ‘join group’.
So, here are the tips for the Vintage Christmas Quilt Along, all together and I’ll add more as each month’s sewing is posted.
- Read the entire block pattern carefully before beginning sewing.
- As you cut your pieces out, label them with the letter associated.
- Use a fine line pencil to mark your lines on tiny squares.
- Re-read each step, noting the number of elements to make.
- Lay out the pieces for each step so you can chain sew where possible.
- Use your quarter-inch foot where possible for accuracy.
- Sew slightly to the outside of diagonal lines.
- Be sure to square up your units as you go.
- Press your units with a Wool Press Mat, pressing toward the outside edges.

If you have a tip on sewing the Vintage Christmas blocks, please let me know in the comments. Are you quilting along?

I have the book and am joining in ….as I left Facebook years ago I will post my pictures on Instagram…..looking forward to this. I didn’t get my QOV blocks in the mail to you on time…will send them in later for use in other sew-ins.
Have enjoyed looking through the book this last month. Such great advice to read the pattern instructions thoroughly! I think I am going to pull fabric “as needed” for this project, and see if I can’t tie it all together by the end. I like that you used the same red from the candles in the tree skirt, and that helps the blocks to relate. What are your thoughts on background fabrics? Mix it up or use the same consistently and hope to “have enough”…..??
I am joining and have the book. I have some Christmas blocks from an instagram quilt a long Lori did years ago. Hoping to mix them in the final quilt. Your detailed instructions are great. I love Christmas quilts and will use fabrics from my stash.
I would love to see pictures of other Christmas quilts.
Looks like a fun project….but I promised myself not to buy anything until I used up what I have, so I will have to pass on this because I don’t have the book. But I will certainly enjoy watch the process!
I have discovered the wonder of GLUE! I had such a hard time when I made my granddaughter Elizabeth Hartman’s flamingo quilt. Some of the pieces were 1/2 an inch. There was no way I could get the small pieces accurate. I had bought some nice little glue sticks, and thought I would see if this worked. Like a charm!!
I have purchased several refills and use the glue on ALL my corner pieces. Just a dab on the cut-off corners, viola, accuracy!
Elaine
Yes, I’ quilting along. Lucky me, I already have the book. A confession, I’m a hopeless bookaholic.
Hello Carole, I am not doing this Quilt Along as I do not have the book. I did read your post and found all of your tips to be useful in any quilt blocks that I make. So, thank you for sharing those! I also started thinking, while I was reading, that even though I do not have the book there might be a similar block in one of my many books or magazines and also on the internet. I will let you know what I discover. Its not like I do not already have enough quilt projects to keep me busy or anything. Ha-Ha-Ha!!!! Thank you again for sharing your blocks and all of the information you shared, Carole! Have a splendid day!
Just ordered the book; can’t wait to join you all!
Yes i will be quilting along, and i bought the book on Amazon……♥ Pamela
I just purchased this book and fabric kit. I’m currently working on Farm Girl Vintage 2 and then will work on this one.