
If you found this page on a search, and have a quilt needing repair, see my page Well Loved Quilt Repair before emailing me.
Recently I was contacted by a lady who needed a repair of her treasured vintage quilt. This quilt was unusual in that most of it was in great shape, without any damage at all. But a couple of the fabrics used in this hand pieced quilt were almost completely gone, leaving patches of exposed batting. I asked her to take the quilt to her local shop to choose fabrics for patches before mailing it to me.
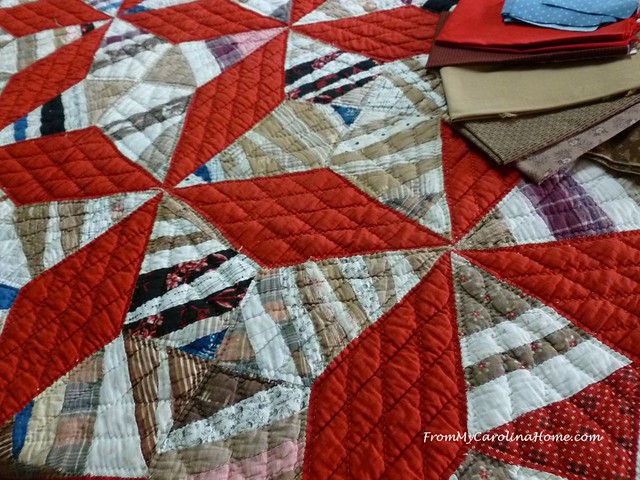
She visited a quilt shop in her area and got excellent recommendations for fabrics to send with it. The colors and values chosen were perfect.
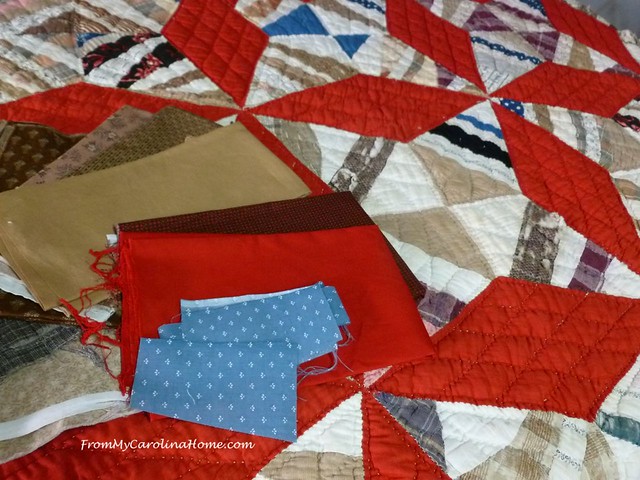
All over the quilt, patches made with three of the prints were totally disintegrated.

The surrounding fabrics were still in perfect shape.
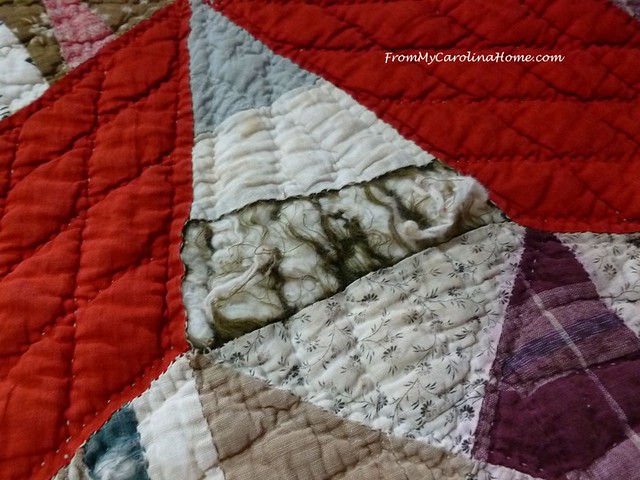
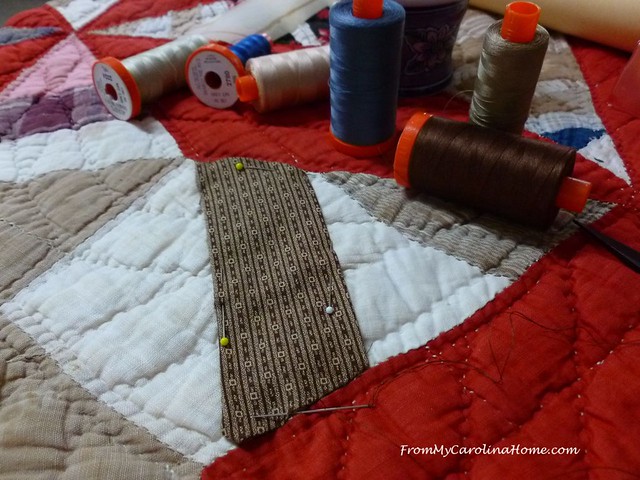
So, this one called for a hand repair. I set the quilt up on my cutting table, with a stool so I could sit and sew. I rolled the quilt and worked methodically from left to right, checking each star and making repairs as I went.

I made a template with Golden Threads paper.
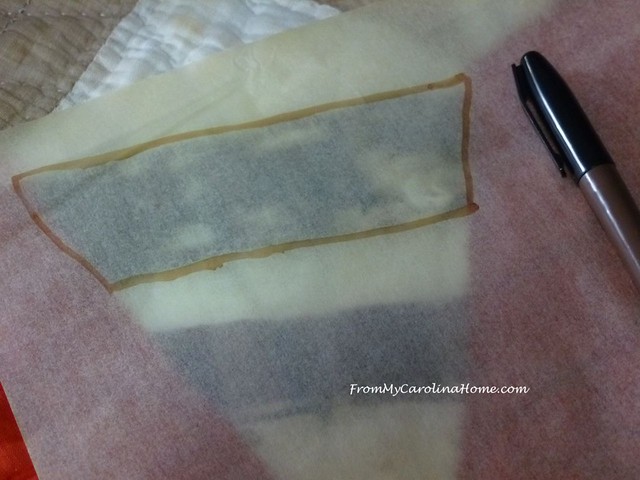
Adding seam allowance as I cut, the first patch was ready for applique over the frayed fabric. The edges are folded under and pressed, trying to get the corners sharp.

Then I pinned the patch in place, to be sure it fit properly. If it needed adjustment, I did this before I began sewing.

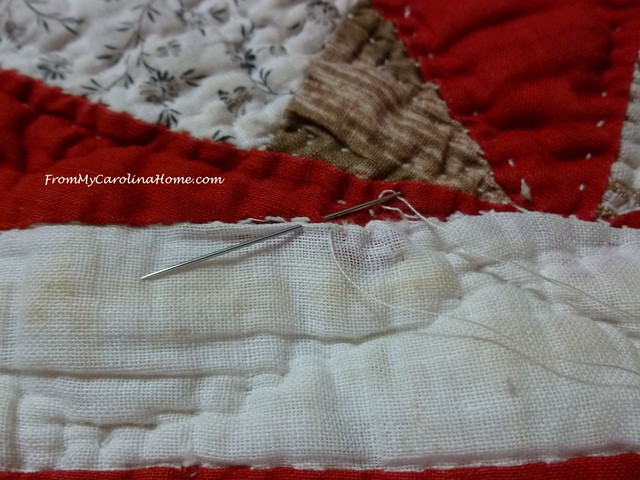
Hand stitching with Aurifil thread, the 50 weight is perfect for invisible stitches.
One down, and lots more to go. More than two dozen patches needed repair. To the right of the white patch is a fabric where the color is fading but it isn’t split yet. I treated those with Frey Check to preserve the original fabrics wherever possible.

In some spots, I could just restitch the patches that had come loose.
For the next patch, the grey weave print was the closest match to the original fabric.

The same procedure of making a template, cutting the patch, pressing under the edges then hand appliqueing in place was used.

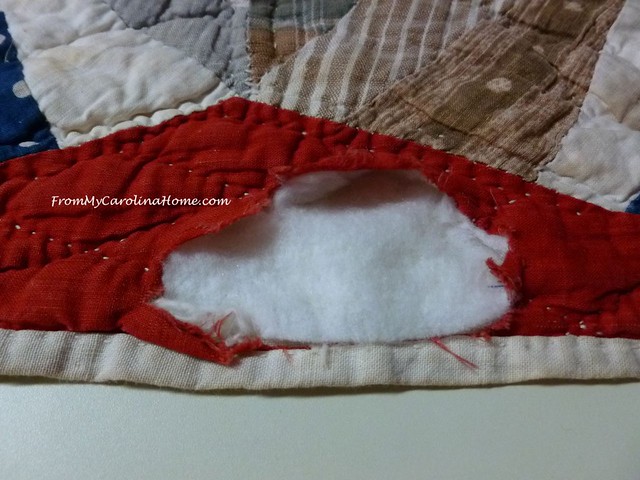
There was a hole in this red fabric, and the patch fabric is such a close match that you have to look hard to see it.

One other spot on the red needed a patch. It is likely that this spot is where the quilt is grabbed more often to pull it up on a bed or over cold feet. The batting was gone in this spot but the backing was fine, so I added a scrap of batting before patching the hole.
Make a patch, pin, sew, repeat.

In this patch the fabric is totally gone.

It looked like a light color originally, so I went with the lightest brown she sent..

One section of the edge was frayed.

Because the binding was an extension of the muslin backing that was brought to the front originally, I sewed the muslin replacement to the back first.

Then I folded it to the front and hand stitched it down so it had the same look as the remaining binding.

It is a little lighter than the original muslin, but it will darken with use.

This star was in the worst shape, needing five patches. I pinned all of them at once.

After the repair, it is getting harder to tell which are new and which are original. By distributing the replacement prints over the whole quilt, new ones are disguised a bit. I finished by patching a few holes on the back side.

Unfortunately, I didn’t get a photo of the whole quilt when it was done. I really thought I had, but nope. The quilt was on it’s way back to its owner in just a couple of weeks. She sent me an email later that really warmed my heart. She said “Oh my goodness. It’s impossible to tell which are original or replacements and I bought the fabric! You are an artist… I cried when I opened the box.” It is so gratifying to restore someone’s treasured heirloom especially when they are very happy with the result.
If you missed Friday’s post, I hope you’ll see that the Safelight Project is starting again for the third year. There are several ways you can get involved, and some nice prizes participants might win! Please click on the button below to see the post.

What are you working on now?
If you have a quilt needing repair, see my page Well Loved Quilt Repair at the top of the blog.

another beautiful repair job!!
Hi my name is Patricia. Just saw your detailed pictures of repairing this quilt. Trually amazing. A work of art. Thank you for sharing.
What a terrific repair. You are SO wise to have had her pick out her replacement fabrics. Did you have to re-do any hand quilting? I imagine repairing this was a time consuming project. Sounds like you gave new life to a well loved quilt.
No, I didn’t requilt any of the patches. I knew I couldn’t match the original quilting so I left the patches as they were. It also would have dramatically increased the price to her, so I didn’t.
Great repair! Your skill and dedication in restoring quilts is awesome. Such an important service to the quilt world.
Carole, what a fabulous repair job! I agree it was hard to tell from the pictures the replacement fabrics and the red fabric was spot on a match! Glad the lady was pleased! These repair posts are my favorite to read!
Thanks for sharing this Carole…I have a quilt from practically childhood that is in good shape except for the same thing…one fabric throughout the quilt has just disintegrated. Maybe I can do the same as you did and bring it back into gentle service! Wondering same as stitchinggrandma if you had to do, or chose to do some quilting on those pieces? And how nice it was so appreciated! Well done, as usual for you!! (:))
Thank you for sharing how you repair quilts. It is good to know as I’m sure I will have quilts to repair at some point soon.
Carole, you did a beautiful job! So much patience and dedication but it’s all worth it, as you said, when the customer is so pleased with the job!
Hello, Fellow North Carolinian!
You did a wonderful job! I did a similar rescue for a friend, but I complicated it even more by deconstructing and saving the original salvagable pieces. Not sure that was wise or that it came out as nicely as yours, and I cautioned her about machine washing the already-fragile heirloom.
I wish I could post pictures for you to see.
Awesome job, Carole!!! What a beautiful antique quilt. Your client’s reaction is heartwarming.
You inspire me. I have a vintage quilt that needs repair, and I haven’t tackled it yet. Fear of the unknown and lack of confidence in my skills. But you make it look achievable. Great job.
Excellent job of repair! I wanted to have a business strictly to repair old quilts but soon found it was just so very slow [Translate…I am slow} and the customers didn’t quite appreciate how tedious and exacting the process is. One quilt I restored was so smelly, I had to wash it three times to clean it before I could begin! And it needed a lot of repair….a Drunkards Path from feedback. So that career was short but I still love the idea. Your plan for them to bring matched fabric is a great idea!
Question: Did you requilt the restored areas? Thanks!
Hello Carole, Reading about the repair work that you do for people is amazing! Seeing how you managed the repair in this quilt was again fascinating and seeing how closely the fabrics matched was astonishing. The ladies at the quilt store new their fabrics at the fabric store this woman went to. I definitely give them a hand of applause! I really appreciate what you do in repairing these treasured quilts, Carole, and also appreciate that you share your story and methods with us in how you repair them! Thank you for a great post! Have a marvelous day!
Beautiful job, as always!
Oh, Carole! Another treasure restored beautifully. It helps so much to see the detail involved in this. I’m always impressed by your skills and patience.
I have a quilt that I think was made by my great-grandmother that has several places that need patches. They are also mostly the brown ones! I plan on trying to patch them using some of your wonderful descriptions of how you do the patching. At one point a place was patched with a piece that does’t match or blend at all, but I plan on leaving that and doing my best with the rest. I know that the quilt was used a lot by at least of couple on generations, including mine!
Well done!
You are wonderful! I know how much work and expertise go in to a project like this. I’ve only repaired two quilts for others and the pleasure of feeling their joy when they saw the finished project was so worth the work. Nice job!
Amazing work!! So much dedication and care. I can easily imagine her reaction when she opened the package. I would have felt the same way.
-Soma
Amazing repair. I have a quilt that was my grandmothers with the similar kind of wear. Now I may cautiously try repair. Thank you for sharing your expertise.
Hi Carole! Excellent job! I admire your skills and I haven’t forgotten about our discussion last May 2018 for you to repair a 30s quilt that I found in Nebraska. I haven’t yet reached out to you because I’m still searching for the 30s fabrics to my liking. It definitely takes time to find it and that’s okay. 🙂 Thanks for sharing your skills and knowledge with all of us!
-Keysha
How satisfying to put these old quilts back together and make them beautiful again. I always wonder about the original maker, where she found the fabrics to make the quilt, how urgent was it to get it made and on to somebody’s bed. What stories are held in with those stitches.
Good job Carole! Looks lovely.
What a wonderful thing you have done Carole, the family heirloom can continue on with the family.
They way you break down each step with images and a great description makes for a fascinating post. Very interesting how you show a daunting job accomplished one stitch at a time.
What a treasure and a great job, Carole. Years ago I used this same technique to repair an old family quilt and now I can’t find the repair pieces. 🙂 The quilt you repaired will be loved for years to come, too.
You did such a wonderful job of repairing this beautiful quilt ! I have my great great grandmothers silk quilt which carries a label ” made by her own hands (her name) at the age of 93 in the year of 1893″ ! The quilt is in terrible shape as you might imagine. I am a quiltmaker myself, but am at a loss as to how I might repair this lovely heirloom. The cotton backing is mostly complete, the batting is partly there, and some of the silk pieces are there but a lot of the silk – looks like charmeuse is gone. Would you have some suggestions for me?
Inspiring repair, Carole. I have a quilt my Grandma made that needs a little TLC; this post was. Gentle reminder to not let it wait too long.:)
What you do is amazing. I don’t know if I have the patience to do it. It is so beautiful to know that someone treasures a quilt enough to have all that done to restore it as much as possible. Great job!
I am glad you were able to help her. You did a great job, & she did appreciate it.