
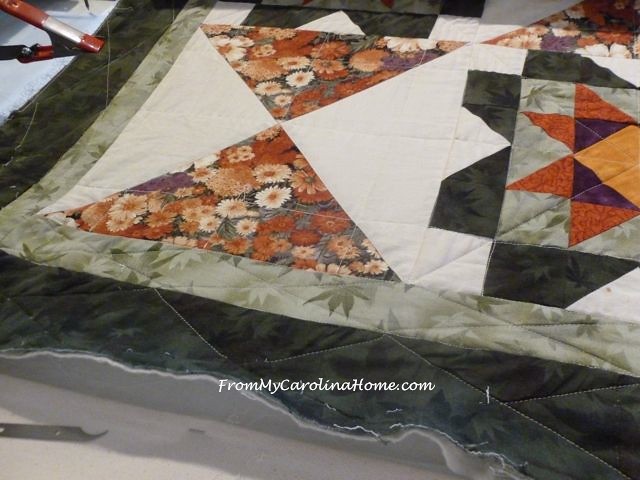
I promised to show this some time ago, and I haven’t had a moment to do so until now. For what it is worth, I don’t recommend this, but if you are just this side of totally insane like me, here is how to skin a quilt. I will admit that using the longarm for this project made it a bit easier than usual. This was the not the first time I have had to take out major sections of quilting, and this is by far the better way. If you do not have a longarm, the concepts are the same, but you need a big floor space to tape down the backing edge. First let me show you the ‘before’ of the quilt, and why I just had to fix it.
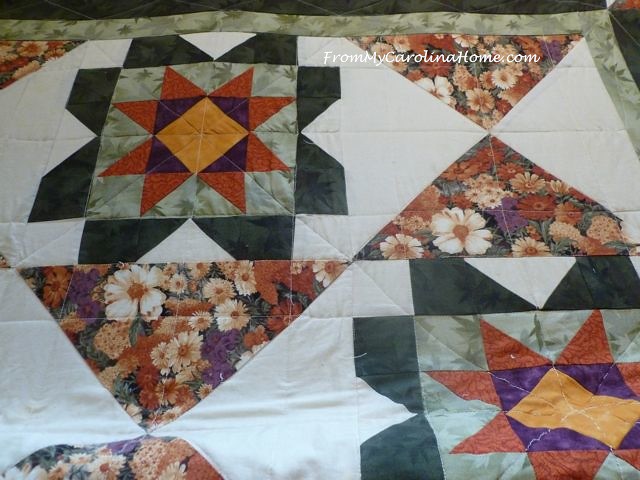
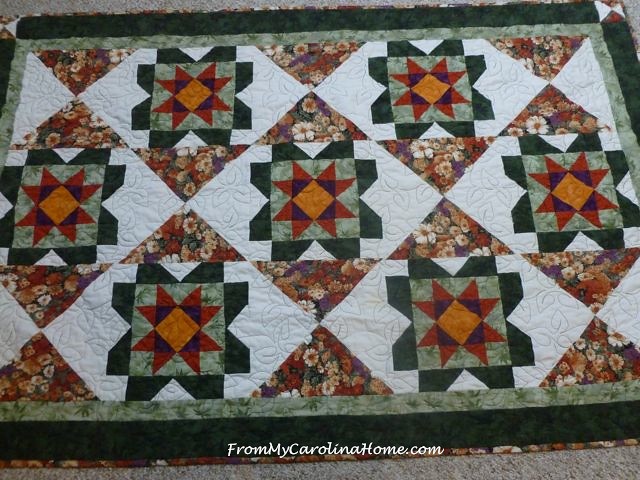
The pattern is by Lynette Jensen in The Thimbleberries Book of Quilts called Cottage Flower. It was one of the first quilts I made, and I quilted it myself with just some not-so straight lines. Terrible quilting. I added some diagonal lines too, I have no idea why.
I just went straight from the flower block across the hourglass block. There is a lot of poorly done SID too, awful in white thread on dark green fabric. Lots of puckers at points where lines of stitching crossed kept jumping out at me every time I looked at it.
The borders were also just straight lines, and some places on the blocks just didn’t make sense. The thing is, I just love these fabrics!
It started to bug me when I began to quilt better, and really bugged me after the longarm was delivered. So, one day I decided that I wasn’t ever going to be happy with this quilt unless I fixed it. The only way to frog this much quilting is to skin it. Start by removing the binding, and loosening the stitching on one end.
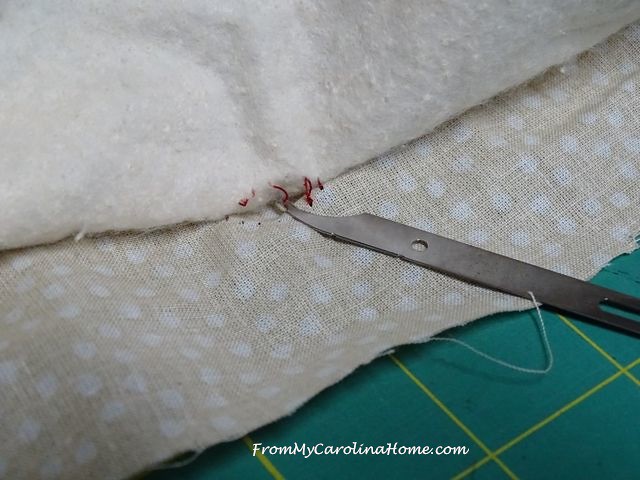
I pinned this edge to the longarm leader. I pinned the opposite side to the other leader and rolled it up to create some tension on the backing. Lift up on the top and batting, and slice through the stitching threads with a fine edge, like a scalpel. If you don’t have a longarm, tape the backing edge to a tile or linoleum floor (or a worktable) with a strong tape – like masking or duct tape – to give you something to lift against.
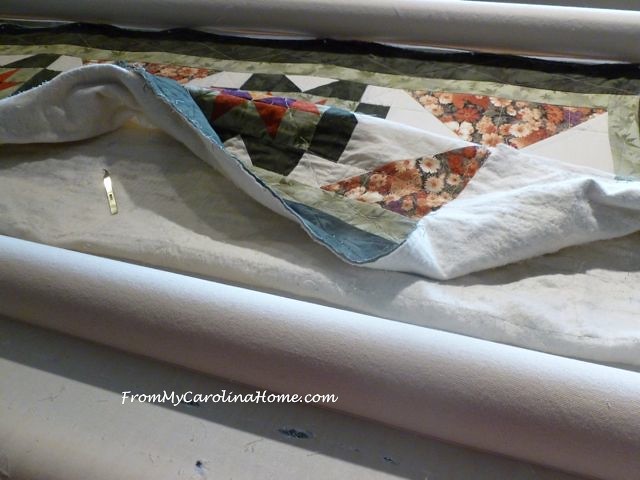
You can see on the left side of the picture below, the backing is going to get a bit torn up. Better that than the top! It is why you lift both the top and batting, so any nicks are in the batting and not your top. It didn’t help that I used cheap muslin as the backing.
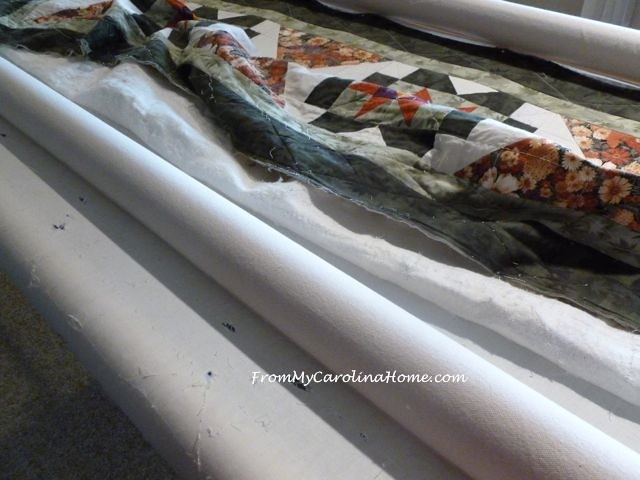
Here is the scalpel I used, called a surgical seam ripper. Lethal little bugger, it is wicked sharp and sliced through those threads easily. Just pull up on the batting and top to create a slight bit of tension against the backing.
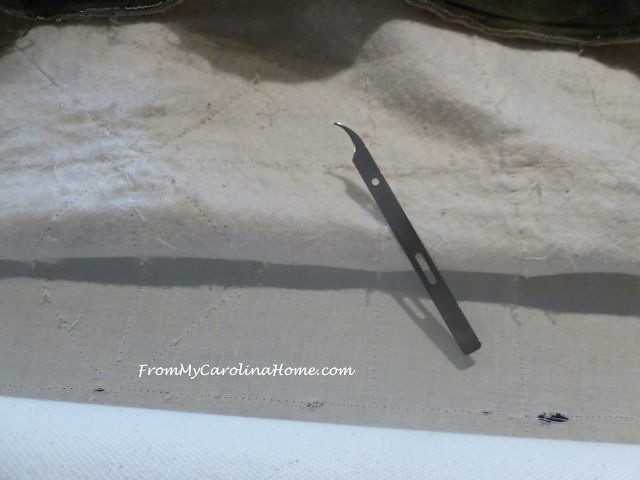
The scalpel will hook the threads and cut them, allowing you to pull the top and batting away from the backing. You can cut multiple lines of stitching at one swipe with this method. Here is a closer shot I took this morning to help you see what I mean.
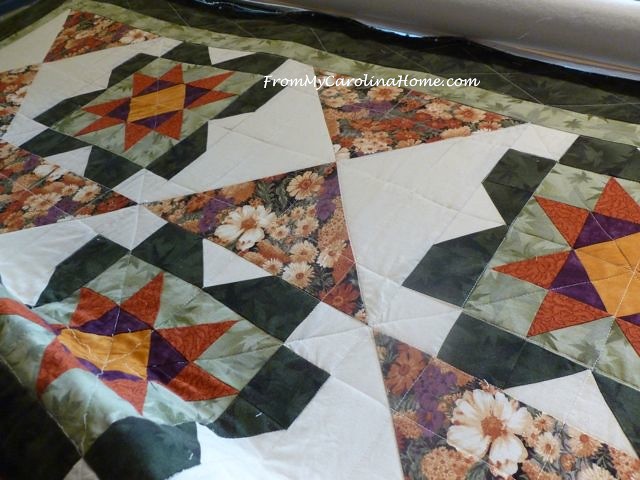
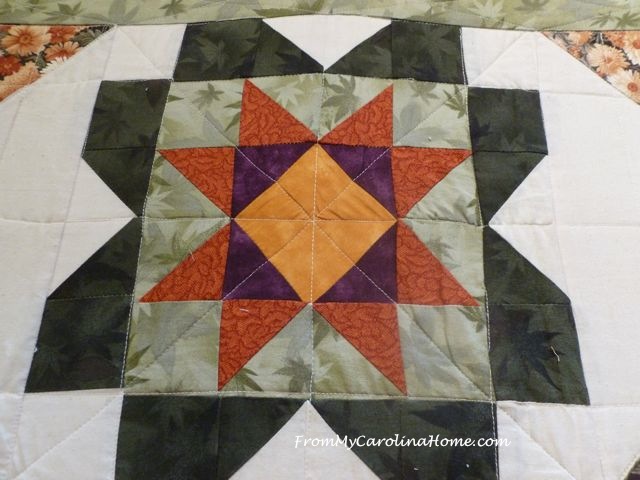
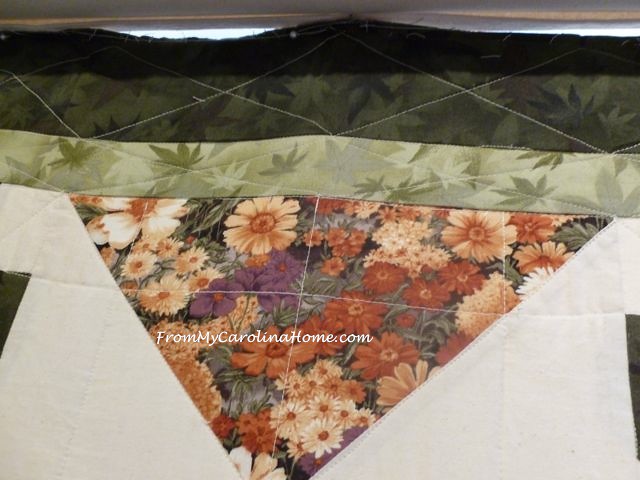
Just keep pulling up on the batting and top, slicing through the threads as you go. Believe it or not it only took a day to get the top completely free of the backing on this throw size quilt. I loaded a new backing using a better quality fabric, with a better quality batting, and put a leaf pantograph on the whole quilt.
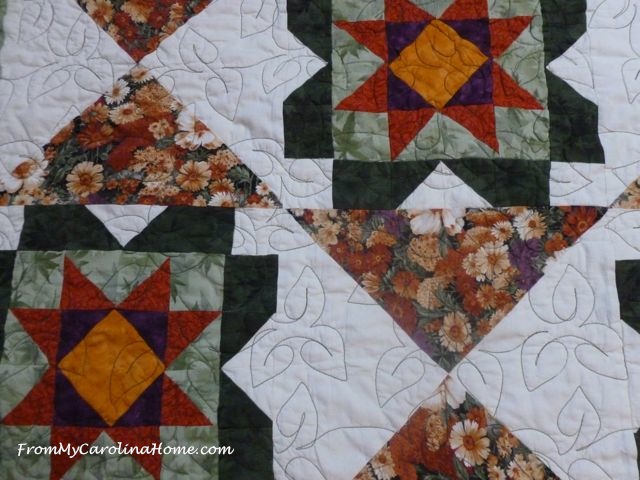
So much better, isn’t it!! The darker thread gives interest to the white areas, and recedes in the dark patchwork. No more wonky lines in white thread on dark green patches.
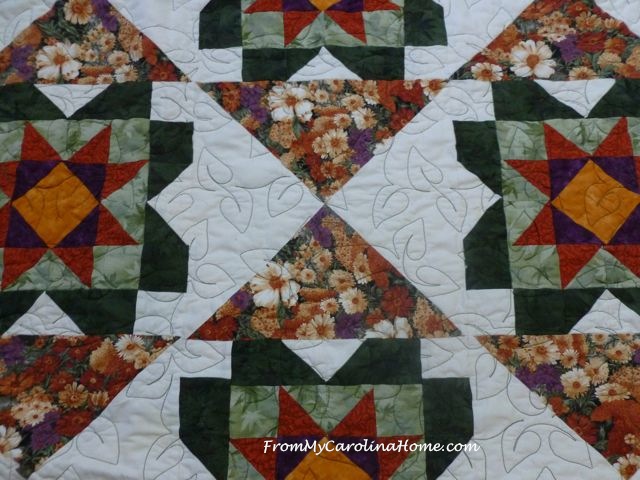
Now I enjoy using this quilt, and I am happy with the quilting. The piecing isn’t bad here, especially for a beginner.
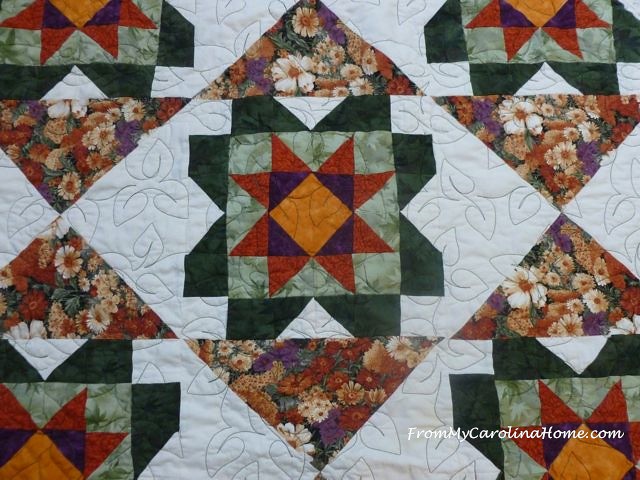
I was able to reuse the binding. I love that print, and now I can use the quilt without being annoyed at the poor quilting.
Have you ever been so dissatisfied with something you just had to take it apart and start again?

I have but only with knitting or crochet. I have had to take a seam or two apart but not a whole quilt…. I like your method though as it seems to work quite nicely… Love the finished product with the leaves…
Sheila Gillman,
You certainly have patience and determination! I am afraid that the quilt would have become a cat’s blanket! I must say the “new” quilting design is lovely.
I’ve got a project in my pipeline now that I need to do that on: my grandmother’s tops that I have been working on sporadically to make into table toppers for the grandchildren. I’ve done two, have two to finish, and the one almost done I had pulled the backing around as the binding and was slowly hand quilting it. Now I look at it and it’s puffy and I hate it, so I have planned on loosing it all back up, thinking sincerely about taking it to my long arm quilter and having her do a simple pantograph on it and then I will do a good binding on it. I had to replace some of the block fabrics, they were rayon and shredding from being in a cedar chest since the 50’s! Now I look at those and think I may remove what I added, because I got some old blocks and fabrics from eBay auctions just for the work I want to do on her tops. So many projects, too little time!
Thanks for the encouragement AGAIN…
sharon
Even your re-working is magical! I like your clear directions and focused photographs.
Yep! Or I have given it away so I don’t have to look at it!! LOL!!
Oakkkkkay…..THANK YOU!!!! I needed this post! Thanks for sharing it with me….this method will save me a ton of time.
Mercifully, the earliest quilts with seriously sub-standard machine quilting are long gone from here! Excellent technique, however, and I will remember it if a major oops occurs down the road. Love the new quilting motif and thread color.
Thanks for yet another good idea with great photos,
Susan
Beautiful quilt, I love the fabrics, too, and thank you for the “how to” on removing quilting to redo; excellent photos and instructions. Yes, I have had many disappointing “experiments, some have been savable and others became children’s charity quilts. LOL
Good Morning Carole! Me, myself and you know who would most likely never take on that kind of task; but, oh you did such a fantastic tutorial and it turned into a spectacular beautiful quilt! So, after seeing the final quilt, I can understand why you did take on the task. The fabrics that you chose for the top blocks are gorgeous! Did I tell you that the Scrap Dance quilt you designed is the first quilt I have actually ever kept in over 10 years of quilting? I just love to make quilts and give them away as gifts and to people who need them. Another odd thing about me is that I try and make nice quilts definitely, yet I do not worry about all of my imperfections either. I know that is one of the reasons that reading blogs is so interesting, for me, each quilter shares so many parts of themselves and each and every one of us go about things differently. Yet, in the end we all end up with a warm, beautiful (to us) quilt!
Well, today I am going to be doing several different things ranging from sewing to putting away Christmas decorations. It is still very cold here and getting snow in the higher elevations of the mountains, so it is definitely indoor weather for me. LOL. I hope that you have a fabulous creative day!
This quilt meant more to you than just any older project.
I try to “let go” of some of my past projects I am not satisfied with, but there are always a few that are worth redoing.
This one, well, I am very glad you took the time to do this one over. Before, it was really okay (my kind of quilting because I do not have a long arm) but the upgrade is marvelous, Carole.
LOL, no I have never been that annoyed! However, if I were going to take out quilting, this would certainly be the way to do it! Great idea.
The new quilting is wonderful! I looks like it was a lot of work but the end result was worth it.
Holy cow! There is something in your personality and quilting that I can identify with. I must have that same gene that fosters a desire for high standards in my own work. I have never heard of skinning before but I am going to squirrel away the idea. Between this and the other post I read today about fixing a mistake in a pieced block, I think you are right up there with Wonder Woman.
So interesting to read this. Lately I have been ripping things out that really annoy me but my current project just needs to be done so I hope it will fluff up a bit to hide the little puckers that are appearing… Did you send away for the surgical seam ripper? I’ve not noticed in LQS that I have visited.
Oh Geez! I wouldn’t ever had had that much patience. You are AMAZING! I’m relatively new to quilting (love it!) and remember on my first I had some puckering which I managed to hide with maching quilting. It was only a baby quilt size so after a LOT of practice, I tried my hand at stippling for the first time on a few segments of it. OMG, what a mess! I used a seam ripper and surgical fine point tweezers to pull everything out of the stippled parts (the rest of the quilt was straight lines). It took me days!!! So I went back to practicing then took another shot at it. For a first quilt, it worked out pretty well and after washing it was delightfully soft and pebbly. WIsh I had the space and money for a long-arm. Oh well – it’s still great fun.
THANK YOU for your tips and advice – your tutorials are so very clear and precise. You should write a book (or have you already?)
I have taken out many rows of quilting on my quilts. I do not have a longarm and quilting a large quilt on my machine sometimes gets confusing. Once, I kept veering off at the end of the quilt that the quilt was so far off, it was in kind of a loop. I was very aggravated that I kept it up for so long.
Thanks for showing another technique on how to repair a quilt.