
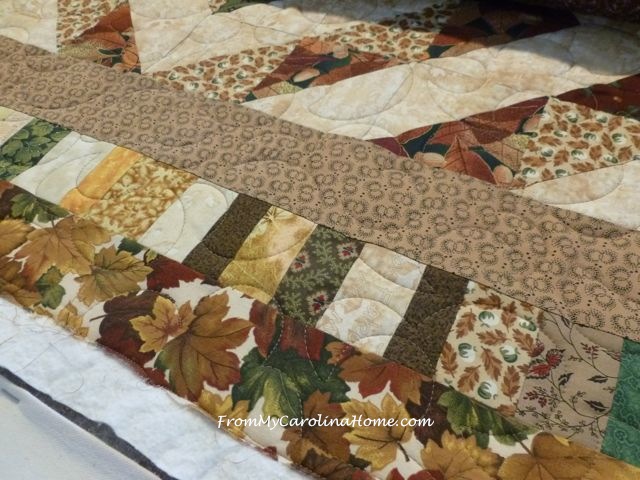
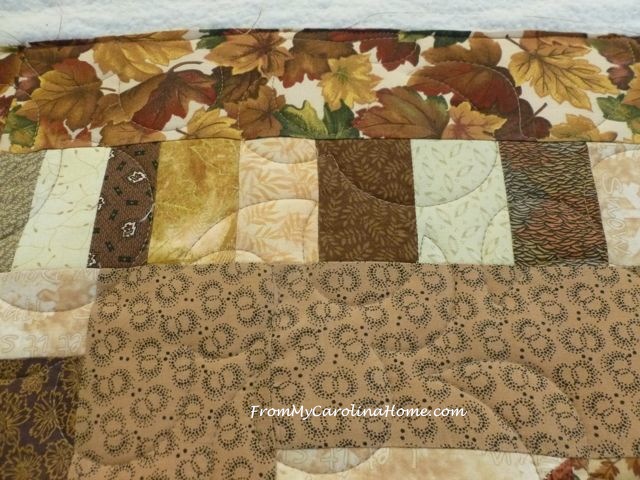
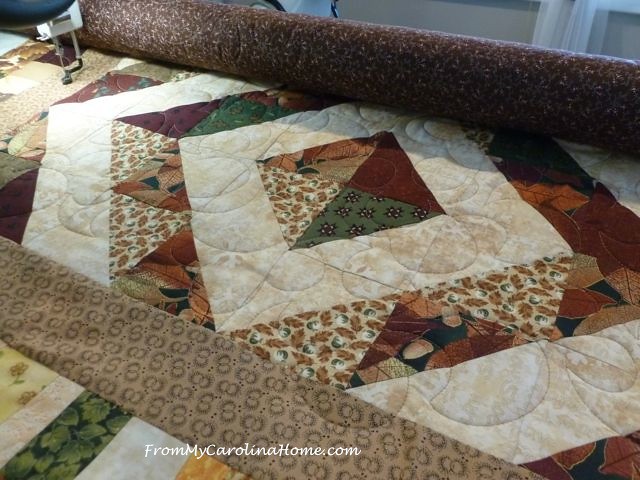
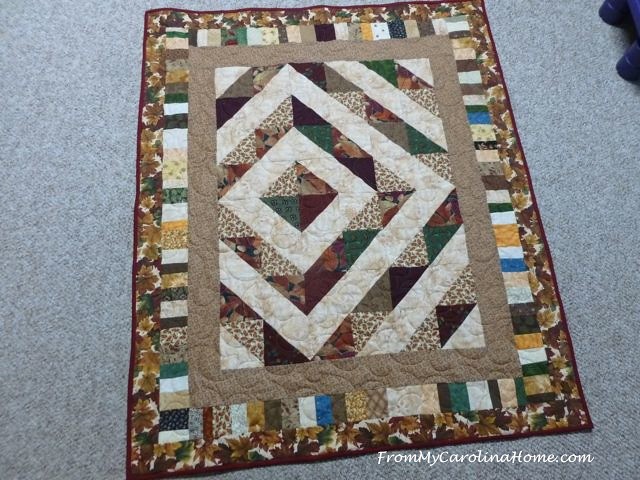
This offset diamond quilt is really resonating with me right now, I like both the design and the colors. It needed some borders to make it bigger, so I added both a print fabric border, and a scrappy one to use up more of the scrap chaos. Then I loaded it on the longarm to quilt.

Starting with stitching down the top edge and part of both sides, then picked a panto with soft curves to contrast with the sharp angles in the piecing.
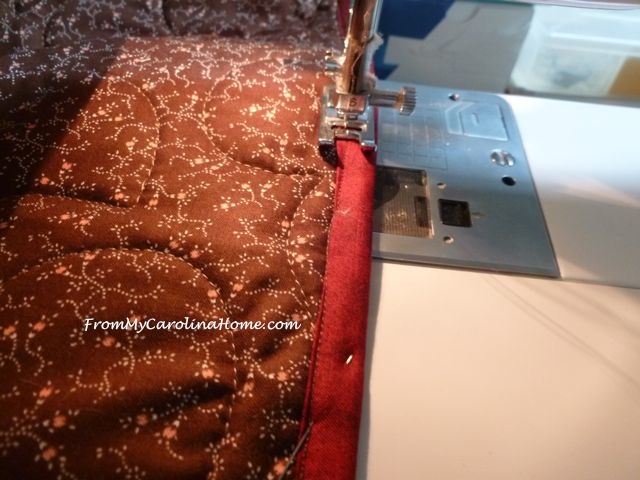
One thing I wanted to try with this quilt was putting the binding on by machine. I don’t like this method as a rule, because I cannot do it well. But more and more, charities are asking for this because of the frequent washing that these quilts must have in industrial washers and dryers. See my tutorial page at the top for complete instructions in a four part series if you want the step by step version of how I usually bind a quilt. This time, I began as I always do by stitching the binding down on the right side and joining the ends as usual.
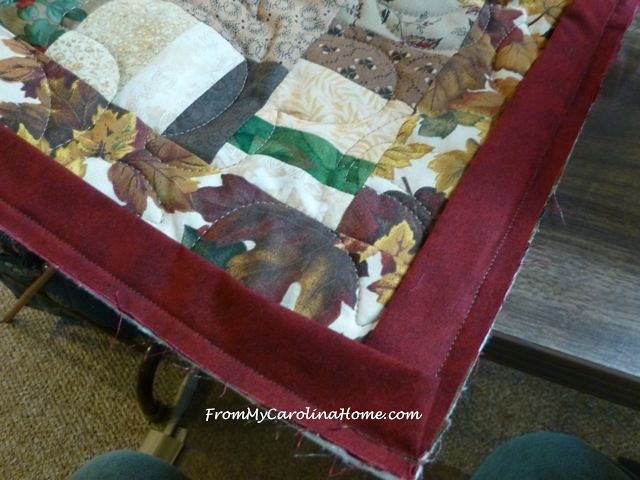
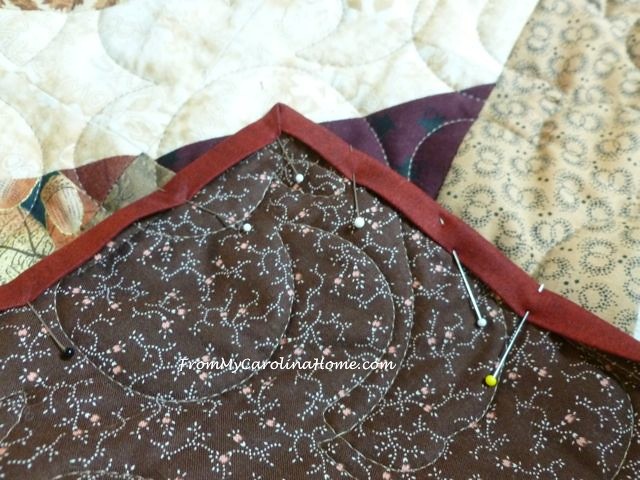
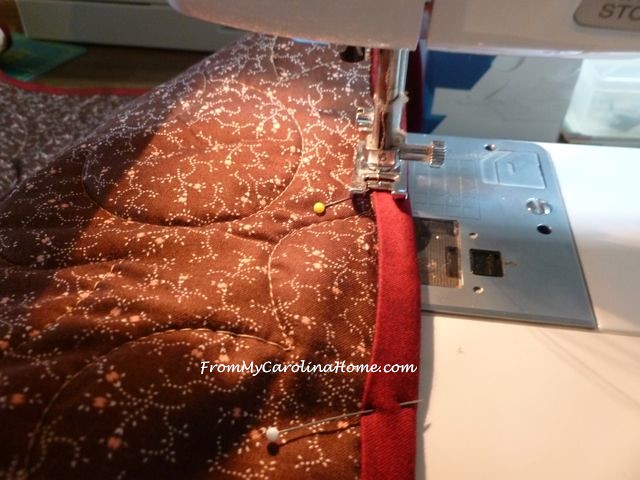
Then, I carefully pinned the binding to the backside, making sure I covered the stitching line.
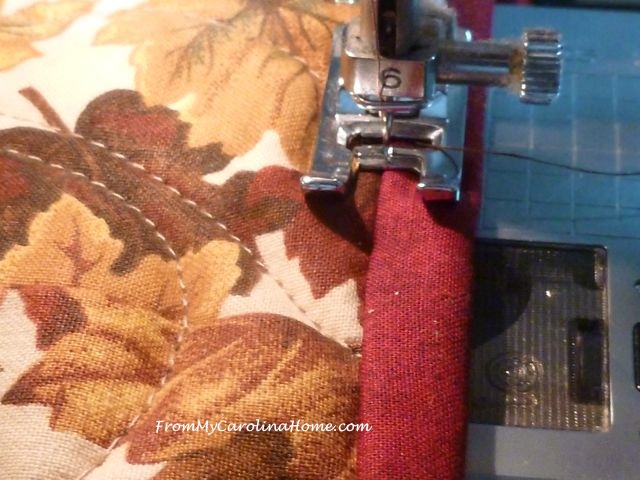
From the top side, I stitched in the ditch on one side.
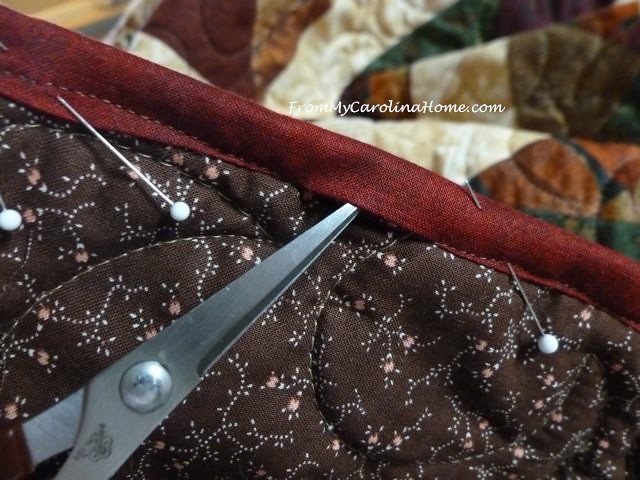
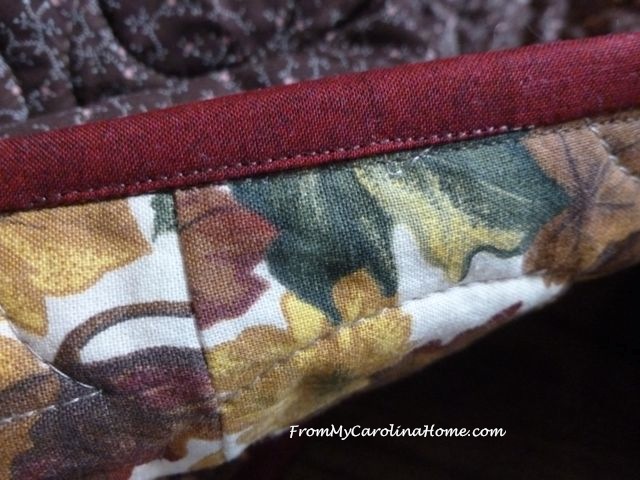
Then, I checked it on the backside. It didn’t work. There were two places where the binding scooted away, and didn’t get stitched down.
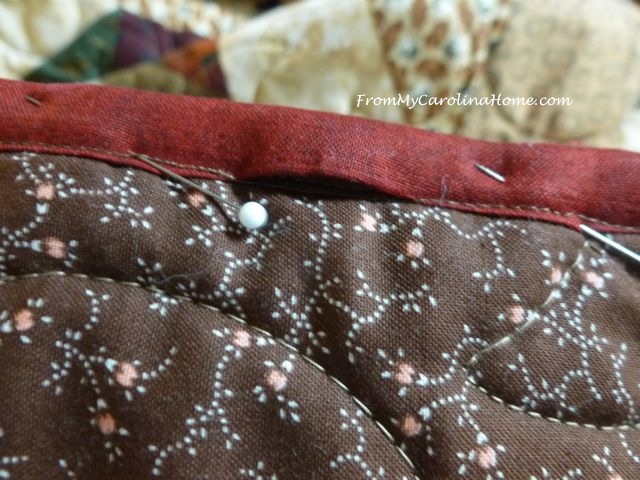
Arrrghhh! Not only that, but look at how uneven the binding is on the back!
OK, plan B, do the next side by stitching the binding down on the back.
So now the front looks bad.
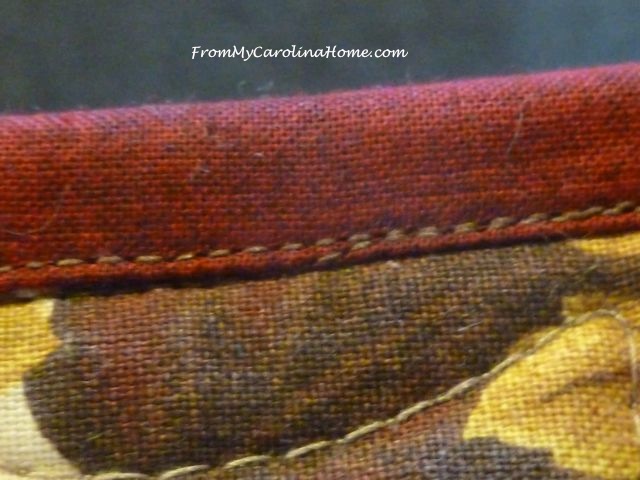
Try one more time on another side, moving the stitching line into the binding just a bit more.
Better on the front but I still don’t like the way this looks.
I know that some will say it doesn’t matter on a charity quilt, but it just grinds my teeth not to do my best work no matter who is the recipient. But it is finished and ready to go to Cancer Care.
Have you mastered binding by machine? Any tips?

I struggle with the same issues when machine binding…but that’s the only way I do it. I have learned to pin the binding on the backside so I can see the pin from the front to make sure I don’t ‘miss’ but I frequently have the uneven sewing you describe. Haven’t figured that out yet 😉
By the way…I love that offset diamond pattern and the colors!!
Nope, same issue, and I just about need to make the original strip 2.75 to 3 inch rather than 2.5 to even think about it. Has anyone tried using a hemstitch or some of the binding feet gadgets?
But I will say, even though it takes longer, there’s something soothing about hand stitching a binding, and no edges missed! I will finish up my wall hanging (your fall door panel!) by hand after I finish the machine quilting on it (shadow work, so no free motion)
of course the 9 foot square king size binding I did in July was a doozy!
Thanks again for the inspiration and tips…
sharon in colorado
I love putting the binding on by machine – it’s neat and quick but the method we use is just the reverse. Sew it first on the back and bring it forward. Cover the stitching line and sew right along the edge of the binding on top. The stitching will show front and back but match your threads to coordinate. Give this a try.
Hi Carole.. This is the way I do mine, always have. (back first turn to front) I cut bindings 2 1/2″ wide, NEVER press it, just fold as you sew. Make sure it’s folding even, as you sew. I also use my walking foot. I’ve never had any problems. It’s rare I use a bias binding, unless doing curves. Hope this helps you. ;o)
Carole, I really like your diamond quilt! I’m a scrappy fan myself, so always look for scrappy quilt patterns. I make a lot of charity quilts and here’s how I tackle the binding: After sewing onto the front side, I turn it and use a multiple zig zag to sew down the backside. With a matching thread it looks very presentable, holds well, and it takes just minutes. Be sure to zig and zag over the folded edge rather than trying to stay on the binding. Of course you can reverse this and sew it down on the back and then using a decorative thread, zig zag on the front side.
I recently saw a video on You Tube, where you stitch from the top by machine. It used to strips for the binding, one being larger than the other and when you fold over, it makes like a welt and you sew in the ditch and it is suppose to come out in the ditch on the back. My first one wasn’t as good as second one. But what is the old saying…practice make perfect. Guess I will keep trying, especially on the charity quilts our guild donates to the Hayworth Cancer Center in High Point
I sent you a reply but AOL will not accept an email from me. Thank you for the ideas!
This is why I ALWAYS sew back of binding by hand. My first quilt was a baby quilt for my granddaughter and in order to have it ready for the shower, I had to machine sew the binding. I had the same problem that you had and my daughter noticed it immediately. Of course, I had planned to get it back and redo by hand but it taught me that it will likely take just as long to machine sew with all the fixes I’d need to make. So I take needle and thread and consider it a great time to snuggle under the quilt and watch a movie while I sew the back binding.
Your quilt is beautiful as always and I love the offset pattern. I’m very impressed with what you are able to make out of scraps and leftovers! Thanks for always sharing so honestly, Carole.
Thank you, Vicki, I sent you a personal email, but AOL does not accept emails from gmail. Thank you so much for commenting! I normally do all my bindings as I present in my tutorial (see the top of the page for Quilting Tutorials), but this organization is insisting on machine finished bindings.
Carole, I adore this quilt and all of its scrappiness. I have always sewn bindings on by machine. Two tips that have helped me improve (still not perfect though) is to sew the binding onto the back first, on the front of the quilt along the sewn line place a tiny drop of washable Elmer’s School glue along the sewing line. Carefully ironing the binding down and pinning to help it from shifting any at all. The second part is to use the zig zag stitch, like Melanie mentioned, and stitch it down. These steps for me help a lot. Thanks for sharing and have a wonderful creative day!
Beautiful. I learned a trick years ago. I attach the binding to the back and bring it forward and stitch it on the front using clear bobbin thread. Some times I’ll add a second layer something like rick-rack or prairie points to make it look interesting instead of a folding to the front.
Beautiful quilt!!
I made your Caramel Apple coffee cake yesterday and wow! WE LOVE IT!!!! Thanks for sharing it!
Hi
I just happened upon your mystery quilt and fell in love with it. I think I may end up doing the twin size. I do my binding by machine always. For my last few quilts I have been resorting to decorative stitches from the front side to finish the binding. I use a wide curvy stitch that looks good from both sides, catches binding easily and even if it goes a little off does not show. Do try it once and you may never go back to anything else.
Felicityaciones ha quedado muy lindo !!!!!
I used to do only hand finished binding, but my wrists give me grief so I do alot of both now. I attach from the front though because I like the traditional look. I use a 2″ strip, or a bit bigger/smaller depending on batting loft & I dont bother with glue or pressing. I use hair clips as I am approaching, just like hand finishing. My ‘trick’ is to move my needle left, use walking foot, and I form a ditch
Oops, I form a ditch with my stiletto. So, I am finishing from the backside. The front will have a stitch line showing next to the binding but not right in the ditch. This often mixes right in with my quilting pattern, & if it is going to detract from design, I hand finish. Try it on a potholder! When I am approaching a corner, I use a straight pin that can slide back as I stitch onto it, before pivoting.
What a great quilt! I may have to “borrow” your pattern for some of my donation quilts, if that’s okay with you.
For a lot of my donation quilts (especially the ones for kids), I chose a decorative sewing stitch on my machine. I fold the binding to the back, pin it down and then stitch the decorative stitch right down the middle of the binding, making sure that the binding on the backside will still cover that stitching line. Doing the binding that way gives it just a bit more stability when the quilts get washed, which comes in handy for the quilts going to kids. I sometimes use a contrasting thread colour too – makes it just a bit more special!
This is a great quilt – l like the autumnal colours very much. Can’t machine stitch binding, drives me nuts, but good luck finding a solution.
I would not say I have mastered machine binding, but I do it anyway. The only way to get better is to keep practicing. For my ‘best’ quilts I still finish by hand, but for quilts that will go to a baby or get a lot of washing, I bind by machine.
I love the offset idea, it appeals to me so much more than the centered version would. And your colors and prints are gorgeous!
I have the same “issues” with sewing the binding on by machine. Lately I’ve been a little more successful following this method
http://www.52quilts.com/2012/05/tuesday-tutorial-susies-magic-binding.html
I do it a little differently…I sew the binding on with my standard foot so the seam is (approximately) 3/8″. When I wrap the binding to the front I pin through the flange seam that’s created (parallel to the stitching) and through the stitching line on the back. (Does this sound like mud? I can send pictures) . The extra pinning takes a little bit longer bu my stitches come out (almost) exactly in the ditch on the back. HTH.
It may have been scrap chaos to begin with, but it sure made a nice border addition for this quilt! LOVE fall quilts. 🙂
Oh – yeah, for machine binding, I either do the flanged method or I attach it to the back and then do a super-thin top stitching along its edge on the front, which looks really nice actually.
I just attempted to attach my first binding completely by machine today. Not sure I’ll ever do it again! Thank goodness it’s just a car quilt. Great blog. I am visiting from Red Letter Quilts today after being so very impressed with her Scrap Dance quilt.